
Comprehensive Guide to Connecting and Configuring WebCCTV NVR on a Local Network
This guide provides step-by-step instructions for connecting, configuring, and troubleshooting WebCCTV Network Video Recorder (NVR) on a local network. Learn how to connect to both local and internet networks, assign IP addresses, and understand bandwidth considerations for optimal video storage. The guide covers essential troubleshooting techniques for ensuring effective communication with the NVR and meets minimum system requirements for client PCs. Enhance your surveillance setup with this comprehensive overview of WebCCTV functionality.

Comprehensive Guide to Connecting and Configuring WebCCTV NVR on a Local Network
E N D
Presentation Transcript
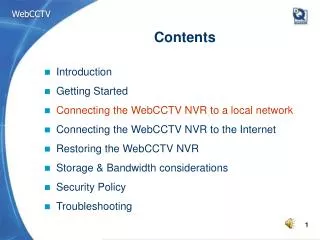
Contents • Introduction • Getting Started • Connecting the WebCCTV NVR to a local network • Connecting the WebCCTV NVR to the Internet • Restoring the WebCCTV NVR • Storage & Bandwidth considerations • Security Policy • Troubleshooting
The WebCCTV NVR in a local network • Network Overview • Connecting the NVR to a network • Accessing the WebCCTV NVR on a LAN
The WebCCTV NVR in a local network • Network Overview WebCCTV NVR & WebCCTV NVS in a network
IP Address Subnet Gateway The WebCCTV NVR in a local network • Connecting the NVR to a network Assigning an IP address Control Panel Network connections Local Area Properties
The WebCCTV NVR in a local network • Connecting the NVR to a network General Network communication Step By Step • Appl w running on ip 2 listens on port 5000 • Appl x running on ip 1 wants to communicate with Appl w • Appl x connects to ip 2 port 5000 • Appl w accepts. • Communication channel is established. • Appl w and Appl x can communicate. Server Client Appl x Appl z Appl y Appl w 5000 IP 1 IP 2
The WebCCTV NVR in a local network • Connecting the NVR to a network WebCCTV Network communication Step By Step • WebCCTV server runs a web server application (port 80) and a video-server application (port 1518 and ports 4096-4224) • Internet Explorer (IE) wants to communicate with WebCCTV Server • IE gets a webpage from web server application and ActiveX in webpage gets images from video server application. WebCCTV Server WebCCTV Client Internet Explorer Web 80 Video 4096 - 4224 1518 IP 1 IP 2
The WebCCTV NVR in a local network • Accessing the WebCCTV NVR on a LAN Client Configuration Same IP Subnet • In 90% of cases subnet mask : 255.255.255.0 • i.e. IP of WebCCTV = 192.168.100.50 then IP of Client PC must be 192.168.100.x where x is between 0 and 255 except 50 • E.g. 192.168.100.240 belongs to the same group as 192.168.100.50 Reachable via gateway • If IP of WebCCTV NVR is not within subnet :i.e. 192.168.200.56 a gateway must be defined in the Client PC.
The WebCCTV NVR in a local network • Accessing the WebCCTV NVR on a LAN Connection test ‘Ping’ command is a very important test = ‘ECHO’ Its results tell you immediately where the problem could be, if any e.g. IP of Client 192.168.222.251 & WebCCTV NVR 192.168.222.2 • 3 situations : • The other side answers = there is correct network communication possible
The WebCCTV NVR in a local network • Accessing the WebCCTV NVR on a LAN Connection test • The other side doesn’t answers = there is no correct network communication possible.‘Request timed out’ = on the same subnet but no answer • The other side is not reachable = there is no correct network communication possible.‘Destination host unreachable’ = not on the same subnet and no gateway defined
The WebCCTV NVR in a local network • Accessing the WebCCTV NVR on a LAN Minimum Client PC Requirements Operating System • Windows 2000 Service Pack 3 • Windows XP Hardware • Intel Pentium III 1000 MHz or higher (decompressing video needs) • 128 MB RAM • 16 MB RAM on video-card Software • Internet Explorer 6 • DirectX 9.0b • Windows Media player 9 or higher
The WebCCTV NVR in a local network • Accessing the WebCCTV NVR on a LAN Remote Client test Internet Explorer 6 At first connection, a viewing component (ActiveX technology) has to be installed on the client PC.If not installed correctly (needs Administrative rights), the WebCCTV application will not run properly.
The WebCCTV NVR in a local network • Accessing the WebCCTV NVR on a LAN Client Configuration Internet Explorer 6 settings • Basic Rule : Allow Internet Explorer the installation and execution of signed ActiveX controls and Administrative rights at first visit • Two approaches : • Easiest & safest : Consider the WebCCTV NVR IP address as a trusted site.Menu Tools Internet Options Security Trusted Sites • Change the overall security to allow signed ActiveX installationMenu Tools Internet Options Security Custom Level
The WebCCTV NVR in a local network • Accessing the WebCCTV NVR on a LAN Client Configuration Internet Explorer 6 settings • Easiest approach : • Consider the WebCCTV NVR IP address as a trusted site.Menu Tools Internet Options Security Trusted Sites
The WebCCTV NVR in a local network • Accessing the WebCCTV NVR on a LAN Technology • Microsoft • Only Internet Explorer • Usable in many environments : Web pages, Visual Basic, C++ (i.e. WebCCTV Software Development Kit) Installation • Administrative rights (only First time !) • Security settings Internet Explorer • Anti-Virus & Anti-Spyware programs Removal • C:\windows\downloaded program files\ • WebCCTV3 Network Client Class
The WebCCTV NVR in a local network • Accessing the WebCCTV NVR on a LAN Client Configuration Video Hardware acceleration = FULL Anti-Virus and Anti-Spyware software • Allow WebCCTV ActiveX to install and execute • Allow scripts to execute Personal Firewall software • Allow outgoing connections Control Panel Display Settings Advanced Troubleshooting