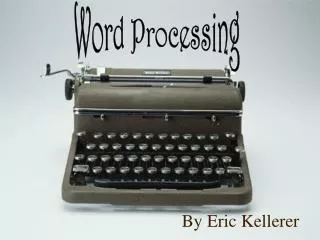
Mastering Your Word Processing Skills
Mastering Your Word Processing Skills. Learn the tools and features to successfully type a word document. Get Started!. The tools and features you are going to learn today include: Creating a new word document Save As Save Adding text to the header Aligning text Line Spacing

Mastering Your Word Processing Skills
E N D
Presentation Transcript
Mastering YourWord Processing Skills Learn the tools and features to successfully type a word document Get Started!
The tools and features you are going to learn today include: • Creating a new word document • Save As • Save • Adding text to the header • Aligning text • Line Spacing • Using the tab key • Fonts • Text Size • Text Color Opening Word
How to Open Microsoft Word When looking at your computer’s desktop, click on the icon that looks similar to the ones below. Microsoft Word 2010 Microsoft Word 2007 Hint: Look for a big blue “W” How to Save As
How to Save As “Save As” allows you to give a name to your document and save it to your folder. 1 2 Click on the “Office” button (the circle in the top, left corner). Then, click on the “Save As” option. Continue
3 Next, the “Save As” box will appear on the screen. Click on the documents folder on the left side of the box. 5 Click the “Save” button 4 Choose a name for your word document and type it into the text box labeled file name. How to add text in header
How to Add Text in the Header By adding text in the Header, it will appear automatically appear on every page of your document. 1 Double click at the top of your word document to make the Header appear. You will see a dotted blue line labeled “Header” at the top. Continue
After clicking in the Header you can add text that will appear on every page of your document. 2 Type your text in the Header 3 When finished typing in the Header, double click outside the Header area, in the middle of the document. (The blue dotted line with disappear. • In the Header, include: • Your First & Last Name • The Date • The Class or Subject How to Align Text
How to Align Text You can align text to the right, to the center, or to the left of your document. Take a look below to see examples. Left-aligned means the text is lined up along the left side. Center-aligned means the text is in the middle. Right-aligned means the text is lined up along the right side. Click on the button that matches the alignment you want to use. Line Spacing
How to Change Line Spacing Line Spacing is how much space there is between lines of text. Single Spaced = Very little white space between lines of text. Double Spaced = Skipping a line between text. (More white space). Continue
Follow these steps to change the line spacing of your document from single-spaced to double spaced. 2 1 Click the tiny arrow in the bottom right corner of the “Paragraph” box. Click the “Page Layout” tab at the top of the screen. Continue
Next, the “Paragraph” box will appear on the screen. 5 3 Click on the down arrow by the “line spacing” option. 4 Then, choose “Double” from the drop down list. Click the “OK” button. Continue
Now your text is double spaced! This makes your paper easier to read. How to Indent a Paragraph
How to Indent a Paragraph To show the beginning of a new paragraph you need to indent. You can indent easily by using the “Tab” key on your keyboard. 1 Press the “Tab” button on the keyboard. 2 Your paragraph will indent. How to Change the Font
How to Change the Font You can customize your document by changing the font. 1 Highlight the text by clicking and holding the left mouse button, then dragging the cursor over the text. Continue
2 Click on the down arrow by the font selection box. 3 Click on the font that you would like to use. How to Change the Font Size
How to Change the Font Size You can also change the size of your text. 1 Highlight the text you want to make bigger or smaller. 2 Click on the down arrow by the size selection. 3 Click the size you want. How to Change the Font Color
How to Change the Font Color You can also change the color of your text. 1 Highlight the text you want to color. 2 Click on the down arrow by the color selection. 3 Click the color you want. Your turn to Try!
Now it’s your turn to try! You will be creating a word document using the tools and features you learned. Here are your directions: • Open Microsoft Word • Create a new word document • Save your document as your “Last Name, First Name” • Include your Name, Date, and Class in the Header • Type a paragraph about your favorite holiday. • Make sure to indent your paragraph, use the “Arial” font, • Size 12, and double spaced. • Include a title. Make your title center aligned, size 14, • “Arial” font, and the color green. • Make sure to save your document when you are • finished.