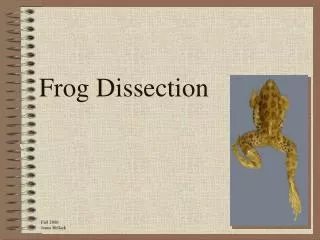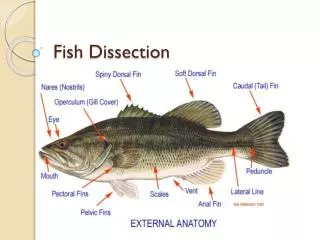
Fish Dissection
Fish Dissection. Step 1. Step 2. Cut into the anus (also called the vent) of the fish. Step 3. Cut anteriorly ( towards the head). Cut in between the pelvic fins found on the ventral ( tummy) side of the fish. Step 4.

Fish Dissection
E N D
Presentation Transcript
Step 2 • Cut into the anus (also called the vent) of the fish
Step 3 Cut anteriorly ( towards the head). Cut in between the pelvic fins found on the ventral ( tummy) side of the fish.
Step 4 • Cut forward along the isthmus, the narrow, fleshy space beneath the head and between the gill covers. The gill covers (also known as operculae) are flaps which lie along both sides of the head and protect the underlying gills
Step 5 Organs found in the body cavity: 1.Heart 2.liver 3. pyloric caecae 4.adipose (fatty) tissue
Step 6 Here the the adipose tissue (1) and gut (2) are pulled aside to expose the swim bladder (3), gonads (4) and kidneys (5).
Step 7 The gut is severed at the posterior end of the body cavity, near the anus. The gut and other organs attached to it are pulled forward out of the way
Step 8 • Pull the gut forward to expose the swim bladder (1), gonads (2) and kidneys (3). A larger portion of the liver is now visible (4
Step 9 The other organs have been removed to expose the swim bladder at the top of the body cavity.
Step 10 • Remove the right gill cover (operculum) to expose the gills.
Step 11 • 1. Gill filaments - the site of gas exchange • 2. Gill rakers - appendages along the front edge of the gill arch • 3. Gill arches - support the gills
Lab report #6 • Title, Objective • Data • Drawing of external anatomy-labeled • Drawing of internal anatomy-labeled • Chart comparing 3 animals • Discussion • What are the parts adapted for swimming/ life in water? • Looking at the frog and pig, what can you conclude about the relationship between structure, function and the environment these animals live in?