Access Lesson 2 Creating a Database
This lesson focuses on how to create a database using Microsoft Office 2007, covering essential concepts and objectives. You will learn to design, create, and save tables in Datasheet view, set field data types, and modify field properties in Design view. By the end, you will understand how to use templates, set primary keys, and customize fields to meet your data management needs effectively. Whether you're a beginner or need a refresher, this guide will equip you with foundational database skills.

Access Lesson 2 Creating a Database
E N D
Presentation Transcript
Access Lesson 2Creating a Database Microsoft Office 2007: Introductory
Objectives • Create a database. • Design, create, and save a table in Datasheet view. • Set a field’s data type in Datasheet view. • Add, delete, rename, and move fields in Design view. • Set field properties in Design view. Microsoft Office 2007: Introductory
Vocabulary • Alphanumeric data • AutoNumber • Blank Database template • Data type • Default Value property Microsoft Office 2007: Introductory
Description property Design grid Design view Field Properties pane Field property Field Size property Format property Primary key Required property Template Vocabulary (continued) Microsoft Office 2007: Introductory
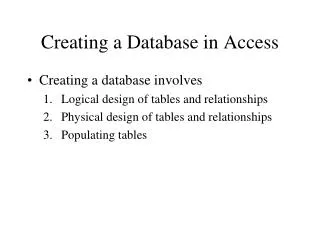
Creating a Database • The first step in creating a database is to create the file that will hold the database objects. • You can use a template that already has objects in it. • You can also use a Blank Database template with no objects in it. Microsoft Office 2007: Introductory
Creating a Database (continued) • To create a database, start Access. • On the Getting Started with Microsoft Access page, double-click blank database. • Specify a file name and storage location. • Click Create to create the new database and open it in Access. Microsoft Office 2007: Introductory
Creating and Saving a Table • When you create a blank database, Access creates the first table and names it Table1. • You can change the name when you save it. • To save, click the Save button on the Quick Access Toolbar. Fill in the name in the Save As dialog box. • The new table name appears on the tab for the table and as an object in the Navigation Pane. Microsoft Office 2007: Introductory
Designing a Table • After creating a table, you need to tell Access what fields to include. • Access creates one field named ID and sets it as the primary key. • A primary key is the field that contains a unique field value for each record. • In some tables, this field is called AutoNumber because it automatically adds a unique number. Microsoft Office 2007: Introductory
Designing a Table (continued) • You can tell that Access created an AutoNumber for the ID field because of the word New in the first record’s field. • Good candidates for being a primary key are • Employee numbers • Social security numbers • Student ID numbers • The advantage of setting a primary key is that Access will not let you enter duplicate values for this field in different records. Microsoft Office 2007: Introductory
Designing a Table (continued) • To enter a field name in Datasheet view, double-click the “Add New Field” field selector. • After you have created all the fields, you can enter the first record. • Access assigns a data type as you enter data (Text, Memo, Number, etc.). • You can change the data type for a field by: • Table Tools Datasheet tab • Data Type & Formatting group • Data Type Microsoft Office 2007: Introductory
Working in Design View • In Design view you can add, delete, and make changes to how fields store data. • The field names and data types appear in the upper half in a design grid. • The Field Properties pane appears below. • A selected field turns orange. The primary key has a key symbol in it. Microsoft Office 2007: Introductory
Working in Design View (continued) • You can use the options in the Tool group on the Table Tools Design tab to: • Add and delete fields, insert a field • Drag fields in the design grid to a new location • Rename a field, and change a field’s data type • The Description property in the design grid is optional, and you can use it to describe what to enter in the field. • Any changes made in Design view are automatically updated in Datasheet view when you save the table. Microsoft Office 2007: Introductory
Changing Field Properties in Design View • A field property describes the field’s contents beyond the field’s basic data type, such as: • Indicating number of characters allowed • Indicating allowable values • Field properties will vary depending on the field’s data type. • The Field Size property sets the number of characters you can store in a Text, Number or AutoNumber field. • There is an array of Field Size property options including the ability to store decimals, positive numbers, negative numbers, or whole numbers. Microsoft Office 2007: Introductory
Changing Field Properties in Design View (continued) • Use the Format property to specify how you want Access to display numbers, dates, times and text. • For example, if you enter the date 10-28-10, Access will display it as October 28, 2010, if the Format property is set that way. • The Default Value property enters the same field value in a field every time a new record is added to a table. • The Required property specifies whether you must enter a field value in a record. Microsoft Office 2007: Introductory