Download
1 / 8
80 likes | 100 Views
Learn to master portraiture photography using natural light, reflectors, and flash techniques. Collaborate with subjects for captivating images. Discover equipment tips and camera settings to enhance your skills.

E N D
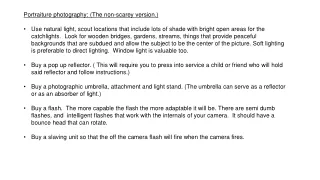
Portraiture photography: (The non-scarey version.) • Use natural light, scout locations that include lots of shade with bright open areas for the catchlights. Look for wooden bridges, gardens, streams, things that provide peaceful backgrounds that are subdued and allow the subject to be the center of the picture. Soft lighting is preferable to direct lighting. Window light is valuable too. • Buy a pop up reflector. ( This will require you to press into service a child or friend who will hold said reflector and follow instructions.) • Buy a photographic umbrella, attachment and light stand. (The umbrella can serve as a reflector or as an absorber of light.) • Buy a flash. The more capable the flash the more adaptable it will be. There are semi dumb flashes, and intelligent flashes that work with the internals of your camera. It should have a bounce head that can rotate. • Buy a slaving unit so that the off the camera flash will fire when the camera fires.
The Camera Settings for using the flash: • If it is a semi dumb flash, the camera shutter should be set below the flash sync speed. Most cameras has a maximum sync speed of 1/200th. So the shutter should be set at 1/100th or below. Use the camera on Shutter priority or on manual setting. The flash must be set with the aperture that you set on your camera. • If it is an intelligent flash that works with your camera, the camera will sense the flash, set the shutter speed correctly, zoom the flash head with the lens. You set the aperture and take the picture. • If off the camera you can make the flash that fires into the umbrella properly expose the subject. This requires a lot of thought and testing to be sure of your settings. • The following chart shows how the flash must be synced up to take a picture.
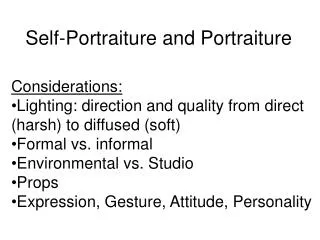
Portraiture photography: (The scarey version.) Portraiture is different than landscape or photojournalism. Landscape or photojounalism are the individual photographer satisfying their own vision without the approval of the subject. Portraiture is the collaboration of photographer and subject, each to benefit from the session. “With great power comes great responsibility.” Spider Man. Your power is the understanding of the technical aspects of photography and the artistic vision to use that understanding to capture an image that is satisfying to you and to the subject. You have the responsibility to be prepared for the client. I started by giving all the mothers in my extended family a portrait session for Mother’s day. I would set up my lights and work out my setup and techniques. It allowed me to practice my setups, get used to the lights, while talking to someone who I knew well without a lot of pressure. The key is to work out bugs and problems before doing a commercial set. So photograph your kids, your dog, the neighbor’s kids, the neighbors. Anybody you can persuade to sit for you, do it. I would provide some 8X10s, with the understanding that I could use the best in my portfolio.
Put together a portfolio. • My advice is don’t skrimp. • Don’t print at Walmart or Sam’s Club. • Pick a local lab or one that advertises in a photo magazine. Look on line for reviews. What you want is a lab who cares enough that your work will look good. They will be your lab if your business includes prints. • Make your portfolio prints large, 11x14 or larger. This is your selling tool when trying to book clients. • The larger the print the more the client can understand the quality that your guarantying. You need to differentiate your work from the cell phone photographers. You are telling them that you know what you are doing. • Equipment Tips: • Backups are vital to success. • Backup flashes; • backup batteries for the cameras, the flashes, the meter, the strobe slaves. • Backup Flashes • Backup Cameras (even if they are less capable) • Murphy : “If anything can go wrong, it will go wrong.” • Before each shoot, unpack your gear and repack it. It will remind you where everything is, what you have and what you don’t have. Pack the less used gear first and the most used gear so it is on top and available.
Settings : Why I shot the way I did: • Metered using a hand held meter : • It allows me to measure the light falling on the subject. It allows precise exposure. If you are using the camera meter it is reflected light, making the exposure subject to the amount of light coming from the subject. • (Chimping in a commercial environment should be avoided. Look at the first shot to be sure that you haven’t forgotten anything, but it should be a confirmation rather than a vehicle to getting everything right.) • You can get an idea of contributing light sources by measuring in different directions. • They make domes for phones and an app that turns you phone into a light meter. • Set the camera on manual. • You are in control. The exposure that you set was picked after analyzing the scene. The camera lens might be pointed off the subject, or taking in dark clothes. I you let the camera decide, your exposure might be off. • Set the white balance. Several things you can do: • shoot Raw and Jpg. • Set to auto white balance. • Use background white object to determine white balance. • Before printing at a lab change color space to sRGB
The session: • Meet with the client to understand their expectations. Show them your portfolio and ask if any of the pictures appeals to them. Discuss what clothes they were going to where. I shot someone in her home. She wore a blouse that literally made her fade into the couch. I asked her if she had something with more pizzazz and she changed into a red blouse that was perfect. • If you are shooting at someone’s business or home, make sure that you are on time. Scope the traffic, route etc at the time of day of the appointment. You can be there early, but always wait until the appointed time to ring the bell. Being early can be as annoying as being late. • If they are coming to you, bring them in to your setup, tell the sequences that you intend to go thru and why. • Get a rapport going, try to relax them with small talk about them, their kids, a football game etc. • Talk to them about posing, placement of hand etc. Always as permission before touching someone to move their hand or arm or whatever. • If shooting small children, you have about ten minutes until they will be bored. Give them toy and shoot, shoot, shoot. Have the parents in the room if they are toddlers. If they’re over 7, parents will be in the way. Have them wait elsewhere. • Dogs, unless well trained, have about 3 – 5 minutes before they fade. The following story about taking a picture of Winston Churchill illustrates several things. Being ready at any time to shot is important. And sometimes courage is what is required for a great picture.
A portrait of Winston Churchill photographed by Yousuf Karsh during the darkest days of World War II reveals a leader resolute in the face of crisis. The year was 1941; Churchill was visiting Canada, and the Nazi puppet government in France had just sworn to wring the neck of Britain like a chicken. Staring straight into Karsh’s camera, Churchill’s eyes are steely, almost obstinate. Moments prior, he had stood in the Canadian parliament, hands on hips, and announced passionately: “Some chicken! Some neck!” Churchill relinquished his glass to an assistant and began to sit for the photograph, still puffing on his cigar. Karsh readied the equipment but, just before taking the picture, he placed an ashtray in front of Churchill, asking that the prime minister remove the cigar from his mouth. Churchill obstinately refused, and Karsh was perplexed: the smoke from the cigar would certainly obscure the image. He returned to the camera, ready to take the picture—but then with lightening speed, Karsh leaned over the camera and plucked the cigar from Churchill’s lips. “He looked so belligerent, he could have devoured me,” Karsh would remember later, and it’s a belligerence that comes across in the famous photograph—a scowl over the pilfered cigar that came to represent, seemingly, a fierce glare as if confronting the enemy. read more: http://www.smithsonianmag.com/smithsonian-institution/the-day-winston-churchill-lost-his-cigar-180947770/#AqkgT7v6UFWumLHQ.99