Comprehensive E-CATS Tutorial Guide for Firefox Users
This tutorial provides essential instructions for using the E-CATS system efficiently with Firefox. It covers the installation of Firefox, including the necessary Canadian English dictionary for effective spell-checking. The guide includes steps for logging in, selecting clients, and entering various client activities such as daily logs, one-on-one interactions, consequences, and phone logs. Users will also learn how to add facility reports and access important features throughout the application. Follow these guidelines to maximize your experience with E-CATS.

Comprehensive E-CATS Tutorial Guide for Firefox Users
E N D
Presentation Transcript
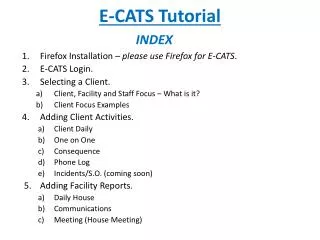
E-CATS Tutorial INDEX • Firefox Installation – please use Firefox for E-CATS. • E-CATS Login. • Selecting a Client. • Client, Facility and Staff Focus – What is it? • Client Focus Examples • Adding Client Activities. • Client Daily • One on One • Consequence • Phone Log • Incidents/S.O. (coming soon) • Adding Facility Reports. • Daily House • Communications • Meeting (House Meeting)
E-CATS Tutorial INDEX • Logging Out • Contact Information
1 - Firefox Installation IMPORTANT! You must install Firefox before working on E-Cats. http://www.mozilla.org/en-US/firefox/new/ Click ‘English (US)’ version. Follow the instructions below to install ‘Firefox.’
Now open the following link. https://addons.mozilla.org/en-US/firefox/addon/canadian-english-dictionary/ Click the green button. Then click ‘Restart Now’. Click ‘Install’.
To ensure that your Canadian Dictionary (spell checker) is installed: Open Firefox: Select ‘Options’ under ‘Tools’ Menu. Make certain ‘Check my spelling as I type’ is checked. Then click ‘OK’.
To access the Connor Homes E-CATS click here – www.connorhomes-ecats.ca You’ll see this page first when you open the E-Cats website.
Bookmark this page: Hold ‘Ctrl’ and press ‘D’. Click ‘Done’.
2 - E-CATS Login • Email or call for a Username & Password • **DO NOT Share Usernames & Passwords** your E-CATS activities are logged.
To login, first click the ‘Login’ tab. Enter your username & password then click the ‘Login’ button. **Please remember this is a new product you are testing, there will be issues. Report any problems and suggestions to davenaulls@connorhomes.com Thanks – Dave Naulls
3 – Selecting a Client To get started, you must select a client from the Client Manager. Open the Client Manager by clicking the ‘Client Manager’ Tab. The client focus (person you are entering data for) will show here. Then select the client by clicking the button next to their ID.
3a - Client, Facility and Staff Focus – What is it? “Client, Facility and Staff Focus” functions in the following manner: All Client specific forms will have a “Focus” on the selected Client only. “test test” is the Selected Client, the selected Client will be displayed here. All Client forms filled out will be saved under the selected client until changed. All Facility specific forms will have a “Focus” on the selected Facility only. “Brown Residence” is the Selected Facility, the selected Facility will be displayed here. All Facility forms filled out will be saved under the selected Facility until changed. **For those with access to the “Staff” tab, once a “Staff” is selected, all records will pertain to the Staff displayed in the status line.
3b - “Client Focus” examples: This shows the selected clients school. Both current schools and previous schools will be listed for reference. We will add a “Current” button to show which resource is active. This will be the same in all Client Related data fields in E-CATS such as the “Lawyers shown below” Client Focus is shown here. The lawyers listed are not all of the lawyers in the system. They are the “Selected Clients” Lawyers.
4 - Adding Client “Activities” • Client Activities are the regular occurring activities for Clients such as “Daily Logs”, “One on One” logs, “Consequences”, “Phone Logs” and “Incidents/S.O.” • These “Activities” are not attached to a “Facility” as a Client can move from facilty to facility. • Facility Reports are under the “Facility” tab.
4a - Adding “Client Daily” Log To view, edit or add logs, click on the ‘Activities’ tab. To add a client log, click ‘Client Daily’ in the left menu. Then click ‘Add Daily Client Report’ to begin.
Enter the information and remember to review your data when you are finished. Once you’ve finished your client’s log, click ‘Submit’ to return to the Client Daily list for the selected client.
You must return to the Client Manager and select your next client before entering a second client log for the same day. Repeat the steps to select a client, then return to ‘Reporting’ to continue adding client logs.
4b - Adding “One on One” logs Click the One on One button Click “Add New” to create a new log Click “Edit” to review or modify Fill form as required, add Date and “Submit”
4c - Adding “Consequences” Click the Consequence button Click “Add New” to create a new log Click “Edit” to review or modify To add a staff for supervision or “Reviewed” section click the checkbox and the field will be added.
4d - Adding “Phone Log” Click the Phone Log button Click “Add New” to create a new log Click “Edit” to review or modify Clicking “Existing Client Contact” will add a Client dropdown and disable “Contact Name”
4e - Adding “Incident/S.O.” reports Coming soon – we are developing this module.
4 - Adding “Facility” Reports • Facility Reports are forms that relate to the Facility or “House”. • Forms under the Facility Tab are “Facility” focused. • You must select a facility before you begin. • Forms included under this tab include: • Daily House – state of the “house”, Menu & Notes. • Communications – internal notes for the facility. • Meeting – record house meetings.
5a - Adding “Daily House” Log To add House logs, click ‘House Daily’ under the Reporting menu. Click “Add Daily House Report” The report will be recorded for the shown facility. Once finished click ‘Submit’ to add your log to the Daily House Reports list.
5b - Adding “Communications” Log To add a Communications Log, click ‘Communications’ from the Facility menu. Then click the ‘Add Notes’ button. The report will be recorded for the shown facility. Select the type of Communication you’re logging, then add the needed information in the ‘Notes’ box. Click ‘Submit’ when you are finished reviewing your data.
5c - Adding “Meeting” (House Meeting Log) Facility (house) form is being recorded for. Click on “Meeting” Click “Add House Meeting” Fill form as required and click “Submit when finished.
6 - Logging out when finished When you are finished your reports, click ‘logout’ to close the database. Make sure you are logged out so your session can not be hijacked.
7 - Contact Information • Email – techsupport@connorhomes.com • Phone - 613-337-9176 • Contacts: • Dave Naulls – Manager – design, layout and Tutorials. • Duane Naulls – design, testing, populating and rollout. • Beverly Naulls – design, rollout and monitoring.