Download
1 / 22
220 likes | 365 Views
Operating the PSNC Classes. By Dave Batty. A. What does the PSNC classroom look like?. Each student works at his own desk. Each student office has a small bulletin board in it for the student papers. Each student has a flag to put up when they need to talk to the teacher.

E N D
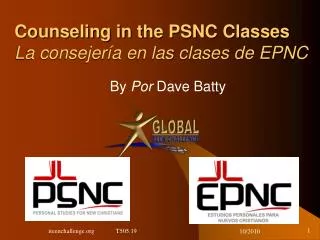
Operating the PSNC Classes By Dave Batty PSNC #6
A. What does the PSNC classroom look like? • Each student works at his own desk. • Each student office has a small bulletin board in it for the student papers. • Each student has a flag to put up when they need to talk to the teacher. • Table in the middle of the classroom for taking tests and grading lessons. PSNC #6
A. What does the PSNC classroom look like? • Library book shelves • File cabinet for student materials. • Five stack trays for student papers.1. To Test2. Testing3. Tested4. Conference5. File PSNC #6
B. How does the PSNC class start each day? • Each day starts with “Opening Exercises” which is the only group activity in the PSNC classes. • Introduce new students. • Quote the scripture of the month. • Hand out Congratulations Slips. • Student book reports • Announcements PSNC #6
C. Regular activities in the PSNC class time • Give final tests on lessons or scriptures they have memorized. • Hold conferences with any students who need to revise their daily goals. • Hold conferences with any students who have papers in the stack tray labeled “Conferences.”--After having that conference, put the papers in the tray labeled “File” PSNC #6
C. Regular activities in the PSNC classtime • Talk with any student who has their flag up. • Make notes on your Daily Checklist for Teachers regarding the progress of each student. • Before the end of class, check the daily goals of each student. (For tomorrow) PSNC #6
D. First day in the PSNC classroom for a new student • Introduce yourself to the student. Learn his full name. • Assign the student to their student desk. • Have them fill out the Student Information Sheet. • Briefly go over the information they put on this sheet. PSNC #6
D. First day in the PSNC classroom for a new student • Briefly explain how the PSNC class functions. • Optional—give a reading placement test. • Give the student a Bible and any other class papers needed to start their work. • Explain how the flags are used in the classroom. Have the student make one. PSNC #6
D. First day in the PSNC classroom for a new student • Give them Project 301, “I’m Here!” Explain that any time they need help to put up their flag. • Give them Lesson 101, and explain what needs to be done, especially at each stop point. • Regularly check with this student, even if they do not have their flag up. PSNC #6
E. Next days in the PSNC classroom for a new student • It may take more than one day, but when the new student finishes Lesson 101, then you have them complete the Scripture Memorization Class Student Manual, and then do their first Scripture Memory Verse. • After they complete their first Scripture Memory Verse, then you will give them 2 new things—Lesson 102 and a new Scripture Verse. Introduce the Daily Goal Sheet. PSNC #6
E. Next days in the PSNC classroom for a new student • After a few days, get them started on the Bible Reading Class. • After a few more days, get them started on the Personal Reading Class. • After a few more days, get them started on the Character Qualities Class. PSNC #6
F. Teacher’s work after PSNC class each day • Take all the lessons out of the top stack tray labeled “To Test.” • Attach the Final Test to the lesson and put it back in the “To Test” tray. • Take all the papers out of the “File” stack tray. File them in the appropriate place. PSNC #6
F. Teacher’s work after PSNC class each day • Take all the papers out of the stack tray labeled “Tested.” • Grade all papers and tests. Record scores on the Student Record Sheet. • Put the graded papers in the tray labeled “Conference.” These are ready for class for tomorrow. PSNC #6
F. Teacher’s work after PSNC class each day • Create a Congratulations Slip for each student who completed a Lesson, etc. • Plan your agenda for the next class session, especially the opening exercises. • Check the new goals on the Daily Goal Sheet for each student if you did not do this during class time. PSNC #6
Make every effort to get all grading of student papers completed before the next class session. Immediate feedback is very helpful to the students. PSNC #6
For more information on the daily work of the teacher in the PSNC • The PSNC website has free downloads at www.iTeenChallenge.org • Section One of the PSNC teacher training materials. PSNC #6