Aircraft Ground Procedures Guide
150 likes | 242 Views
Understand taxiing and takeoff procedures for safe aircraft operations on the ground and in the air. Learn about pre-taxi checks, takeoff clearances, and maintaining control during flight. Master techniques for slow flight maneuvers.

Aircraft Ground Procedures Guide
E N D
Presentation Transcript
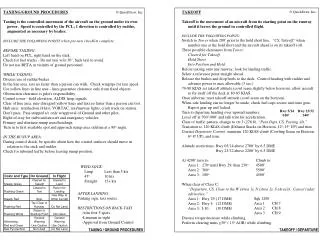
TAXIING/GROUND PROCEDURES • Taxiing is the controlled movement of the aircraft on the ground under its own power. Speed is controlled by the PCL; 1 direction is controlled by rudder, augmented as necessary by brakes. • INCLUDE THE FOLLOWING POINTSwhen pre-taxi checklist complete: • BEFORE TAXIING: • Left hand on PCL, right hand on the stick. • Check for fuel trucks - Do not taxi w/in 50’, back taxi to avoid. • Do not use BETA in vicinity of ground personnel. • WHILE TAXIING: • Discuss use of rudder/brakes. • In the line area, taxi no faster than a person can walk. Check wingtips for taxi speed. • Use yellow lines in line area - lines guarantee clearance only from fixed objects. • Obstruction clearance is pilot's responsibility. • Control tower - field elevation, ALDIS lamp signals. • Clear of line area taxi no faster than a person can trot. • Don’t pass. Pass stopped a/c only w/approval of Ground and other pilot. • Right-of-way for outbound aircraft and emergency vehicles. • Primary and alternate runup areas/headings. • Turn in to first available spot and approach runup area sideline at a 90o angle. • IN THE RUNUP AREA: • During control check, be specific about how the control surfaces should move in relation to the stick and rudder. • Check for inbound traffic before leaving runup position. • TAKEOFF • Takeoff is the movement of an aircraft from its starting point on the runway until it leaves the ground in controlled flight. • INCLUDE THE FOLLOWING POINTS: • Switch to Tower when 200’ prior to the hold short line. “CS, Takeoff” when number one at the hold short and the aircraft ahead is on its takeoff roll. • Three possible clearances from Tower: • Cleared for Takeoff. • Hold Short. • Into Position and Hold. • Before taxiing onto any runway, look for landing traffic. • Select a reference point straight ahead. • Release the brakes and drop heels to the deck. Control heading with rudder and advance power to max allowable (3 sec.) • 70-80 KIAS set takeoff attitude (cowl seam slightly below horizon), allow aircraft to fly itself off the deck at 80-85 KIAS. • Once airborne, reset takeoff attitude (cowl seam on the horizon). • When safe landing can no longer be made, check fuel caps secure and raise gear. Report gear up and locked. • Turn to departure heading over upwind numbers. • Level off at 500’ and talk trim for acceleration. • When directed by tower, change to CH 8, “Corpus Christ Dept, CS, off Navy Corpus Passing Alt. Working N/S H/L” • Climb out IAW course rules. • Discuss torque decrease while climbing. • WIND SOCK: • Limp Less than 5 kts • 45o 10 kts • Straight 15+ kts • AFTER LANDING: • Parking sign, taxi routes. • RESTRICTIONS ON BACK-TAXI • -w/in first 5 spots • -Lineman in sight • -Approval from Ground Control TAXIING / GROUND PROCEDURES TAKEOFF / DEPARTURE
STRAIGHT AND LEVEL • Maintain a constant altitude, airspeed and heading using the horizon as the primary reference. • INCLUDE THE FOLLOWING POINTS: • Horizon bisecting the windscreen, wingtips equidistant below the horizon. • Scan outside for attitude, clouds, and traffic. Crosscheck RMI, altimeter/VSI, airspeed (one at a time). • Talk through scan evolution. • Fly and talk one altitude/airspeed deviation and one heading deviation. • Always stop the error and stabilize before making a correction. • NOTE: If your demonstration allows trading altitude for airspeed, or vice versa, at least mention using P.A.T. to correct in other situations. • SLOW FLIGHT/MINIMUM CONTROL MANEUVERS • The slow flight maneuvers are designed to develop your ability to fly the aircraft in a near-stalled condition. • Perform 3 C's (do additional clearing turns during maneuver as required). • Narrate and perform all procedures. • Config 90 kts Gr& Flaps down landing lights on (600#) • PROCEDURES: • 1. Trim for 90 KIAS, Gear DN, Flaps DN, Landing Lights ON. • 2. Stall List. • 3. PCL--400#. • 4. Slow to 25-26 Units AOA, 475#-500#. • RECOVERY: • 1. Level, PCL--MAX. • 2. Below 120 KIAS, Gear UP, Flaps UP (Do not raise flaps below 90 KIAS). • 3. Autoignition--OFF. • INCLUDE THE FOLLOWING POINTSwhen stabilized at 25-26 units AOA: • Power required vs. airspeed (500# normally 100 KIAS with Gear/Flaps DN). • Pitch attitude. • Trim (full right rudder trim plus right rudder pressure). • Decrease in control effectiveness: demonstrate by "wiping out the cockpit". • Rate of turn--high, and radius of turn--small. • Adverse yaw. Turn w/o rudder, then coordinated turn. • Minimum controllable airspeed is not a set figure --will vary with weight, configuration and power setting. • Stall as a result of level turn: demonstrate by using AOB to actuate rudder shakers (26.5 +1/4 Units AOA). • Add power and hold nose at SFMCM attitude to demonstrate AOA decrease from prop wash and acceleration; then disregard AOA, clean up, and accelerate to normal cruise while maintaining altitude. P A T C R A M S STRAIGHT AND LEVEL SLOW FLIGHT / MINIMUM CONTROL MANEUVERS
TURN PATTERN • The turn pattern is a series of constant angle of bank turns while maintaining altitude and airspeed. • PROCEDURES: • 1. Straight and level on cardinal heading. Normal Cruise 600#-650# 150 KIAS. • 2. Turn 30o w/ 15o AOB. Reverse turn for 30o w/ 15o AOB. • 3. Reverse turn for 90o w/ 30oo AOB. Reverse for 90o w/ 30o AOB. • 4. Reverse turn for 180o w/ 45o AOB. Reverse for 180o w/ 45o AOB. • 5. Roll out original heading. • INCLUDE THE FOLLOWING POINTS: • Clear the area and use the horizon rolling into each turn, then cross-check the attitude gyro, altimeter/VSI. • "1/3 rule" for reversals (lead rollout by 1/3 of AOB). • Very little back stick or power required for 15o AOB turns. • For 30o and 45o AOB turns, additional backstick and power required to maintain altitude and airspeed. • Forward stick pressure in reversals when rolling through wings level. • P.A.T. when returning to straight & level flight. • BASIC TRANSITIONS • Used to enter a climb or descent from normal or fast cruise. • INCLUDE THE FOLLOWING POINTS: • Clearing turns required for climbs/descents greater than 1,000’ (15o AOB for 30o) • Emphasize the P.A.T principle in all transitions. • Climbs of 1,000’ or less will be done at max power and cruise airspeed. • Begin level off 50’ prior. • Climbs more than 1,000’ will be done at 120 KIAS. • Begin level off 200’ prior. • All cruise descents are done at 300# and cruise airspeed. • Begin level off 100’ prior. • Normal Cruise 600#-650# 150 KIAS • Fast Cruise 750#-800# 170 KIAS Turn AOB 1/3 Lead 30o 15o 5o 90o 30o 10o 180o 45o 15o BASIC TRANSITIONS TURN PATTERN
DN AIRSPEED RT LT POWER UP • LEVEL SPEED CHANGE • Level speed changes are taught to familiarize you with the various trim adjustments required with, changes in airspeed, power settings, and aircraft configuration. • Normal cruise to downwind (100 kts Gr down) to landing approach (90 kts Gr & flaps Down) to fast cruise. • PROCEDURES: • 1. From normal cruise (150 KIAS, clean, 600#-650#); PCL to 300#, Gear DN (below 150 KIAS), approaching 100 KIAS, PCL to 500#-550#. • 2. Landing List. • 3. Turns as given by IP (30o AOB max). • 4. Reduce power 100#, below 120 KIAS lower flaps, approaching 90 KIAS, 600#. • 5. Turns as given by IP (30o AOB max). • 6. Power to MAX, airspeed below 120, Gear UP, Flaps UP, Lights OFF. Approaching 170 KIAS--750#-800#. • INCLUDE THE FOLLOWING POINTS: • Ballooning tendency when gear is lowered. • Talk trim while decelerating, then again after power is set at 500#-550#. • Stabilize and trim before landing checklist. • Make shallow AOB turns while discussing reduced control effectiveness at low airspeeds. • Talk trim as flaps extend and again after setting 600#. • Complete landing checklist and do turns as before. • Talk trim while accelerating to 170 KIAS. • INTENTIONAL FEATHER WHILE AIRBORNE • The propeller will be feathered while airborne to demonstrate the actual feathering characteristics compared with the simulated condition. • PROCEDURES: • This maneuver will not be performed by the student. • Maintain a minimum of 5,000’ AGL over a hard surfaced runway. • 1. Simulate feather (200#), 100 KIAS glide. • 2. Note rate of descent (600~800 fpm) and nose attitude. • 3. Reduce PCL--IDLE. • Note deceleration and increased rate of descent (~2,300 fpm). • 4. Condition Lever--FTHR. Note acceleration and decreased rate of descent. • 5. Condition Lever--FULL INCR. Note time for prop to spin up, and deceleration at flat pitch. • INCLUDE THE FOLLOWING POINTS: • Feather increases blade angle to a max pitch of 87.5o. • Propeller will continue to turn at ~200-300 RPM • Normal 100 KIAS rate of descent with prop feathered (clean) is approximately 800 fpm; unfeathered (clean) is 2,300 fpm. • NOTE: For accurate demo, make all rate of descent comparisons at the same angle of bank. Power Airspeed Config Trim 1. Normal Cruise 600#-650# 150 KIAS Clean 2. PCL 300# Gear--DN RT-UP 3. Downwind Configuration 500#-550# 100 KIAS Gear--DN 4. Landing List 5. Turns (30o AOB Max) 6. PCL Reduce by 100# Flaps--DN LT-UP 7. Landing Configuration 600# 90 KIAS Gear--DN, Flaps--DN 8. Turns (30o AOB Max) 9. PCL 1015# 170 KIAS Gear--UP, Flaps--UP DN 10. Fast Cruise 750#-800# 170 KIAS Clean LEVEL SPEED CHANGE INTENTIONAL FEATHER WHILE AIRBORNE
SKIDDED TURN STALL • This maneuver demonstrates the excessive loss of altitude and unusual characteristics of a stall in unbalanced flight. • Scenario: Turning final, overshooting the runway, with AOB already at 30o. Bottom rudder applied to make the runway, nose raised to "stretch the glide". • Perform 3 C's. • Talk and perform procedures. • PROCEDURES: • This maneuver will not be performed by the student. • 1. Trim for 100 KIAS (500#-550#), Gear--DN, Flaps--UP, Landing Lights--ON. • 2. Stall List. • 3. Clearing turn 180o of turn, 30o AOB, last 90o to Right. • 4. At start of last 90o turn, PCL--300# and 100 KIAS descent. • 5. Apply excessive right rudder, use left aileron to hold 30o AOB. Simultaneously, raise nose, and reduce PCL to 200#. • 6. Recover IAW OCF: • Positively Neutralize Controls. • PCL--IDLE. • Determine Aircraft Altitude. • Determine AOA, airspeed, and check turn needle. • Execute spin recovery technique if appropriate. • Execute unusual attitude recovery as appropriate (do not exceed 150 kts). • INCLUDE THE FOLLOWING POINTS: • This maneuver will not be performed by the student. • Recover from out-of-control flight IAW NATOPS. If inverted, roll upright rather than pulling through (split-S). • Approximately 1,000’ will be lost - if this happens in the pattern, recovery would not be possible. • STALLS • Stalls are taught to develop your ability to recognize a complete stall or an approaching stall and to recover correctly with a minimum loss of altitude. • NOTE: This discussion is required in flight only when first introducing stalls to the student. Do it before the first stall checklist of the flight. • INCLUDE THE FOLLOWING POINTS: • Three C's: Configuration, Stall/Landing Checklist, Clearing turns. • Discuss the following stall warning signs: • SIGHT Nose high, though stall can occur in normal attitude. • SOUND Reduced wind sounds over the canopy. • CONTROL FEEL Resistance to control movement decreases with airspeed. • KINESTHESIA Sensing change of speed or direction. • RUDDER SHAKERS Should actuate 5-10 kts above stall speed. • Caution the student: Stalls are practiced at altitude. If any warning signs are noticed when not intentionally stalling--recover immediately using MAX power. • Stall Checklist • 1. Bilges--“Clear of loose objects, control lock stowed in 2 places.” • 2. Restraint harness--“Locked and tight.” • 3. Auto-ignition--“ON.” • 4. Engine Instruments--“Checked.” • 5. Report--“Stall checklist complete.” STALLS SKIDDED TURN STALL
SPINS (Technique, Start @ 9200 feet) • Aggravate a stall until the aircraft begins a nose-low, auto-rotation. Concentrate on orientation during the spin and recover once steady state. When rotation stops and assured of flying speed, commence a smooth pullout. • PROCEDURES: • 1. Normal Cruise (150 KIAS, Clean, 600#-650#). • 2. Stall List. • 3. Select ground reference point. • 4. Clearing turn 180o of turn, 45o AOB. • 5. Roll out pointed at reference point, PCL--200#. • 6. Wings level, raise nose to 30o, PCL--IDLE. • 7. At rudder shakers, add rudder in direction of clearing turn. • 8. At full stall, full rudder and full back stick. • Once airspeed stabalizes, recover: • 1. Full Opposite Rudder. • 2. Stick Forward of Neutral. • When rotation stops: • 1. Neutralize Controls. • 2. PCL--IDLE. • 3. Level wings. • 4. Pullout (120 KIAS min, 4.5 g’s max, 24 units AOA max). • 5. Oil pressure--40 psi min. • 6. Add power for Norm cruise (600-650) • 7. Check and report oil pressure. • 8. Check gyro and RMI, secure auto ignition. • INCLUDE THE FOLLOWING POINTS: • Perform 3 C's. • Recover once airspeed stabilizes in a steady state spin . • Push forward on stick until rotation stops (if light in seat gone too far). • Look up to horizon and use both hands while pulling out (avoids rolling pull out). • On recovery, 120 KIAS minimum, 24 units AOA and 4.5 g's maximum. • Fly straight and level on the horizon while completing post-spin procedures. • Spin indications: • 80 KIAS - 100 KIAS. • AOA pegged at 30 Units. • Turn Needle pegged. • Fuel Lights may illuminate. • POWER OFF STALL(Tech. Start @ 8500 feet) • Stall the aircraft in a power off condition to demonstrate the proper recovery when no power is available. • Scenario: After an actual or simulated engine failure, aircraft is stalled while stretching the glide to make a field. • Perform 3 C's. • PROCEDURES: • 1. Normal Cruise (clean, 150 KIAS, 600#-650#), at or above 6,500’ AGL (to recover by 5,000’ AGL). • 2. Stall List. • 3. Clearing turn 180o of turn, 45o AOB. • 4. PCL--200#, approaching 100 KIAS set 100 KIAS glide attitude (horizon bisecting windscreen). • 5. Raise nose to exhaust stacks on horizon (12o-15o), and hold. • 6. At stall (airframe buffet and nose pitching down slightly), relax back pressure and allow nose to fall through 100 KIAS glide attitude, raise nose to 100 KIAS glide attitude. • Before raising the nose to stall, discuss 100 KIAS glide-attitude (horizon bisecting the wind screen). • Avoid secondary stalls during recovery. SPINS POWER OFF STALL
APPROACH TURN STALL (Tech. Start @8500 feet) • Stall the aircraft while simulating a landing approach and recover correctly with a minimum loss of altitude. • Scenario: Landing pattern, inside the 90o, stretching the glide to make the runway by raising the nose rather than adding power. • Perform 3 C's. (90 kts Gr down Flaps down LL on) • Talk and perform procedures. • PROCEDURES: • Departure from controlled flight shall be avoided. • 1. At or above 6,500’ AGL, 90 KIAS, Gear--DN, Flaps--DN, Landing Lights--ON. • 2. Stall List. • 3. Clearing turn 180o of turn, 30o AOB. • 4. Roll out, PCL--300#, 90 KIAS descending attitude (horizon 2/3 way up canopy). • 5. When established, raise nose to 10o-12o (lower exhaust stack on horizon), and reduce PCL--200#. • 6. Recover--Relax, Level, Max, Ball Centered. (Do not cycle rudders.) • Raise nose to cowl seam just above horizon to stop altitude loss. • Climb at 90 KIAS to next 500’ interval, maintain 90 KIAS (600#). • INCLUDE THE FOLLOWING POINTS: • Do not depart controlled flight. • If depart use OCF procedures: • Positively Neutralize Controls. • PCL--IDLE. • Determine Aircraft Altitude. • Determine AOA, airspeed, and check turn needle. • Execute spin recovery technique if appropriate. • Execute unusual attitude recovery as appropriate. • Nose and wing attitudes before stall and after recovery. • Increased back stick pressure needed as airspeed decreases. • Execute recovery on buffet. • Don’t drop nose below horizon. • For Left Turns--Full right rudder to level wings (Left is easier). • For Right Turns--Torque effect will assist in leveling wings (Power-Pause-Pedal). • RELAX back stick - LEVEL wings - MAX power - BALL centered simultaneously. • On recovery, raise nose to cowl seam just above the horizon to STOP THE AIRSPEED FROM ACCELERATING, check VSI for positive climb, THEN accelerate to 90 KIAS and climb out. • SLIP DEMO • Set up demo at 100 KIAS, gear up, flaps down. • Apply slip inputs smoothly. Stress wing down, top rudder. • Compare rate of descent in and out of balanced flight. • Do a straight slip and a turning slip using full rudder. • Note that a turning slip will give higher rate of descent. • Using slips in the ELP, use caution in excess of 30o AOB. • EPL DEMO • INCLUDE THE FOLLOWING POINTS: • EPL is used to regain control of the engine after certain fuel control malfunctions. • Advance/retard EPL slowly. • Gear warning horn will sound when PCL/EPL are both above 75% Nl. Torque increases in climbs, decreases in descents (opposite of PCL). • SLIP DEMO/PEL DEMO APPROACH TURN STALL
BREAK (1000’ AGL) 300# 45o AOB MAX BELOW 150 KIAS GEAR-DN DOWNWIND LEG (800’ AGL) 3/4 WTD (outboard aileron hinge) 100 KIAS (500#-550#) GEAR--DN LANDING CHECKLIST APPROACHING 100 KIAS DESCEND TO 800’ AGL 15o 80 / 90 KIAS UNTIL TRANSITION 15o PRIOR TO ABEAM 300# (275# No Flap) FLAPS--DN TRIM--LT-UP 180o POSITION LOWER NOSE TO 90 / 95 KIAS ~20o AOB FINAL (100’-150’ AGL) 85 / 90 KIAS “GEAR DOWN, PADDLES CHECKED” 90o POSITION (~400’ AGL) PERPENDICULAR TO RWY 90 / 95 KIAS • LANDING PATTERN • NOTE: The pattern commences with the break or takeoff following a touch-and-go or Waveoff, and ends at the start of the approach turn. • INCLUDE THE FOLLOWING POINTS: • Turn downwind with interval, but not before 300’ AGL with flaps up. • 30o AOB max in the pattern. • 100 KIAS • Begin transition early to have the aircraft trimmed before the abeam position. • PPEL traffic has right-of-way over touch and go traffic. • APPROACH • Make a descending 180 degree balanced turn to final in the full flap or no-flap configuration. Control airspeed with nose attitude and rate of descent with power. • INCLUDE THE FOLLOWING POINTS: • Interval is established in the break or crosswind, NOT by varying the approach turn. • Talk airspeed, geographic references, and altitudes on downwind, at the 90o position, and on final. • PROCEDURES: • Downwind: • 1. Landing List prior to 180o. • 2. 3/4 wingtip distance (outboard aileron hinge), pattern altitude, 100 KIAS (500#-550#). TRIM. • Transition (~15o prior to abeam): • 1. 300# (275# for No Flap). • 2. Flaps--DN. • 3. Trim LT-UP • Approach Turn: • At 180o position (abeam touchdown point): • 1. Lower nose to maintain 90 KIAS (95 KIAS No Flap), turn toward 90o position (30o AOB max). • 2. 180o radio call. (Ranger 8/7XX R/L 180 3down and locked full stop/ t&g etc.) • 3. Landing List complete. (Gr down flaps down landing checklist complete) • At 90o position (halfway around final turn): • 1. 90 KIAS (95 KIAS No Flap), 400’ AGL, perpendicular to runway. • 2. Report Gear and Paddles Checked. • Final (1,200’-1,500’ extended centerline [10-12 sec on final], 100’-150’ AGL): • 1. Maintain 80 KIAS (90 KIAS). • 2. Aimpoint in center of windscreen. • Rolling wings level on final should require a slight power reduction to compensate for increase in lift. • Do not slow below 80 KIAS (FF) / 90 KIAS (NF). Entry TAKEOFF
LANDING • Land smoothly on the mainmounts at the intended point of landing on runway centerline. • INCLUDE THE FOLLOWING POINTS: • Approximately same nose high attitude as for takeoff. • Start the landing transition at 5’-10’ above runway. Ensure nose is aligned with the runway before touchdown. For touch-and-go, set the takeoff attitude as soon as power becomes available. • Landing Transition to Touchdown: • 1. Approaching touchdown (5’-10’ above runway), PCL to IDLE. • 2. Back stick pressure to land smoothly on mainmounts with nose high attitude. • Rollout: • 1. Smoothly lower nose to ground. • 2. Maintain directional control with rudders. • 3. At taxi speed, turn off of runway. • Touch and Go Landing: • 1. PCL--MAX. As engine spools-up, raise nose to takeoff attitude. • 2. Execute normal takeoff, climb at 90 KIAS (100 KIAS No Flap). • 3. When safely airborne (90kts and pos RoC) reset power to 1015 and raise flaps. • 4. Number one with interval, call crosswind. • 5. Transition to level, 100 KIAS downwind (500#-550#). • WAVEOFF • The waveoff is a set of standard procedures used to effect the safe discontinuation of an approach. • PROCEDURES: • 1. PCL--MAX. • 2. Level wings, center ball (right rudder). • 3. Raise nose to climb at 90 KIAS (100 KIAS No Flap). • 4. When safely airborne (90kts and pos RoC) reset power to 1015 and raise flaps.. • 5. Offset to pattern side of runway to avoid conflicts and keep aircraft in sight. • 6. With interval, call crosswind or depart pattern. • INCLUDE THE FOLLOWING POINTS: • A waveoff may be initiated by the pilot, or directed by the RDO, wheels watch, tower, IP, or another aircraft. • At an OLF, offset if necessary to keep traffic on the runway in sight or to avoid conflicting traffic. • The earlier a wave off is initiated, the safer it will be. • Should have 90o of approach turn between you and aircraft ahead. • DELTA PATTERN • - Racetrack pattern oriented around duty runway for arriving/departing traffic that will cause undue delay. • - Racetrack pattern extended to airport perimeter for runway change. • - 2000 feet AGL. • - Requires tower approval to enter. • To enter racetrack DELTA (civilian traffic): • - Climb from current position to Delta Pattern altitude and maintain interval. • - Maintain 100 KIAS, Gear--DN, Flaps--UP, 1/4 WTD (double row of rivets) outboard of duty runway on upwind leg. • To re-enter pattern: • - Descend to pattern altitude abeam upwind numbers (departure end), established on downwind. • To enter circular DELTA (runway change): • - When number one upwind, climb from current position to Delta Pattern altitude. • - Be established at 1400’ by 180o position. • OUTLYING FIELD DEPARTURE • The outlying field departure is a series of uniform procedures by which aircraft depart the pattern. • PROCEDURES: • 1. Ensure number one upwind (departure end). • 2. Above 300’ AGL with Flaps UP, call departing. • “RDO/Tower, CS, number one upwind departing.” • 3. PCL--MAX. • 4. Below 120 KIAS, Gear--UP, Landing Lights--OFF. • 5. Climb to departure altitude and accelerate to 170 KIAS, or climb at 120 KIAS. • INCLUDE THE FOLLOWING POINTS: • If pattern altitude is reached before being number one upwind, reduce power to maintain 100 KIAS. • Criteria for being "number one upwind" for departure does not require interval. LANDING / WAVEOFF DELTA PATTERN / OUTLYING FIELD DEPARTURE
High Key (Right Pattern) High Key (Left Pattern) 1/2 wtd 45o 45o 20-30 sec Flaps or Gear DN prior to High Key (low key LAPL) Allow sufficient time to crank gear down Perform Landing Checklist 2. CROSSWIND 2000’ AGL, 100 KIAS Crossing the landing line Gear--DN (prepared surface only) Flaps--DN (unprepared surface) 1. HIGH KEY 2500’ AGL, 100 KIAS 1/4 WTD (double row of rivets) Grear or flaps down Report “HIGH KEY” Wait 3 sec to start turn Use 10o-15o AOB in calm wind 5. FINAL 1200’ Final, 90/95 KIAS Gear--DN (prepared surface only) Flaps--DN (unprepared surface or if field is made) Canopy--BLOWN Battery--OFF Execute waveoff NLT 300’ AGL Climb @ 100 KIAS to LOW KEY 3. LOW KEY 1200’ AGL, 100 KIAS 2/3 WTD (mid-aileron hinge) Gear--DN (prepared surface only) Flaps--DN (unprepared surface or when field is made if landing on prepared surface) Report “LOW KEY” Level wings, then Use 10o-12o AOB 4. 90o POSITION 600’-800’ AGL, 100 KIAS Gear--DN (prepared surface only) Flaps--DN (unprepared surface) Increase to 20o-24o AOB begin decel to 90 FF, 95NF APPROACH TO HIGH KEY • HAPL • The simulated High Altitude Power Loss (HAPL) will be initiated above 2,500 ft. AGL by the instructor reducing power to idle and informing the student he has a simulated power loss. The HAPL may occur at any airspeed and configuration. Fly to intercept the ELP profile while simultaneously executing the appropriate procedures. • INCLUDE THE FOLLOWING POINTS: • Wind - Determine direction and velocity by local indications (windsock, tetrahedron, smoke, cattle face into wind). If nothing is visible, use last known wind. If wind is calm, state an assumed wind. • Field Selection - Best landing site is an airfield. Otherwise, largest "reachable" field, aligned with the wind. The next best site is a hard-packed surface. A cultivated field is normally smooth and free of livestock, but landing direction should be aligned with the furrows and the wind. Watch out for power lines, livestock, ditches, etc. If nothing is available, consider bailout, altitude permitting. (1200’ Controlled, 2000’ Night/IMC, 5000’ Uncontrolled) • When out of airspeed, altitude, and ideas, land in the trees or ditch if near a large body of water. • Engine indications - briefly review flameout, frozen engine, and rollback. • N1 at 0%--Frozen, Condition Lever--FUEL OFF. • N1 at 12%--Flameout, attempt AIRSTART. • N1 above 40%--Rollback, Use EPL. • Set yourself up for the maneuver by choosing a field and positioning yourself before initiating. Initiate by announcing "you have a simulated power loss" and reduce the PCL to IDLE. • Start going through ENGINE FAILURE procedures. • When engine instruments are checked, read actual N1 off gauge, IP will then give a simulated Nl. • Attempt airstart if conditions warrant, at / above 1,500’ AGL. • Fly to intercept the ELP at High Key. If off altitude at any checkpoint, talk briefly about the corrections you are making, and continue. Do everything possible to fly a good ELP ground track. • IP will take the controls and fly the waveoff without descending below 300’ AGL • Climb at 100 KIAS to a suitable Low Key. Enter Bowties 1 1/2 mi off end of landing site. @ 3,500’ AGL turn toward High Key. If at or below 3,500’ AGL go to near Hi Key. If above 3,500’ AGL go to far Hi Key. Then execute ELP. SIMULATED ELP Most common error High and Tight (30o-35o AOB at High Key). From 1,500’ AGL High Key, 30o AOB with Flaps UP will make field. Transition--100 KIAS Gear/Flaps--UP clean Check--Engine Instruments Condition Lever--FTHR (PCL--200#) Select--Landing Site Harness--LOCKED AIRSTART (if N1 ~12%) PCL--IDLE T-Handle--DOWN Standby Fuel Pump--ON Starter--ON N1 and ITT--MONITOR Starter--OFF Successful Start Condition Lever--FULL INCR PEL--EXECUTE Bailout (if no start, no landing site) If forced landing is continued: Condition Lever--FUEL OFF T-Handle--PULL MAYDAY / 7700 ELP profile Increase to 20o-24o AOB HAPL HAPL
Low Key if High Low Key if Low WIND • LAPL/P • The simulated Low Altitude Power Loss in the pattern will be initiated above 800 ft. AGL by the instructor reducing the power to 200 ft-lbs and informing the student there is a simulated power loss. • INCLUDE THE FOLLOWING POINTS: • Stress airspeed control and completing the first six steps simultaneously when practical. • Roll back (N1 40% use EPL otherwise feather • Do additional procedures for LAPL as time allows. • Never turn more than 90o for a field. • Waveoff at 300’ for unprepared surfaces. • LAPL/P to off duty runway only when no other aircraft are in pattern and with RDO approval. Low approaches only. • LAPL • The simulated Low Altitude Power Loss will be initiated between 800 and 2,500 ft. AGL by the instructor reducing power to idle and informing the student he has a simulated power loss (if below 1,000 ft. AGL the instructor will set 200 ft-lbs). • NOTE: For training purposes in the early contact syllabus, initiate from normal cruise with sufficient altitude to complete an airstart. For a good demo, intercept the profile prior to Low Key. As in the HAPL, waveoff should be flown at 100 KIAS to Low Key. Hardest Parts: Field Selection Getting to Field 2500’-1700’ High Key or X-Wind 1700’-1000’ Low Key Below 1000’ 90o or Str-In Transition--100 KIAS Gear/Flaps--UP Check--Engine Instruments Condition Lever--FTHR (PCL--200#) Select--Landing Site Harness--LOCKED If N1 above 40% EPL--ENGAGE If N1 below 12% Condition Lever--FTHR / FUEL OFF MAYDAY Look away from wind direction to avoid tailwind Transition--100 KIAS Gear/Flaps--UP Check--Engine Instruments Condition Lever--FTHR (PCL--200#) Select--Landing Site Harness--LOCKED AIRSTART (if N1 ~12%, above 1200’ AGL) PCL--IDLE T-Handle--DOWN Standby Fuel Pump--ON Starter--ON N1 and ITT--MONITOR Starter--OFF Successful Start Condition Lever--FULL INCR PEL--EXECUTE Bailout (if no start, no landing site) If forced landing is continued: Condition Lever--FUEL OFF T-Handle--PULL MAYDAY / 7700 ELP profile LAPL LAPL/P
@1700’-1800’ Power--Back Nose--Over Gear--DN Low Key • PPEL • Utilize the PEL procedure to ensure that a safe landing at a paved field can be made if indications of an impending engine failure should occur. • INCLUDE THE FOLLOWING POINTS: • Power is always available in PPEL: use 1015# / 850# any time you are not within gliding distance of High Key or "below profile" after intercepting ELP. • Once power has been reduced to 200#, use max allowable power and 100 KIAS to climb. • Ways to lose excess altitude (S-Turns, Slip, Gear/Flaps, Power-last resort). • Gear down with landing checklist complete no later than High Key (start early if emergency gear extension is necessary). • Initial turn off of High Key and Low Key should be at shallow AOB (10o-12o), then varying as necessary. • Flaps should be lowered at Low Key (unless situation dictates no-flaps). If not in position to lower flaps by the 90o, add power to regain the profile, then lower flaps. • PPEL/P • Utilize PEL procedure if indications of an impending engine failure occur while in the landing pattern. • INCLUDE THE FOLLOWING POINTS: • Instructor will initiate maneuver at or above 500’ AGL with interval, and make the crosswind call. • Initiate a climbing turn (Gear-UP) to a position within gliding distance of any available runway. Then continue to low key for the duty runway using normal ground track. Climb no higher than ~1700’-1800’. • Reduce power, nose over, lower the gear, and complete the landing checklist prior to pattern low key. • PEL Most common error reluctant to add power. When adding power use 1015# or 850#. PEL is steeper than normal approach. Do not reduce PCL below ~200# until over runway. Gear-DN, 1000’-1500’ prior to High Key 2. CROSSWIND 2000’ AGL, 100 KIAS Crossing the landing line Gear--DN Increase to 20o-24o AOB 1. HIGH KEY 2500’ AGL, 100 KIAS 1/4 WTD (double row of rivets) Gear--DN Report “HIGH KEY” Wait 3 sec to start turn Use 10o-12o AOB 3. LOW KEY 1200’ AGL, 100 KIAS 2/3 WTD (mid-aileron hinge) Gear--DN Flaps--DN Report “LOW KEY” Level wings, then Use 10o-12o AOB 5. FINAL 1200’-1500’ Final, 90/95 KIAS Gear--DN Flaps--DN Students reluctant to use power on final Maintain ~200# until over runway 4. 90o POSITION 600’-800’ AGL, 100 KIAS Gear--DN Flaps--DN Increase to 20o-24o AOB Increase to 20o-24o AOB TURN--to nearest paved field CLIMB--to within glide distance of High Key CLEAN--Gear and Flaps--UP CHECK--engine instruments DETERMINE--duty runway DELIVER--“PAN-PAN” REDUCE--PCL to 200# when field is made GEAR--DN prior to High Key LANDING CHECKLIST--Complete PCL--MAX Allowable or 850# CLIMB--at 100 KIAS to ~1700’-1800’ CLEAN--Gear and Flaps--UP CHECK--engine instruments DETERMINE--duty runway already known DELIVER--“PAN-PAN” REDUCE--PCL to 200# when ~1700’-1800’ GEAR--DN LANDING CHECKLIST--Complete PPEL PEL
TAXIING is the controlled movement of the aircraft on the ground under its own power. Speed is controlled by the PCL; direction is controlled by rudder, augmented as necessary by brakes. • TAKEOFF is the movement of an aircraft from its starting point on the runway until it leaves the ground in controlled flight. • STRAIGHT AND LEVEL (S&L): Maintain a constant altitude, airspeed and heading using the horizon as the primary reference • TURN PATTERN: The turn pattern is a series of constant angle of bank turns while maintaining altitude and airspeed. • LEVEL SPEED CHANGES (LSC): are taught to familiarize you with the various trim adjustments required with, changes in airspeed, power settings, and aircraft configuration. • SLOW FLIGHT MINIMUM CONTROL MANEUVERS (SFMCM): The slow flight maneuvers are designed to develop your ability to fly the aircraft in a near-stalled condition. • STALLS: are taught to develop your ability to recognize a complete stall or an approaching stall and to recover correctly with a minimum loss of altitude. • POWER OFF STALL (POS): Stall the aircraft in a power off condition to demonstrate the proper recovery when no power is available. • APPROACH TURN STALL (ATS): Stall the aircraft while simulating a landing approach and recover correctly with a minimum loss of altitude. • SKIDDED TURN STALL (STS): This maneuver demonstrates the excessive loss of altitude and unusual characteristics of a stall in unbalanced flight. • SPINS: Aggravate a stall until the aircraft begins a nose-low, auto-rotation. Concentrate on orientation during the spin and recover after two turns. When rotation stops and assured of flying speed, commence a smooth pullout. • INTENTIONAL FEATHER WHILE AIRBORNE: The propeller will be feathered while airborne to demonstrate the actual feathering characteristics compared with the simulated condition. • HAPL: The simulated High Altitude Power Loss (HAPL) will be initiated above 2,500 ft. AGL by the instructor reducing power to idle and informing the student he has a simulated power loss. The HAPL may occur at any airspeed and configuration. Fly to intercept the ELP profile while simultaneously executing the appropriate procedures. • LAPL: The simulated Low Altitude Power Loss will be initiated between 800 and 2,500 ft. AGL by the instructor reducing power to idle and informing the student he has a simulated power loss (if below 1,000 ft. AGL the instructor will set 200 ft-lbs). • LAPL/P:The simulated Low Altitude Power Loss in the pattern will be initiated above 800 ft. AGL by the instructor reducing the power to 200 ft-lbs and informing the student there is a simulated power loss. • PPEL: Utilize the PEL procedure to ensure that a safe landing at a paved field can be made if indications of an impending engine failure should occur. • PPEL/P: Utilize PEL procedure if indications of an impending engine failure occur while in the landing pattern. • OUTLYING FIELD ENTRY (OLE): The outlying field entry is a series of uniform procedures by which aircraft enter the landing pattern. • APPROACH: Make a descending 180 degree balanced turn to final in the full flap or no-flap configuration. Control airspeed with nose attitude and rate of descent with power. • LANDING: Land smoothly on the mainmounts at the intended point of landing on runway centerline. • WAVEOFF: The waveoff is a set of standard procedures used to effect the safe discontinuation of an approach. • OUTLYING FIELD DEPARTURE: The outlying field departure is a series of uniform procedures by which aircraft depart the pattern. TALKIE 1 TALKIE 2
GPS General Functions: 1. OTH 1: FSS 2. OTH 2: ARTCC’s 3. OTH 5: fuel calculations 4. STA 1: satellite info: valid posn with 4 or 3 with altitude - space vehicle: bad-weak-unknown-blank(good) and fail - signal to noise ratio: mid 30s to 50s = usable 5. STA 5: RAIM status; above bar good – below bad 6. SET 3: nearest apt criteria – set length/surface of runway desired 7. SET 6: turn anticipation enable/disable with cursor 8. SET 7: altimeter setting 9. ALT button – press twice to accept/mod as desired 10. APT 7: SIDS/STAR 11. APT 8: approaches 12. Save page: press save and enter for present posn = SAR use 13. CTR: waypoints for FIR boundaries 14. Super Nav 5: right cursor for VOR-off ,APT-on, TK-change to Hdg - scale: auto left cursor and small dial Note: To insert a new airport/etc. into FPL, it goes in above the cursor. OPERATING AREA GPS FLIGHT PLANS FP 1: South Mustang FP 2: BI South FP 3: Central FP 4: North Mustang FP 5: BI North FP 6: Foxtrot FP 7: Delta GPS Functions
GPS RVFAC: 1. Load approach into the active flight plan. 2. Select navigation source to GPS. 3. Tune backup TACAN/VOR NAVAIDS. 4. Brief the approach. 5. Verify amber ‘ARM’ within 30nm of the airfield. 6. Press ‘ALT’ to verify altimeter setting. 7. Once on vectors, select ‘OBS’. 8. Select FAWP as the active WPT. 9. Select ‘Super NAV 5/AUTO scale/verify FAWP active’. 10. Twist FAC in the CDI. 11. On vector to final, select ‘LEG’ prior to 3nm from FAWP. 12. Configure to BAC within 5nm of FAWP. 13. At FAWP, conduct 6T’s, verify 3 green ‘GPS/ACTV/LEG’ If missed approach: Select ‘Direct’, verify MAWP, ‘Enter’ GPS Procedure Turn Approach: 1. Load approach into the active flight plan 2. Select navigation source to GPS 3. Tune backup TACAN/VOR NAVAIDS 4. Brief the approach 5. Verify amber ‘ARM’ within 30nm of the airfield 6. Press ‘ALT’ to verify altimeter setting 7. Select ‘OBS’: - prior to the IAF if the IAF&FAF are co-located - after the IAF but prior to FAF if the IAF&FAF are not co-located 8. Conduct 6T’s at IAF 9. At the end of two minutes, execute the 45/180 reversal 10. Once established with FAC intercept, select ‘LEG’ prior to 3nm from FAWP, twist FAC, configure to BAC 11. Select ‘Super NAV 5/AUTO scale/verify FAWP active’ 12. At FAWP, conduct 6T’s, verify 3 green ‘GPS/ACTV/LEG’ If missed approach: Select ‘Direct’, verify MAWP, ‘Enter’ GPS Arcing Approach or ‘Basic T’ Approach: 1. Load approach into the active flight plan 2. Select navigation source to GPS 3. Tune backup TACAN/VOR NAVAIDS 4. Brief the approach 5. Verify amber ‘ARM’ within 30nm of the airfield 6. Select ‘Super NAV 5/AUTO scale’ 7. Press ‘ALT’ to verify altimeter setting 8. Select ‘LEG’ prior to the IAF 9. Conduct 6T’s at IAF 10. Once established on the arc or approach leg, twist desired track into the CDI, configure to BAC within 5nm of FAWP 11. Once on FAC, verify FAWP active 12. At FAWP, conduct 6T’s, verify 3 green ‘GPS/ACTV/LEG’ If missed approach: Select ‘Direct’, verify MAWP, ‘Enter’ GPS Holding: 1. Select navigation source to GPS 2. Select holding fix as the active WPT - select ‘LEG’ en-route to the holding fix - select ‘OBS’ prior to the holding fix and center CDI needle 3. Determine proper holding entry procedure 4. Conduct 6T’s at holding fix 5. At the end of outbound timing or distance, tail-radial-turn 6. Upon reaching holding fix commence No-Wind Orbit 7. At the end of outbound timing or distance, tail-radial-turn 8. When wings level start timing if required and determine wind direction, tail-radial-wind, and number of degrees off the the holding course 9. Upon reaching holding fix commence Correction Orbit GPS Procedures GPS Procedures