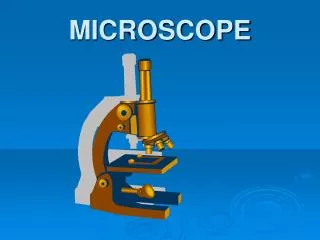
Microscope
Microscope. Basics. T. Trimpe 2005 http://sciencespot.net/. Microscope Safety. 1. Always carry the microscope with two hands - one on the arm and one underneath the base of the microscope. Hold it up so that it does not hit tables or chairs. Never swing the microscope.


Microscope
E N D
Presentation Transcript
Microscope Basics T. Trimpe 2005 http://sciencespot.net/
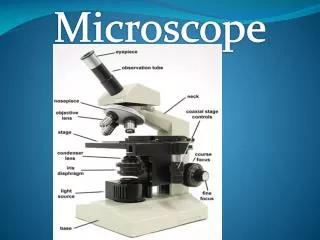
Microscope Safety 1. Always carry the microscope with two hands - one on the arm and one underneath the base of the microscope. Hold it up so that it does not hit tables or chairs. Never swing the microscope. 2. Do not touch the lenses. If they are dirty, please raise your hand and ask for the special lens paper to clean the lenses. 3. Be cautious when handling glass slides and cover-slips. Please do not handle broken glass - notify teacher. 4. Always clean slides and microscope when finished. Store microscope set on the lowest objective with the nosepiece turned down to its lowest position (using the coarse adjustment knob). 5. Cover microscope with dust cover and return microscope to storage if so requested.
4 - Slowly lower the cover slip on top of the drop. Cover Slip Lower slowly 5 – Place the slide on the stage and view it first with the scanning objective. Once you see the image, you can rotate the nosepiece to view the slide with the different objectives. You do not need to use the stage clips when viewing wet-mount slides! How to make a wet-mount slide … 1 – Get a clean slide and coverslip from your teacher. 2 – Place ONE drop of water in the middle of the slide. Don’t use too much or the water will run off the edge and make a mess! 3 – Place the edge of the cover slip on one side of the water drop.
Tips for Creating A Wet Mount: • Gather a thin slice/piece of whatever your specimen is. • If your specimen is too thick, then the coverslip will wobble on top of the sample like a see-saw: • 2. Place ONE drop of water directly over the specimen. If you put too much water over the specimen, then the coverslip will float on top of the water, making it harder to draw the specimens as they float past the field of view! • 3. Place the coverslip at a 45 degree angle (approximately), with one edge touching the water drop, and let go. You don’t want any air bubbles trapped in your slide or in your field of view.
Steps for Using the Microscope 1 – Turn on the microscope and then rotate the nosepiece to click the 4X objective into place. 2 – Place a slide on the stage and secure it using the stage clips. Use the coarse adjustment knobto get it the image into view slowly moving the knob away from you (stage is moving down). 3 – Once you have the image in view, rotate the nosepiece to view it under different powers-low power and high power. Draw what you see on your worksheet! 4 – When you are done, return the nosepiece tothe 4X objective the microscope and put up the stage all the way up and return the slides you used.