MICROSCOPE
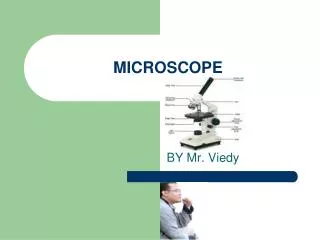
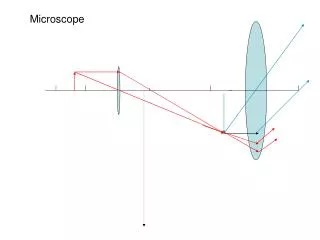
MICROSCOPE. Microscope is a tool that is used to observed microscopic objects that cannot be seen with the naked eyes. A light microscope works by means of centralizing light caught by our eyes to form a magnified image of an object. Objectives.

MICROSCOPE
E N D
Presentation Transcript
Microscope is a tool that is used to observed microscopic objects that cannot be seen with the naked eyes. • A light microscope works by means of centralizing light caught by our eyes to form a magnified image of an object.
Objectives • To know parts and their functions of a microscope • To use a microscope correctly
Light microscope Stereo microscope A stereo microscope is often used for lower-power magnification on large subjects
Electron Microscope Electron microscopes, which use beams of electronsinstead of light, are designed for very high magnification usage. Electrons, which have a much smaller wavelength than visible light, allow a much higher resolution.
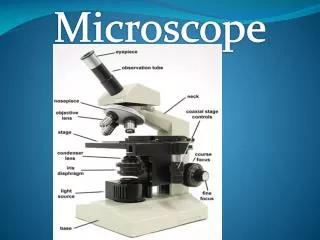
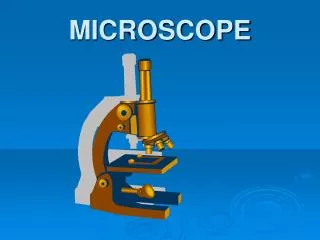
Microscope Parts Eyepiece Coarse Adjustment Body tube Fine Adjustment Revolver Arm Objective lens Stage Stage Clips Hole Diaphragm Base Mirror
Microscope Parts Body tube Revolver Stage Clips Arm Base
Parts of Microscope and their function • Eyepiece (Lensa Okuler): to magnify image you look through • Coarse adjusment (Pemutar Kasar): focuses the image under low power • Body tube (Tabung): connect the eyepiece to the revolving nose piece • Fine adjustment (Pemutar Halus): sharpens the image under high and low magnification
Revolver (Pemutar Lensa): holds and turns the objectives into viewing position • Low-power objective Lens (Lensa Objektif Pembesaran Lemah): contains the lens with lower power magnification • High-power objective Lens (Lensa Objektif Pembesaran Kuat): contains the lens with high (the most) magnification • Arm (Lengan Mikroskop): support the body tube.
Stage (Meja Benda): platform used to support the microscope slide • Stage clips (Penjepit): hold the microscope slide in place • Diaphragm (Diafragma): regulates the amount of light entering the body tube • Mirror (Cermin): allows light to go upward through the diaphragm, the specimen, and the lenses • Base (Kaki Mikroskop): provides support for the microscope
How to figure out the Magnification? Low Power 10 X 10 X 100 X Eyepiece Objective Lens Magnification High Power 10 X 45 X 450 X
Working with your microscope ! Seven easy steps for beginners ! • Place the microscope on flat surface. The arm should be toward you. • Look through the eyepiece. Open the diaphragm. • Adjust the mirror until you can see the most light coming through the tube.
Place the slide so that the material to be observed is in the middle of the hole on the stage. • Turn the nosepiece to the low- or medium-power objective- never start to the high-power. • Turn the coarse adjustment until the objective goes as far as it can without touching the slide. • Finally, look through the eyepiece and sharpens the image by turning the fine adjustment.
Attentions !! • Always carry the microscope by holding the arm with one hand and supporting the base with the other hand. • 2. Do not touch the lenses with your finger. • 3. Always focus first with lower-power objective. • 4. Do not use coarse adjustment when the high power objective is in place.
Once you have examined the specimen under low power, try this: • fiddle with the mirror. Sometimes you can change the light and see the specimen in a different way. • as you look through the eyepiece, try moving the slide to see different parts of the specimen. This takes practice. • try a high-power objective, but expect the light to be dimmer. You will probably have to change the focus a bit.