Download
1 / 41
410 likes | 546 Views
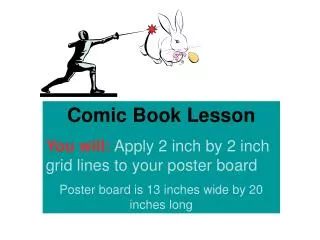
Comic Book Lesson You will: Apply 2 inch by 2 inch grid lines to your poster board Poster board is 13 inches wide by 20 inches long. You will need : A Pencil A Ruler A 13 inch by 20 inch poster board Your brain To pay attention To try your best. Orient your poster board “portrait”.

E N D
Comic Book Lesson You will: Apply 2 inch by 2 inch grid lines to your poster board Poster board is 13 inches wide by 20 inches long
You will need: • A Pencil • A Ruler • A 13 inch by 20 inch poster board • Your brain • To pay attention • To try your best
Towards the top of your poster board, line up the left side of the ruler (nearest the number 1) with the left side of your poster Double check the alignment!!
Starting at number 2, make a tic mark every 2 inches. (2, 4, 6, 8, 10, and 12)
Repeat this same step at the middle of your poster board Line up the left side of the ruler (nearest the number 1) with the left side of your poster Starting at number 2, make a tic mark every 2 inches. (2, 4, 6, 8, 10, and 12)
Repeat this same step at the bottom of your poster board Line up the left side of the ruler (nearest the number 1) with the left side of your poster Starting at number 2, make a tic mark every 2 inches. (2, 4, 6, 8, 10, and 12)
Now let’s connect our tic marks. Use your ruler to get a straight line.
Turn your ruler vertically and connect the first 3 tic marks. USE A VERY LIGHT LINE WHEN YOU DRAW
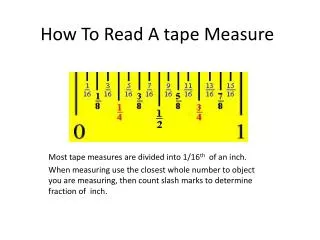
Wait a minute, Mr. Robinson. My ruler is only 12 inches long and the poster board is 20 inches long. What do I do!?
Psst, hey. Move that ruler down just a bit after you draw the first line. Keep the ruler on the line you just drew and keep it on the tic marks.
WEEEE! That was fun. Does your line look like this one? Remember kids: Draw LIGHTLY!!
Let’s do it again. But now, move your ruler to the next set of tic marks. Remember kids: Draw LIGHTLY!!
Yipee!! Are you getting the hang of it? I bet you are.
Now you can do it on your own!! Draw the rest of the vertical lines on your poster board just like we did together. If you get stuck, raise your hand and Mr. Robinson will come to your rescue. Remember kids: Draw Lightly
When you are finished, your poster board should have 6 vertical lines drawn on it. Does yours? Count them and see!! Each line is 2 inches apart from the other line. The last line on the right is 1 inch from the right side of the poster board.
Whew! We are half way finished. Let’s keep going. Ho! Ho! Ho! You are doing excellent!!
Take that same ruler and line the end of the ruler (nearest the number 1) with the TOP of your poster board. Do this near the left side of your paper. Your ruler does not have to be on your vertical line, but it can.
Starting at number 2, make a tic mark every 2 inches. (2, 4, 6, 8, 10, and 12)
Whoa, hey Mr. Robinson! The poster board is 20 inches long and my ruler only 12 inches. I can’t continue the tic marks. What do I do?!
Psst, hey. Move that ruler down. Line up that last tic mark with the number 2 on your ruler. Keep making tic marks until you run out of poster board.
When you are totally finished, you should have 9 tic marks along the left side of your poster board. Each spaced 2 inches apart. Count yours and see!
Good job. Move the ruler to the middle of the poster board. Line up the end of the ruler (near the number 1) with the TOP of your poster board.
Make those tic marks every 2 inches. Kids, this is the exact same thing as you just did on the left side of your poster board.
Can you guess what happens next? I bet you can.
Move that ruler to the right side of your poster board. Make tic marks every 2 inches. (2, 4, 6, 8, 10, and 12) When you run out of ruler: Line up that last tic mark with the number 2 on your ruler.
Kids, this is the exact same thing you just did on the left side and middle of your poster board.
Line up your ruler horizontally on the first and second tic mark at the top of your poster board.
Connect the tic marks. Remember kids: Draw Lightly
Move the ruler down to the next set of tic marks. Line up the end of your ruler (nearest the number 1) with the left side of your poster board.
Continue working your way down your poster board connecting the tic marks. Remember kids: Draw lightly.
When you are finished, you should have 9 horizontal lines. Each line is 2 inches apart. Count your lines.
All 2 inches apart? If so, then…