Download
1 / 8
90 likes | 212 Views
Dive into the fascinating world of flight by designing and testing your own parachute inspired by Leonardo da Vinci's innovative design. All you need is a plastic bag or light material, scissors, string, and a small weight like a toy figure. Follow step-by-step instructions to create a parachute that promotes air resistance and slow descent. Then, experiment with different materials to see which works best! Document your findings and channel your inner Da Vinci as you explore the art of parachute design and the science of air resistance.

E N D
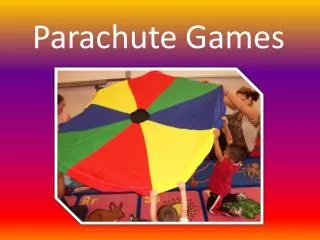
Design and test a parachute • What you'll need: • A plastic bag or light material • Scissors • String • A small object to act as the weight, a little action figure would be perfect
Design and test a parachute • Instructions: • Cut out a large square from your plastic bag or material. • Trim the edges so it looks like an octagon (an eight sided shape). • Cut a small whole near the edge of each side. • Attach 8 pieces of string of the same length to each of the holes. • Tie the pieces of string to the object you are using as a weight. • Use a chair or find a high spot to drop your parachute and test how well it worked, remember that you want it to drop as slow as possible.
Design and test a parachute • What's happening? • Hopefully your parachute will descend slowly to the ground, giving your weight a comfortable landing. When you release the parachute the weight pulls down on the strings and opens up a large surface area of material that uses air resistance to slow it down. The larger the surface area the more air resistance and the slower the parachute will drop. • Cutting a small hole in the middle of the parachute will allow air to slowly pass through it rather than spilling out over one side, this should help the parachute fall straighter.
Make a Parachute • Build your own parachute using Leonardo da Vinci's design for the first ever parachute. It looks like a pyramid! Here’s how. • Take a sheet of fairly stiff paper 30 cm long and 16cm wide.Fold it in half. • Open it out and draw a line 1cm from the long edge to the middle fold. • Cut off this section and fold back the remaining piece – it’s a tab so that you can glue your parachute together. • Now fold it along the diagonal - from corner to corner. • Open it out like a book and measure 15cm up from the centre fold. The diagram will show you exactly where to measure. • Now join up the points then cut out your shape. • Fold it into a pyramid shape and glue it into place. • Make a small hole near each corner at the base. • Now tie strings, each the same length, to each hole.
Make a Parachute • You’ve made the Leonardo Da Vinci parachute! Test it by attaching a weight (a piece of egg carton makes a good basket for the weight) to the strings and throwing it up into the air. • Experiment with different types of material. Does newspaper or card or plastic carrier bag work better? • How can you measure this?
Make a Parachute • Write up a report of your investigation of different materials. • Can you imagine you are Leonardo da Vinci? • Find an illustration which shows you how he might have worked. • Can you write out his thoughts as he designed his parachute? • What did he know at that time? • What materials were available for making his parachute? • What tools could he use? • Did he have scissors? • Can you illustrate your writing and make it look “old”?