Download
1 / 30
370 likes | 690 Views
Instalasi DNS Server, Web Server & Mail Server. DNS SERVER. WEB SERVER. MAIL SERVER. DNS Server. Instal bind9 dengan perintah: apt-get install bind9. Lalu pindah ke direktori bind: cd /etc/bind Konfigurasi file named.conf.default-zones: nano named.conf.default-zones

E N D
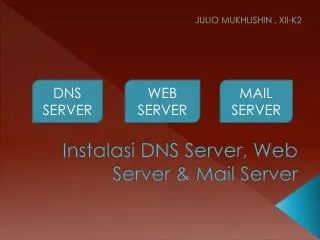
Instalasi DNS Server, Web Server & Mail Server DNS SERVER WEB SERVER MAIL SERVER JULIO MUKHLISHIN , XII-K2
DNS Server • Instal bind9 dengan perintah: apt-get install bind9
Lalu pindah ke direktori bind: cd /etc/bind • Konfigurasi file named.conf.default-zones: nano named.conf.default-zones • Pada bagian zone “localhost” Ganti kata localhost menjadi nama domain (julio.com) Ganti kata db.local menjadi db.julio (bisa apa saja)
Pada bagian zone “127” ganti “127” dengan IP address blok pertama debian disini “192”, lalu ctrl x dan y untuk menyimpan
Copy kan file db.local dan db.127 : Cp db.local db.julio Cp db.127 db.192
Konfigurasi file db.192 seperti berikut: Nano db.192 • Lalu simpan dengan ctrl x dan y
Konfigurasi file db.julio seperti berikut: Nano db.julio
Restart bind dengan perintah: /etc/init.d/bind9 restart
Lihat apakah domain kita telah cocok dengan IP servernya: Nslookup julio.com • Jika sudah benar maka terlihat tampilan berikut
Lalu install paket web browser yang bisa berjalan di mode teks untuk mengecek domain kita pada server debian Apt-get install lynx
BACK • Cek dengan perintah: Lynx julio.com Jika berhasil maka muncul gambar dibawah ini
Web Server • Install paket software apache2 dan php5, agar komputer client bisa mengakses domain yang kita buat,caranya: Apt-get install apache2 php5
BACK • Setelah itu kita cek di web browser client dengan mengetikkan nama “julio.com” pada address bar browser, jika berhasil maka akan muncul gambar seperti ini
Mail Server • Install software postfix : Apt-get install postfix
Setelah muncul gambar diatas pilih tombol OK dengan menekan enter • Lalu pilih Internet Site, lalu enter
Lalu masukkan system mail name yaitu julio.com, seperti dibawah tekan enter
Lakukan konfigurasi ulang pada postfix: Dpkg-reconfigure postfix • Pilih OK
Akan muncul gambar dibawah ini, biarkan kosongkan, tekan enter
Masukkan angka 0 (agar inbox mail menjadi unlimited), tekan enter
Pilih protokol internet yang digunakan, disini saya pilih IPV4, tekan enter
Selanjutnya kita konfigurasi file main.cf : Nano /etc/postfix/main.cf • Lalu masukkan script dibwah ini dibaris paling bawah dari file main.cf: Home_mailbox = Maildir/
Simpan konfigurasi diatas lalu restart postfix : /etc/init.d/postfix restart • Buat 2 buah user untuk percobaan pengiriman email: Adduser (nama user) • Buat direktori Maildir untuk setiap user: Mkdir /etc/skel/Maildir • Install paket dovecot dengan perintah: Apt-get install dovecot-common dovecot-imapd dovecot-pop3d • Lalu konfigurasi file dovecot.conf: Nano /etc/dovecot/dovecot.conf • Tambahkan script berikut pada : • Protocol = imap imaps pop3 pop3s (tambahkan pop3 pop3s) • mail_location = maildir:~/Maildir mail_location = mbox:~/mail:INBOX=/var/mail/%u (hilangkan tanda “#” didepannya)
BACK 3.mail_executable = /usr/lib/dovecot/imap mail_executable = /usr/lib/dovecot/pop3 (hilangkan tanda “#” didepannya) • Lalu simpan, kemudian reload & restart dovecot dengan perintah: /etc/init.d/dovecot reload /etc/init.d/dovecot restart • Setelah itu kita akan mencoba mengirim pesan dari user yang kita buat 2 tadi (pengirim epul, penerima koprol): telnet mail.julio.com 25 (tekan enter) MAIL FROM: epul (tekan enter) RCPT TO: koprol (tekan enter) DATA (tekan enter) Cek mail <<pesan teks (tekan enter, lalu (.) titik dan enter) QUIT (tekan enter)
Lalu kita cek pada user koprol, apakah ada email masuk atau tidak: telnet mail.julio.com 110 (tekan enter) user koprol (tekan enter) pass 1 (tekan enter) stat (tekan enter) retr 1 (tekan enter) • Kemudian dalam inbox akan muncul email yang dikirim oleh user epul.