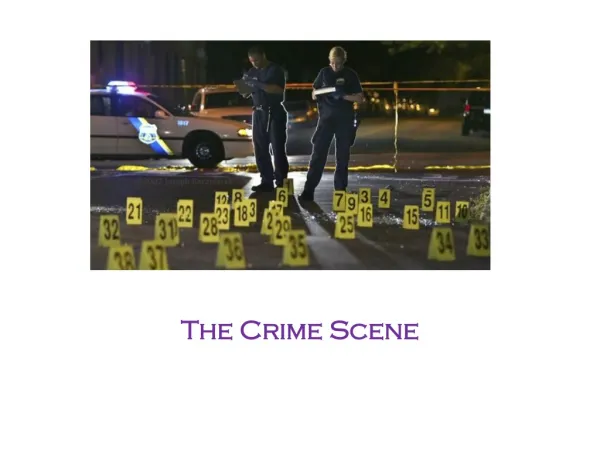
The Crime Scene
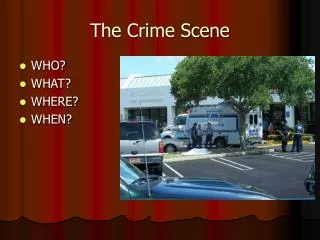
The Crime Scene. Police On T he Scene, Y ou Know W hat I Mean?. When a 911 emergency phone call is made: - the dispatcher sends cops to the crime scene. - the initial police officers make sure that the perpetrator is either apprehended or no longer at the scene.

The Crime Scene
E N D
Presentation Transcript
Police On The Scene, You Know What I Mean? • When a 911 emergency phone call is made: - the dispatcher sends cops to the crime scene. - the initial police officers make sure that the perpetrator is either apprehended or no longer at the scene. - they secure the scene and call in the forensic investigators.
Securing the Scene • Nothing can be changed at the crime scene. Police tape must surround the entire area. • Only authorized personnel may enter the scene. They must be extremely careful when handling anything.
The Legalities • Securing the scene is a matter of safety and legality. • If a defense attorney can determine that evidence was tampered with during the crime scene investigation, a guilty man may be set free.
Recording the Scene • The Crime Scene must be secured and protected. • Ways to record a crime scene: - draw a sketch of the area. - take pictures and videotape everything in its untouched state. - take notes.
Sketching the Scene • The first stage is the rough sketch. It is the initial drawing made by the forensic sketcher at the scene. It is a rough outline with rough measurements of the scene. • Later on, the forensic artist takes the rough sketch and converts it to a smooth sketch. This sketch accurately represents the crime scene to scale.
REQUIRED ELEMENTS • Address of Crime • Date • Time • Type of crime • Name of officer making the sketch • Legend • Each item identified in the sketch • A key to name each item in the sketch
Measurement Requirements • All measurements of a moveable object must be from a fixed object. • Make measurements from two points • Indicate north in the drawing. • Objects drawn do not have to be to scale.
A Picture Says 1000 Words • The forensic photographer must record every single aspect of the crime scene at every necessary angle. • NOTHING MAY BE LEFT OUT! • It is crucial to record a bodies position in accordance with everything in the scene.
Taking Notes • ALL aspects of the scene must be recorded. A detailed description of the scene as well as all the physical evidence is necessary. • Time, by whom, and how all the evidence listed was packaged and shipped must be noted.
Looking for Clues • Physical evidence is most important at a crime scene. There are many different methods of searching for ALL of the physical evidence at the crime scene. The methods are: the spiral search method, the grid method, the strip method, and the zone search.
The Spiral Search • The Spiral Search method is good for circular rooms. It consists of starting on the outskirts of a locale and then slowly spiraling inwards until the middle of the locale is reached. • It can also be conducted from the inside out.
“Gridding the Scene” • During a grid search, investigators search an area by walking first horizontally across a locale, and then crossing back over vertically. This creates the “grid” shape that gives this method its name. • This type of search is extremely useful in rectangular, or square-like areas.
“Stripping the Scene” • In a “strip” search for evidence, several investigators walk across the scene in a straight line, very slowly. This allows them to cover everything in the scene all at once.
To Your Zones! • The “zone” search is conducted by breaking up a locale into several areas. These areas are then assigned to teams of investigators for inspection. This method allows for the different teams to focus more carefully on there designated area.
You have your evidence,NOW WHAT? • What do you do with all the evidence? • After recording it, the evidence must be packaged for analysis at the lab. • Different types of evidence requires different types of packaging.
Every LITTLE thing counts… • Trace evidence such as hairs and fibers can provide extremely important clues linking an individual to a crime scene. • This evidence may be placed in pill bottles, vials, or manila envelopes.
The Bloody Truth • Often at crime scenes, there will be bloodstained evidence which must be treated with great care. • Bloody evidence must NOT be stored in a container without air. • Why do you think? • Wrapping paper, sealed manila envelopes, and paper bags are good for storing these bloody clues.
Collect the Drugs • Drugs often lead to crime, and may be a key factor in figuring out what happened at a crime scene. • If a liquid drug is found inside of its container, it must be labeled and placed in a heat-sealed plastic bag.
More Drugs • Often the drugs are solid or powder in form. • These drugs should be placed in plastic bags and sealed with tape to ensure that no drugs are lost during shipment to the lab.
The Chain of Custody • During and after the collection of the evidence, the chain of custody must be kept intact. • Everything that has already been mentioned must be done properly. If any evidence is recorded or collected improperly, it will be thrown out in court.
The Chain Continues… • It is better that fewer people handle the evidence. • Each time the possession of evidence changes, it must be properly documented and recorded.
Evidence to Check Your Evidence • Controls must be collected so that the people in the lab can test evidence to make sure that it truly came from where they think it did. • Examples of controls would be a blood sample taken directly from the victims body, or the removal of paint directly from a car that was in a crash.
Submission Time • Once you have collected your evidence, your control evidence, and maintained the chain of custody, you can submit the evidence to the lab. • Shipping the evidence is as fragile a process as collecting it. If any damage occurs during shipment, the evidence will be considered tampered with and thrown out in law.
It Is Out Of Your Hands • There are two main ways of submitting evidence. - The most secure way is by hand. Directly bringing it from the crime scene and to the lab technician -The next most popular way is by mail. Sometimes testing facilities are not nearby and evidence must be shipped away for testing.
CONGRATULATIONS!!!!! • YOU JUST PROCESSED A CRIME SCENE!!!!
Sources • Saferstein, Richard. Criminalistics. 7th ed. Upper Saddle River, New Jersey: Prentice Hall, 2001. • "Forensic Science: Scene of Crime." Forensic Science. 04 Apr. 2008 <http://library.thinkquest.org/04oct/00206/scene_of_crime.htm>. • "Evidence Collection in Crime Scene Investigations." Crime Scene Investigation. 03 Apr. 2008 <http://www.crime-scene-investigator.net/csi-collection.html>. • "Crime Scene Response Guidelines." 03 Apr. 2008 <http://www.crime-scene-investigator.net/respon4.html>. • "Collection and Preservation of Evidence." 02 Apr. 2008 <http://www.crime-scene-investigator.net/evidenc3.html>.