Download
1 / 17
170 likes | 200 Views
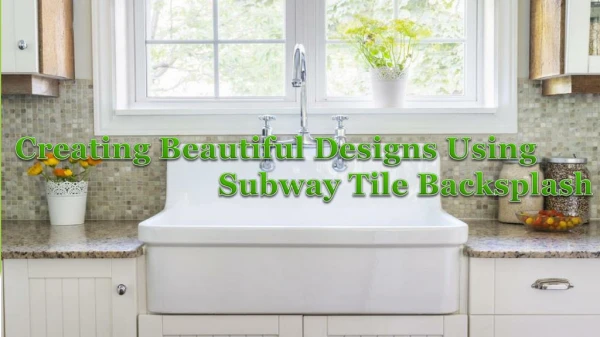
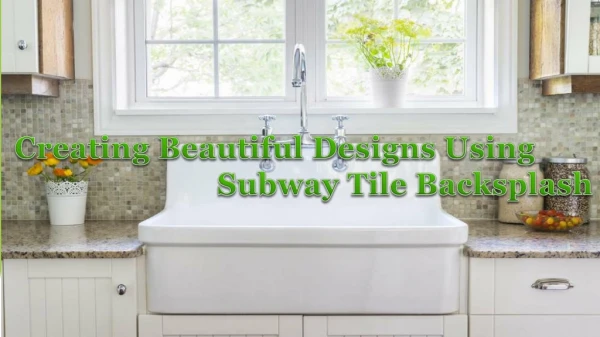
Subway tiles have gained quite a following in the commercial arena of backsplashing and as a flooring material, in general. This has made them a primary choice to be implemented for efficient and stylish designs in the kitchen.<br>

E N D
Introduction Over the period of years, subway tiles have gained quite a following in the commercial arena of backsplashing and as a flooring material, in general. This has made them a primary choice to be implemented for efficient and stylish designs in the kitchen. However, what are these subway tiles and how can they be implemented in a backsplash? This is what this article aims to discuss.
Subway Tile Backsplashing Be it a kitchen backsplash or a shower stall renovation, subway tiles have always been a popular choice for the backsplash material. However, subway tiles were not originally meant to be used in the kitchen, or in any other area of the home for that matter.
Subway Tile Backsplashing They originated to be used in subway, hence the name subway tiles. The popularity of the tiles is primarily due to its versatility. These tiles can be paired and used in almost all forms of kitchen styles, be it the traditional kitchen or the modern ones.
Subway Tile Backsplashing Along with this, they are available in all forms of sizes, be it small or medium-sized. Another factor which makes these tiles desirable is the plethora of choices in terms of materials, colours, and textures.
Creating The Dream Kitchen When people purchase a home for themselves, one part where they lay a lot of stress upon in terms of development is the kitchen. They upgrade the kitchen with the help of a new stove and dishwasher and finish tasks, which are comparatively easier.
Creating The Dream Kitchen This leaves them with the task of backsplashing. Backsplashing often becomes a necessary course of action for a lot of homeowners. This is because countertops often consist of just a single piece of laminate which is cut and attached to the first few inches of the wall above the countertop.
Creating The Dream Kitchen Due to this, it becomes impertinent for people to work on a backsplash. Backsplashing is often conceived to be a very difficult task when in reality it serves as one of the easiest DIY tasks. The task can be performed in a few steps.
The Steps Involved Step 1 •The first step in performing a backsplash is to remove the previous backsplash. In order to do this, you have to make use of a utility knife and remove the seal holding the backsplash in place. There may be some parts in which you may have to remove screws holding the backsplash in place with the countertop
The Steps Involved Step 2 •The removal process of the earlier process takes a few hours to remove. After having done this, the wall needs to be prepared for the new subway tiles to be installed. Usually, peel-and-stick tiles are used for backsplashing as they have a strong adhesive which allows them to stick without falling off easily. If you prefer, you can also make use of a standard adhesive and make use of other backsplash tiles.
The Steps Involved Step 3 • After removing the existing backsplash, more often than not you may find that there are some areas are not in good shape. There may be multiple reasons for this, however, all these can be rectified to become the best version of the wall itself. After removing the previous backsplash, the wall is often found to be rough. This can be smoothened by making use of a fine sandpaper. Post this, the walls should be cleaned so that the adhesive on the tiles do not have any problems sticking to the walls.
The Steps Involved Step 4 • The next step involves preparing the tiles to be applied to the wall. The tiles are usually manufactured using a default format because of which they often need some designing changes so that they can be stuck to the wall. A jig saw is usually preferred for such cases. Some homeowners, however, may prefer using a utility knife for quicker and more accurate applications. You can achieve more accurate applications by using the utility knife to cut the tile a few tiles and then lightly hitting the cut portion with a hammer.
The Steps Involved Step 5 • Installing the tiles are the relatively easy part of the process. The tiles can be easily placed in open areas without any hassle. Most areas such as areas without any outlets or light switches can be easily covered with tiles. It is the areas with the outlets that pose a certain problem. Though, this problems too is easily solvable. All that you need to do is cut the piece around the outline of the outlets and the light switches. To make the tiles fit around the areas of the outlets and light switches, the utility knife will usually suffice. However, in some cases, using the jigsaw is mandatory.
The Steps Involved Step 6 • After having set up the tiles, all that remains to be done is for the final trim pieces to be added. This can be done by using matching peel-and-trim pieces for the edges and these pieces can easily pull the project together. Various companies also provide outlet covers which can be used to cover the outlets and switches to match the color of the backsplash. As an added advantage, these light switches are really easy to install and can be done within no time. This is all that it takes for backsplashing to be done. It is as easy as that.
One Common Problem There is one common problem which is encountered by a lot of people on their first do it yourself project. This happens when the tile pieces are not lined up correctly and hence are needed to be removed to be aligned correctly. Usually, in these cases, the tiles need to be removed and put back up after drawing a line along the bottom to make sure that they went up together and straight. To prevent such an error from happening, you should always try to work on the straight line first
Conclusion The great part of performing backsplashing on your own is the freedom that you get to tackle the project. You can comfortably remove your old backsplash and install new ones with peel-and-stick tiles. The process is quick too. Apart from the part of drying and cleaning, the entire project takes a maximum of twenty-four hours.
THANKS! For Watching