Download
1 / 34
340 likes | 495 Views
Acrobat Connect Pro Meeting Intermediate Training. [name] [title]. Today’s Agenda. Review Logging in to Acrobat Connect What’s new in Connect 7 Raised hand Pushing screen share Decoupled Camera and Voice Blocking Guest Access Breakout Rooms Offline Recordings Using the Content Library

E N D
Acrobat Connect Pro MeetingIntermediate Training [name] [title]
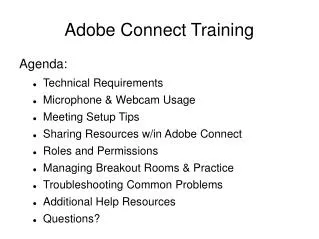
Today’s Agenda Review Logging in to Acrobat Connect What’s new in Connect 7 Raised hand Pushing screen share Decoupled Camera and Voice Blocking Guest Access Breakout Rooms Offline Recordings Using the Content Library Understanding Pod Options Moderated Chat Best Practices + Q&A
Login to Acrobat Connect Pro • Access your account: http://my.adobe.acrobat.com • Create a personal room using Custom URLs • Username = Full email address • Password = LDAP Password • Home Page • Content Tab • Meetings Tab • My Scheduled Meetings • Shortcuts to Create: New Meeting New Content
Connect Pro 7 New Features Agenda: What’s New (highlights) Blocking Guest Access Participant interaction Decoupled Camera and Voice pod Breakout rooms New Homepage/Resources Editable Recordings
What’s New for my Connect Pro Meetings? • Everything you are used to is at the same place • Improved participant interactions controls • Raise hand • Color emoticons • VoIP and Screen Share Push • Simplified ‘Meeting’ menu • Decoupled Camera & Voice • Breakout Rooms
How does Raise Hand Work? Participant View Host View
How does Raise Hand work? • What if ? • Host declines • I want to lower my hand • As a Meeting Host, I want to change raise hand notification options OR
How does Raise Hand work? • New color emoticons • ‘Stepped away’ indicates users who are not in front of their computer • Meeting Host has the option to clear all status
Screen Share Push Host View Participant View
Decoupled Camera and Voice • To use VoIP, you no longer need the real-estate of the Camera and Voice pod
Blocking Guest Access • From the Meetingmenu option select Manage Access & Entry then Block Guest Access…
Blocking Guest Access cont. • When creating or modifying meeting you have the option to Block Guest Access.
Configuring Breakout Rooms Delete Breakout Rooms Add a Breakout Room
Activating Breakout Rooms • Nothing happens until you activate Breakout rooms by clicking Begin Breakouts
Using Breakout rooms – Participant View Toast window displays broadcast messages from Meeting Hosts to all Breakout Room Participants All Participants are now ‘Presenter’ in the Breakout Room Message box enables Participants to communicate privately with Meeting Hosts Label indicates the Breakout session
Using Breakout rooms – Host View Toast window displays message from Participants Label indicates what room the Host is in To navigate to a particular Breakout room, click on the Breakout room header Message box enables Host to communicate privately with Participants across Breakout rooms
Closing Breakout Rooms • Deselect the Breakouts Active button to stop Breakout Rooms • In the main room, you can bring up the pods used in the Breakout Rooms
Home Page and Resources • Create New items menu • My Information Menu • Search feature
Recording Options Make recordings available for public viewing (recordings are private by default) Edit recordings Create a local archive of the recording (download .FLV)
Editable Recordings • Use sliders to select portion of the recording you want to cut • Click on ‘Crop’ to remove the selected portion • Use ‘Undo’ to undo the last Crop action • Use ‘Save’ to save all your edits • You can always ‘revert to original’ Note: There can only be one online version/copy of an edited recording (the original will always be available).
Layouts and Pod Options • Our recommended best practice is to name and order the layouts to reflect your agenda (layouts and PPT slide changes are reflected in the recording TOC ) • Preparing Mode – allows you to work on another layout without affecting the “active” layout (green indicates the active layout – amber indicates layout you are preparing) • Pod Options • Each pod has a set of options depending on the pod type (Example pod options from Share, Note, and Attendee List)
Understanding How Content is Managed • To access or share content and recordings – the files need to be moved from the Meeting folder to the Content Library • Note: Within the Content Library access permissions can be granted by folder as well as individual content Connect Meeting (Meeting folder) Content Library Download Content to your computer Define Access permissions Content used in Connect Meeting room Connect Recording
Chat and Moderated Chat • Moderated Chat (linking chat to a Q&A pod) Moderated Chat pod (linked) Chat pod (unlinked)
Connect Pro Resources • Connect Pro Resource Center: http://www.adobe.com/resources/acrobatconnect/ • Connect Pro User Community: http://www.connectusers.com • Getting Started Page in Connect Pro Central https://admin.adobe.acrobat.com/common/help/en/support/startmain.htm Install FlashPaper FlashPaper allows you to share any document in meetings by converting it into Flash (SWF file) format. Install Adobe Presenter Adobe Presenter is installed as a menu in Microsoft PowerPoint. It lets you create self-running rich media presentations and e-learning courses. • Your Connect Pro Support Team: [name] [email] [name] [email] [insert photo of yourself] [insert photo of yourself]
Travel for Vacations Connect Pro for Meeting & Training
Common Components - General • Use these elements in slides where you need to illustrate your point Callout Text Use this to highlight a part of the UI 1