Laboratory Equipment
490 likes | 741 Views
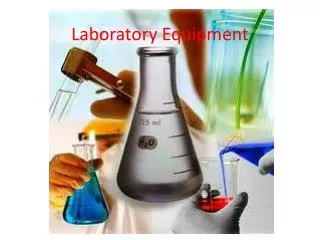
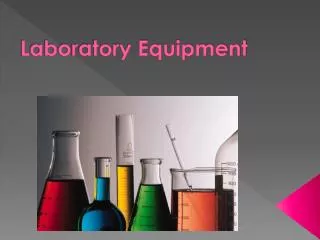
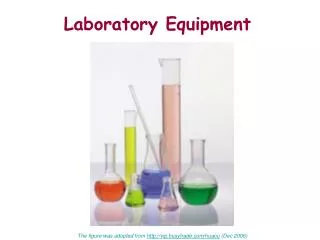
Laboratory Equipment. An Introduction. What is your glassware?. Each table has a piece of laboratory equipment on it. As a group, answer the following questions? What is it? What do you use it for? Why would you choose it over another? How would you use it? When would you use it?.

Laboratory Equipment
E N D
Presentation Transcript
Laboratory Equipment An Introduction
What is your glassware? • Each table has a piece of laboratory equipment on it. • As a group, answer the following questions? • What is it? • What do you use it for? • Why would you choose it over another? • How would you use it? • When would you use it?
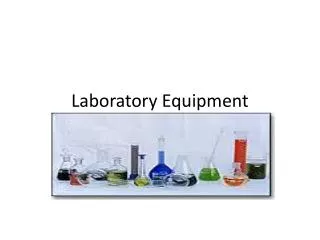
Glassware • Beaker • Erlenmeyer Flask • Graduated Cylinder • Volumetric Flask • Buret • Pipette
Glassware • Only use glassware that had been thoroughly and properly cleaned and dried • Glassware that has been cracked or etched should be discarded - glassware abnormalities can lead to inaccurate measurements • Use the appropriate size of glassware to ensure accuracy
Beakers • Beakers are used to collect a sample, to mix chemicals and to hold chemicals • A beaker has measurements, but is not used to measure exact amounts of a chemical • Beakers come in various sizes
Erlenmeyer Flask • Erlenmeyer Flasks are used to collect the titrant during titrations • The narrow neck prevents excess splashing • Cannot be used to measure exact amounts of a chemical
Graduated Cylinder • Graduated cylinders are used to measure sample, standard, reagents, etc. • Measurements are only as accurate as the cylinder is marked
Reading a Volume • Always read the volume of a liquid at the bottom of the meniscus 50 40 30 20 10
Volumetric Flask • Volumetric Flasks are used to measure a specific volume of sample or to prepare solutions; it is a more accurate method than either pipetting or using a graduated cylinder for large volumes
Burets • Burets are used to deliver larger volumes of reagent in smaller quantities. • Do not use a stopcock that leaks or is damaged in any way • Make sure that the seal on the stopcock is tight
Pipettes • Etched rings on pipettes are “blowout”; if the measurement ring is not etched into the glass, then it is “to deliver” • If a reagent or solvent is accidentally sucked into the bulb or pipette pump, thoroughly clean the apparatus and re-measure the reagent or solvent
Pipette Bulbs and Pumps • Bulbs and pumps are used to draw up the liquid and then to deliver the liquid
Using Pipettes and Burets • Choose the appropriate piece and size of equipment • When measuring volume, always read the measurement at the bottom of the meniscus • Hold the pipette or buret straight vertically and read the volume at eye level • Always use clean pipettes and/or burets
Accessories • Crucible and Evaporating Dish • Tongs • Crucible Tongs • Beaker Tongs • Test Tube Tongs • Clay Triangle • Wire Gauze • Watch Glass • Ring Stand
Crucible and Evaporating Dish • Porcelain cups that can withstand high heat • Used with a bunsen burner to heat sample
Tongs • Tongs are used to handle specific equipment that is hot, going to get hot or has the potential to splash • Crucible Tongs • Beaker Tongs • Test Tube Tongs
Clay Triangle and Wire Gauze • Used when heating equipment with a bunsen burner or cooling hot glassware
Watch Glass • Allows you to observe a chemical reaction in a beaker or flask without the hazard of splashing or sputtering
Ring Stand • Used to clamp a buret, test tube or other glassware
Equipment • pH Meters and probes • Stir Bars/Stir Plates • Hot Plate • Bunsen Burner
pH Meter • pH probes are very sensitive to change • Always keep the probe in a solution when not in use • Calibrate the meter according to the manufacturers recommendations • Allow the meter to stabilize before taking a measurement
Stir Plate • Stir plates are used to mechanically agitate the sample to assure a homogenous mixture • Stir plates must be used during a titration to assure the proper chemical reaction with the entire solute • Do not reuse a stir bar until it has been cleaned
Hot Plate • Hot plates are used to heat chemicals instead of a bunsen burner • Remember that a hot plate is a source of ignition; therefore, do not use any flammable materials around the hot plate • Samples may contain contaminants that cause popping or splattering of the sample; to avoid this, use a boiling stone or an appropriately sized beaker
Stir/Hot Plate • Stir Plates and Hot Plates are often combined into one apparatus
Bunsen Burner • A bunsen burner is used for heating samples. • The fuel is natural gas.
Parts of a Bunsen Burner • The parts of the burner include: • gas inlet • burner tube (adjustable) • air control vent • gas control valve
Lighting a Bunsen Burner • To light the burner, • step 1: turn on the gas • step 2: open the gas control valve 1/4 to 1/2 turn • step 3: hold the striker at a 45o angle and ignite the flame
Adjusting the Flame • Air adds Oxygen which is necessary for combustion • To make the flame burn hotter and larger, open the air mixture valve accordingly • To make the flame burn cooler and smaller, close the air mixture valve accordingly • Opening the gas valve will add more fuel to the mixture but not more Oxygen, and cause incomplete combustion
Color Indicators • Different flame types of a Bunsen burner depend on oxygen supply. • What does the flame on the left tell you? • A rich fuel mixture with no premixed oxygen, incomplete combustion produces a yellow sooty flame. • What does the flame on the right tell you? • A fuel and oxygen mixture allows for complete combustion and a hot, blue flame.
Color Indicates Temperature • Yellow flame (also called a safety flame) at around 1,000°C. • Increasing oxygen supply creates a blue appearance • The coolest part of a flame will be red, then progress to orange, yellow, and white as the temperature increases