Download

1 / 7
70 likes | 145 Views
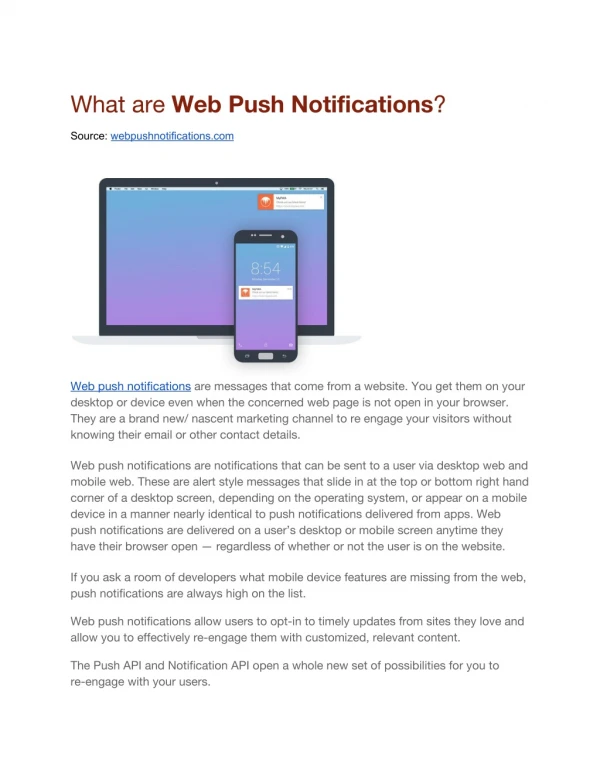
Follow this blog step by step integration of rich push notifications in iOS 10 apps to give your users a very pleasant and smooth experience and dramatically increase chances of conversions.

E N D
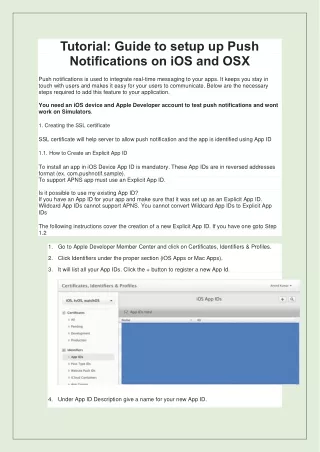
How to Integrate iOS 10 Rich Push Notifications in Your App Without any doubt, with the arrival of rich push notifications in iOS 10, the way app marketing is done has changed. Marketers across the world are leveraging the rich push to attach photos, gifs, sounds and video content to engage their users in a more interactive way. Earlier, you had to either tap on the notification to open either app or URL or had to slide it to close it in your phones. Rich push notification in iOS 10 gives users the ability to check out the rich media in the push right from the notification center . . . or even lock screen. This not only makes the push notifications far less annoying but also gives a very smooth and better experience to the users. Let’s start the process of integration in your iOS app: Go to your project target and click on Capabilitiesand ensure that ‘Push Notifications’ is enabled and that ‘Remote notifications’ is selected underBackground Modes:
Go to AppDelegate.swift and import UserNotification.framework in appdelegate and add this code in didFinishLaunchingWithOptions: UNUserNotificationCenter.current().delegate = self UNUserNotificationCenter.current().requestAuthorization(options: [.sound, .alert, .badge]) {(granted, error) in // actions based on whether notifications were authorized or not if (granted) { UIApplication.shared.registerForRemoteNotifications() } } You can enable Rich Push Notification via Notification Service Extension: Create a Notification Service Extension in your project. To do that, in Xcode, select File -> New -> Target and choose the Notification Service Extension template.
Once you’ve added the new target, you’ll have a new file calledNotificationService.swift. Note: Notification Service Extension has a separate Apple App ID and Provisioning profile! Note that notification extension has its own Bundle Id (ex: com.shephertz.demo.NotificationService) as well as its own Apple App ID and Provisioning profile which must be set up in Apple Developer Portal separately. Open this class, and write this code in did Receive(: with Content Handler:) delegate method to serve any media in the notification. The code in this method looks like this: self.contentHandler = contentHandler bestAttemptContent = (request.content.mutableCopy() as? UNMutableNotificationContetnt) If let bestAttemptContent = bestAttemptContent {
let userInfo = bestAttempContent.userInfo If let userString = userInfo[“attachment-url”], let fileUrl = URL(string: urlString as! String){ URLSession.shared.downloadTask(with: fileUrl) { (location, response, error) in If let location = location { let tmpDirectory = NSTemporaryDirectory() let tmpFile = “file:”.appending(tmpDirectory).appending(fileUrl.lastPathComponent) let tmpUrl = URL(string: tmpFile)! try! Filemanager.default.moveItem(at: location, to: tmpUrl) If let attachment = try? UNNotificationAttachment(identifier: “”, url: tmpUrl) { self.bestAttemptContent?.attachments = [attachment] } } self.contentHandler!(self.bestAttemptContent!) }.resume() } } The ‘attachment-url’ is a self-chosen key, which could be anything. The important part is to use the same key in the final code. This process will just download the media from the server as a temporary file with .tmp extension, save the media to disk, add the path of the media to a UNNotificationAttachment and send it back to the edited notification. There are two conditions when this delegate method did Receive(: with Content Handler:) is called. If both conditions are not matched then notification serves as simple content and doesn’t serve as rich push notification and these conditions are: 1.The remote notification is configured to display an alert
2.The remote notification’s aps dictionary includes themutable-content key should be 1 App Transport Security App Transport Security (ATS) has been around since iOS 9, it has always been easy to opt out of ATS by adding the following snippet to your Notification Service Extension’sInfo.plist. HTTP HTTP URL’s aren’t supported in iOS 10 unless explicitly specified in the plist. You will have to include App Transport Security Settings Dictionary in your Notification Service Extension’ Info.plist and inside this set Allow Arbitrary Loads to YES. Also Read: 5 Ways Rich Push Notifications Can Maximize Conversions Using App42 to send rich push in iOS 10: 1.Login to AppHQ and move to Unified Notifications 2.Click on Push Notifications and click on send Push URL: 3. Select Advanced 4.Select any Media Type 5.Select YES for Convert for iOS 10
Now you are ready to send Rich Push Notification in iOS 10. For any clarifications or confusions, please reach us at support@shephertz.com, we will be happy to assist you.