Download

1 / 6
60 likes | 283 Views
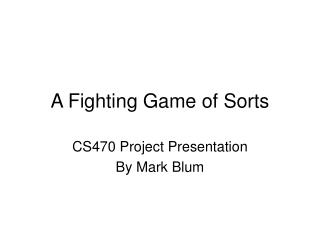
A Comprehensive tutorial to develop real time fighting game in Cocos2dx. To make thing easier you can check out this developed real-time fighting game demo in cocos2dx who help developers bootstrap easily. This demo’s some of key steps involved in doing this and the entire source code can be downloaded or viewed from our git repo.

E N D
Cocos2dx Realtime Fighting Game Tutorial Since we released our Cocos2dx SDK, we’ve had a lot of positive feedback from developers. To make things easier, we’ve also developed a demo real-time fighting game in Cocos2d-x to help developers bootstrap easily. I’ll walk you through some of the key steps involved in doing this and the entire source code can be downloaded or viewed from our git repo. The demo game is quite simple –the user will first click on the “Start Game” button. Once started, the scene changes to the game play scene. Since it’s a 2 player demo, another user will also do the same from a different client and voila! they can shoot balls at each other by tapping on the screen and see them move in real-time.
Now let’s understand how the game code works by examining the key code snippets. First we specify the AppWarp constants that will be used in HelloWorldScene class #define APPWARP_APP_KEY "Your App Key" #define APPWARP_SECRET_KEY "Your Secret Key" #define ROOM_ID "Your Room Id You get your values by registering and creating an AppWarp type of application from AppHQ (SheHertz AppWarp Dashboard). This wiki page contains a step-by-step guide on how to register, creating the app and a game room. Once you’ve got these values, replace as indicated. Also Read: Realtime Multiplayer Development on Cocos2d-x Next we simply add the required UI elements (local player, remote player etc.). For the real-time communication to happen, you need to include AppWarp Cocos2d-x in to your project. The latest version including all the steps for setting up your xcode and Android projects can be downloaded from our Cocos2DX Deveveloper Home. Add this source code to your project. Next you need to initialize the AppWarp’s Client singleton and set up your listeners through which you will get events. < AppWarp::Client *warpClientRef; AppWarp::Client::initialize(APPWARP_APP_KEY,APPWARP_SECRET_KEY); warpClientRef = AppWarp::Client::getInstance(); warpClientRef->setConnectionRequestListener(this); warpClientRef->setNotificationListener(this); warpClientRef->setRoomRequestListener(this); warpClientRef->setZoneRequestListener(this); The listener callbacks required for this sample are defined in HelloWorldScene.cpp file, so HelloWorldScene itself is added as a listener in the above code. ConnectionRequestListener defines
the callbacks for connection establishment and tear-down. RoomRequestListener defines the callbacks for the game room’s join and subscribe operations. NotificationListener defines the callbacks for remote notifications such a player sending a chat or updating a rooms properties etc. class HelloWorld : public cocos2d::CCLayerColor, public AppWarp::ConnectionRequestListener, public AppWarp::RoomRequestListener,public AppWarp::NotificationListener,public AppWarp::ZoneRequestListener Now we are ready to connect to AppWarp cloud and start our game. Now each user who is concurrently connected to your game must have a unique username. In this demo, we will use a simple random user name generator function and use that as the username for connect. You can use other solutions such as a facebook id, email address etc. to guarantee uniqueness depending on your game. userName = genRandom(); warpClientRef->connect(userName); The game starts once the user has successfully connected to AppWarp and joined (and subscribed) the game room.The listener callbacks as a result of connect, joinRoom and subscribeRoom API calls are defined as follows: void HelloWorld::onConnectDone(int res) { if (res==0) { printf("\nonConnectDone .. SUCCESS\n"); AppWarp::Client *warpClientRef; warpClientRef = AppWarp::Client::getInstance(); warpClientRef->joinRoom(ROOM_ID); } else printf("\nonConnectDone .. FAILED\n"); } void HelloWorld::onJoinRoomDone(AppWarp::room revent) { if (revent.result==0) { printf("\nonJoinRoomDone .. SUCCESS\n"); AppWarp::Client *warpClientRef; warpClientRef = AppWarp::Client::getInstance(); warpClientRef->subscribeRoom(ROOM_ID); startGame(); removeStartGameLayer();
} else printf("\nonJoinRoomDone .. FAILED\n"); } void HelloWorld::onSubscribeRoomDone(AppWarp::room revent) { if (revent.result==0) { printf("\nonSubscribeRoomDone .. SUCCESS\n"); } else printf("\nonSubscribeRoomDone .. FAILED\n"); } The game starts when onJoinRoomDone event is fired with a success code. Now the user can shoot in the opponents direction simply by tapping the screen in the direction he wants to shoot and that is handled as follows: void HelloWorld::ccTouchesEnded(cocos2d::CCSet *pTouches, cocos2d::CCEvent *pEvent) { CCSetIterator it = pTouches->begin(); CCTouch* touch = (CCTouch*)(*it); CCPoint location = touch->getLocation(); // Set up initial location of projectile CCSize winSize = CCDirector::sharedDirector()->getWinSize(); CCSprite *projectile = CCSprite::create("Bullet-red.png"); projectile->setPosition(ccp(player->getPosition().x+player- >getContentSize().width/2, player->getPosition().y)); CCPoint projectilePos = projectile->getPosition(); // Determine offset of location to projectile int offX = location.x - projectilePos.x; int offY = location.y - projectilePos.y; // Bail out if we are shooting down or backwards if (offX getContentSize().width/2); float ratio = (float) offY / (float) offX; int realY = (realX * ratio) + projectilePos.y; CCPoint realDest = ccp(realX, realY); // Determine the length of how far we're shooting int offRealX = realX - projectilePos.x; int offRealY = realY - projectilePos.y; float length = sqrtf((offRealX*offRealX)+(offRealY*offRealY)); float velocity = 480/1; // 480pixels/1sec float realMoveDuration = length/velocity;
sendData(winSize.width-realDest.x, realDest.y, realMoveDuration); // Move projectile to actual endpoint CCActionInterval* move = CCMoveTo::create(realMoveDuration, realDest); CCCallFuncN* moveFinished = CCCallFuncN::create(this, callfuncN_selector(HelloWorld::spriteMoveFinished)); CCSequence* seq = CCSequence::create(move,moveFinished, NULL); projectile->runAction(seq); // Add to projectiles array projectile->setTag(2); _projectiles->addObject(projectile); } void HelloWorld::sendData(float x, float y, float duration) { AppWarp::Client *warpClientRef; warpClientRef = AppWarp::Client::getInstance(); std::stringstream str; str <sendChat(str.str()); } Here we are sending x and y values of the touch point according to the remote player’s frame of reference as well as the duration in which the projectile needs to go beyond the screen. The data is a string where characters “x” and “d” are used as separators. This message is received by all players in the room and they can then update their UI in turn (for drawing the projectile). When we receive remote messages we need to write some code to update the remote player’s position or projectile depending on the message received. Here is the code snippet which handles it in the HelloWorldScene.cpp file void HelloWorld::onChatReceived(AppWarp::chat chatevent) { if(chatevent.sender != userName) { std::size_t loc = chatevent.chat.find('x'); std::string str1 = chatevent.chat.substr(0,loc); std::string str2 = chatevent.chat.substr(loc+1); loc = chatevent.chat.find('d'); std::string str3 = chatevent.chat.substr(loc+1); float x = (float)std::atof (str1.c_str()); float y = (float)std::atof(str2.c_str()); float dest = (float)std::atof(str3.c_str()); updateEnemyStatus(ccp(x,y), dest); } } void HelloWorld::updateEnemyStatus(CCPoint destination, float actualDuration) { enemy->setOpacity(255);isEnemyAdded = true; CCSprite *target = CCSprite::create("Bullet-blue.png"); target->setPosition(ccp(enemy->getPosition().x-enemy- >getContentSize().width/2, enemy->getPosition().y)); addChild(target,10); // Move projectile to actual endpoint CCActionInterval* move = CCMoveTo::create(actualDuration, destination); CCCallFuncN* moveFinished = CCCallFuncN::create(this, callfuncN_selector(HelloWorld::spriteMoveFinished));
CCSequence* seq = CCSequence::create(move,moveFinished, NULL); target->runAction(seq); // Add to targets array target->setTag(3); _targets->addObject(target); } That’s it! We saw how you can simply integrate the AppWarp library and add real-time communication to your game. Get started with AppWarp to start developing rich and engaging real-time multiplayer games in Cocos2DX. For questions and or feedback, send us a mail on support@shephertz.com