Download

1 / 49
490 likes | 513 Views
Learn essential elements of composition for capturing engaging photos with proper subject placement, visual interest, and leading lines. Enhance your photography skills with these guidelines!

E N D
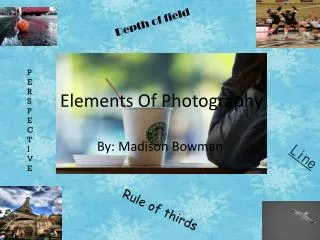
Elements of Composition • In general, good photographs result from careful attention to some basic elements of composition, together with appropriate lighting and an interesting subject. • There is, however, no “right way” to take a photograph. 3 photographers recording the same scene may create equally appealing photos with entirely different composition.
Guidelines – Not Rules • Even though the following principles have emerged for good composition-and they seem rather clear-they should always be consideredguidelines, notrules. • Composition is anart, not a science
Fill the Frame • 1. Move up close toFill the Frame • The biggest mistake that beginning photographers will make is not getting in close enough • Move yourself closer or use the Zoom
Fill the Frame This is my daughter, Alexis, at the age of 2. (She was excited to have her hair in pig-tails.) Notice that I didn’t include the whole chair or even her whole body. The focus is on her upper body and her pig-tails. That was the whole reason for the photo.
Fill the Frame This is Alexis, age 2, playing in the backyard. Notice how I filled the frame and focused in on just her with the water sprinkler. I didn’t show everything in my backyard.
Fill the Frame My Niece Abby
Center of Visual Interest • 2. Compose around aCenter of VisualInterest • Compose your photo around your theme • Does the shot fit the theme? • Stay away from multiple centers of interest! Look for aSINGLECenter of Visual Interest
Center of Visual Interest Where is the single center of interest? Some people say the road, and some people say the motorcycle. Too much stuff will make your photo look busy.
Center of Visual Interest Think of each shot as having a theme or a common idea throughout.
Center of Visual Interest • Simplicity • Be sure that only the things you want the viewer to see appear in the picture. If there are numerous objects cluttering up the background, your message will be lost.
Center of Visual Interest What does your mind focus on here? Most people say the center of interest is the cookie/chocolate chips. The milk in the background is there to help add to the theme of the cookie. But it does not over power the center of interest (cookie).
Center of Visual Interest Effective use? Your answer is hopefully: NO. The background is too cluttered for a single center of interest. To improve this photo, the photographer would have to zoom in more and focus on the upper bodies of the players and the ball. This would eliminate the crowd in the background plus help you see the players’ faces better.
Proper Subject Placement • 3. ObserveProper Subject Placement • Take the time to position your subjects. • Take the time to move the camera to position the objects within the frame • Rule of thirds • Lead the subject
Rule of Thirds • In Rule of Thirds the total image area is divided vertically and horizontally into three equal sections. • Although it is often best to place the center of interest somewhere along the two horizontal and two vertical lines, generally, composition is even stronger if the center of interest falls near one of the four cross-points.
Rule of Thirds Divide these photos vertically and horizontally into thirds and you will see that the center of interest is at a cross-point.
Rule of Thirds Sometimes you can get a neat effect by using objects/buildings to create “real” lines for Rule of Thirds as well.
Rule of Thirds In this photo, there are actually 2 centers of interest (the horse’s head and the girl’s head). But this photo works well with the 2 areas because the photographer put them each in a cross-point.
Leading the Subject • Looking Space – give your subject room to look or move in your photograph • Generally, when a subject is moving in a particular direction, space is provided at the side of the frame for the subject(s) to "move into." This is referred to as leading the subject.
Leading the Subject This is a picture of my daughter and I (taken a few years ago) playing along the Missouri River. You notice that we have room to look or move in the photo. This is another example of “Leading the Subject”.
Leading Lines • Lines direct the viewer’s attention to the center of visual interest. • In addition to moving our eyes around the frame, lines can suggest meaning in themselves. Follow these curved lines up to the old farm house. Without these curved lines, the photo would be a boring photo of an old house. The lines add interest to your picture.
Using Lines • Horizontal lines=stability, openness • Vertical lines=power, height, restriction • Curved lines=grace, beauty • S-lines= gracefulness, leads eye to center
Curved Lines = Grace, Beauty Below is a photo using a curved line to help follow your eye around the flower pot to the plant. The above photo was taken at a park on a play set. You can see how your eye follows the curve of the play set leads your eye down to the girl sitting on the ground.
Horizontal and Vertical Lines?confusing? This photo looks way too busy and confusing. Don’t combine vertical, horizontal, or curved lines together into 1 photo. It is distracting and starts to hurt your eyes.
Framing • 5.Framethe central subject matter • Use objects in the foreground to frame your shot • Adds “depth” to the photograph • Framing a scene holds attention within the shot and keeps viewers' attention from wandering or being distracted from the center of interest.
Frame Central Subject Matter To show a common example, leaning tree branches at the top of a scenic shot breaks up a bright sky and acts as a visual barrier or “stop point” for the top of the frame. Note in the photo above how framing a shot with foreground objects adds depth and dimension.
Perspective • 6. Use visualperspective • Look for Creative Angles • Take an ordinary photo and make it unique through the camera’s perspective • Move yourself and your camera to a different position to look for a different perspective
Visual Perspective
Visual Perspective
Repetition • 7.Repetitionof shapes can draw a viewer into the photograph My nephews, Jacob and Isaac
Repetition Repetition can be found in colors, shapes, objects, etc.
Repetition It can often be thebreakin repetition that makes an effective photograph Thelsel – dpchallenge.com
Other Things to Watch For • A. Avoid Mergers= adjust your shot! • Tonal mergers • Too much of same color • Dimensional mergers • Light post out of subjects head • Border mergers • Subject cut off by frame, • Car shot, but can’t see wheels
Tonal Mergers Tonal mergers result when important objects in a scene appear to blend together and lose their identity. This is because the objects are of similar tonal or color values, or because of lighting problems. Note in the above photo that the butterfly gets lost in the yellow flower.
Tonal Mergers A common example of dark hair blending into a dark background. Try to separate the child's hair from the background… Whenever separate elements in a scene merge together in this way you have a tonal merger.
Dimensional Mergers Dimensional mergers are when an important single center of interest runs together with an object in the background such as a tree, lighting fixtures, street signs, etc.
Border Mergers Border mergers occur when a subject matter is cut off by the edge of the frame — at an inappropriate point. A shot of an individual cropped at the calves looks awkward. Cropping off 1 foot or hand in a shot gives a similar result. A shot of a woman in a strapless dress cropped just above the top of the dress gives the illusion she is "topless."
Time for you to COMPOSEsome GREAT photographs! Attached to this lesson is a separate Word document that clearly outlines the lesson goals, and required photos for this assignment. It would be beneficial for you to print the Word document to bring with when you take pictures.