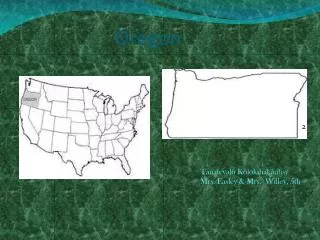
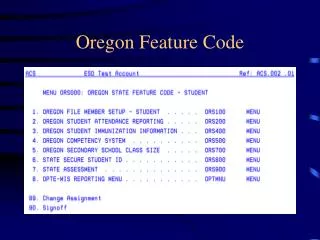
Oregon Feature Code
This document outlines the procedures for managing student data within Oregon schools. It includes details about setting up member files, maintaining attendance registers, managing immunization information, and generating reports for state health departments and academic records. Key processes include indexing schools with State IDs, ensuring attendance registers are complete for quarterly reports, and handling immunization exemptions. Additionally, it covers the importance of maintaining accurate course references and class size files, as well as how to prepare for disease outbreak assessments.

Oregon Feature Code
E N D
Presentation Transcript
Oregon File Member Setup • Done at the district level • Runs the physical file information for the district • Shouldn’t be too concerned by this option
CIMS School/State ID X-ref • Index schools • Each school in district must be included with a State ID attached • State ID found: https://www.ode.state.or.us/
Maintain Attendance Register Extension Info • Index district • Must have identical registers here from ATT.240 • If register is missing, add register here • Necessary for building quarterly report
Print Attendance Registers • Builds quarterly report file • Similar to ATT.530 • Must do this before running quarterly report • Can run over and over • Do not actually have to print out, but must run • Put in district, quarter, limit to school if desired
Print Quarterly Attendance Report • Report used to fill-out web survey • Depicts summarized attendance for each school in the district • Based on attendance registers • Can run for entire district or per school • Be sure to fill in all fields
Maintain Immunization Exemptions Definitions • Done as part of initial setup • 4 exemption codes: • Contracted • Permanent Medical • Religious • Temporary Medical
State Definitions & TB Required • Also done as part of initial setup • Index to see definitions set for district • Lookup on country to see how setup • TB screen will only show up in students basic student information if they are from a location that has been defined here • Screen will appear after immunization
Maintain Student Immunization Information • Where immunization information is first entered and maintained • Same screen in basic student information • Enter exemptions if necessary • Make sure the correct schedule is used • Enrolled 9/1/98 = schedule 2
Student Immunization Primary Review Detail • Large report • Takes a look at all students • Looks like immunization info • Very detailed report
Student Immunization Primary Review Summary • Used for reporting to state health department • Similar setup screen as the detail • Prints in a nice layout
Disease Outbreak • Who could be affected if someone shows up with one of the diseases • Same setup format • Specific to a particular disease or all diseases
Student Immunization Assessment Report • Reports in a percentile format • Can report a particular class or all classes in the district • Reports each of the diseases • Useful report
Deals w/ country codes in basic student information Enter district Enter school or several schools Enter a date range Leave defaults Reports any and all students still requiring TB shots Students Requiring TB Shots
Student Immunization Future Review Detail • Is a forecast/future program • Creates a list of students that will require immunizations • Based on list, a letter or notice can be sent to parents • “Calculate Students Age as of:” is a future date
Print Academic Record (Transcript) • Only menu item used • Enter district • Enter school • Can enter a class or leave it blank • Can enter a student # or leave it blank • F4 to index if necessary
Take Snap-Shot of Course Count Files • From the program: “This procedure will take a Snap-Shot of your Master Schedule for use in the building of School Student Class Size file required by the state. You should run this on the day you want the Snap-Shot taken.” “Only run this once, unless you wish to clear the files and repost the schedule.” • Done on October 1st • Verify enrollments before this is done • Counts class sizes
Build X-ref File From Previous Year • Enter district and school • Leave all defaults to N unless you want to reset information • Clear all this information from previous year when doing a new year. Determined by individual district • Clear all information from previous year • Run once a year before taking Snap-Shot
Maintain Course X-ref to State Subject Area • Add, change or delete a course on a case-by-case basis • If adding, be sure to look at page 6 of the handout
Print Course X-ref Edit Listing • A reference tool, indicating a X-ref of the courses between the school district and the state • “Update Course X-ref File from Master Schedule:” always make Y • Enter district and school
Create SMF Secondary Class Size File • Enter ID codes • Enter email contact addresses • Enter fiscal year (must be updated each year)
District Extension Record • This is where the ethnic codes are defined for the data that is sent to the state. • Can enter up to five different ethnic code abbreviations for one ethnicity.
CIMS School/State ID X-ref Maintenance • Index schools • Each school in district must be included with a State ID attached • State ID found: https://www.ode.state.or.us/
Build Student DBI SMF file • This builds the SMF file that will include the data sent to the state • Enter District (can enter individual school) • Leave predefined enrolled date • Include all students is Y (yes) • Clear present file is Y (yes)
Maintain Student DBI SMF file • Program allows you to add, change, delete or lookup any of the students created when the file was built. • Make sure Student ID line is filled completely. • Ex. Student ID: 0000012346
Create SMF Secondary Class Size File • Enter ID codes • Enter email contact addresses • Enter fiscal year (must be updated each year)
Re-post Last Uploaded SSID to Alt-ID • This program will only be used if the SSID’s are not automatically placed on the Alt-ID line using the FTP. • No data to enter – automatically runs in batch mode.
State Assessment • Only concerned with the first two options.
OPTE-MIS New Year Setup • Option 1 – Clears course definition file (this can be skipped if courses remain about the same as previous year, see option 3 on main menu) • Option 2 – Clears the student demographic file • Option 3 – Clears the student courses taken file
OPTE-MIS to CIMS Options • To review/update where certain attributes are located in CIMS • These attributes are located in STU.107 – General Student Attributes
OPTE-MIS to CIMS Ethnic X-Ref • Enter CIMS Ethnic Codes • Use OPTE-MIS Ethnic Codes (listed above) • Enter Ethnic Descriptions
OPTE-MIS to CIMS State Course X-Ref 1 2 • If not cleared (option 7, option 1) the data can be changed to current year or another year can be added. State provides documentation on what different fields represent.
To Position to a specific record in file, starting with: School No. (from state) Year Strand Course Fill in cross reference information: School No. (from state) Report Year CAM (from state) OPTE-MIS course ID (from state) CIMS district, school, course ID Credit given Core course (state defines what core courses are) OPTE-MIS to CIMS State Course X-Ref
Create demographic for OPTE school • This creates the student demographic file • This creates file that can be extracted from the AS/400 via a file transfer program • For detailed instructions of what files are created, visit www.nwresd.k12.or.us/mis/trainingmaterials.htm then click on “OPTE-MIS Setup Procedure”
Create OPTE-MIS Student, Courses Taken files • This creates the student courses taken file • This creates file that can be extracted from the AS/400 via a file transfer program