Download
1 / 32
430 likes | 1.07k Views
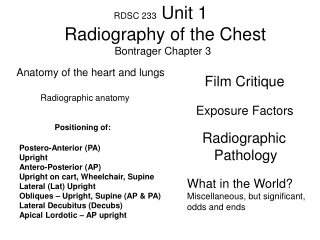
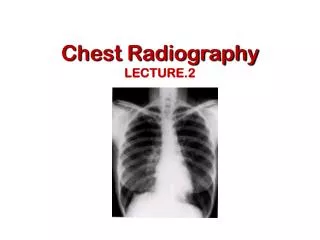
Chest Radiography LECTURE.2. PLEASE TURN ALL CELL PHONES TO SILENT MODE. Learning Objectives. By the end of this Lecture the student will be able to:. List and identify the major anatomical structures of the chest List the common indications for chest radiography

E N D
Learning Objectives By the end of this Lecture the student will be able to: • List and identify the major anatomical structures of the chest • List the common indications for chest radiography • Identify the common technical factors for chest radiography • List the basic and Optional projections for chest radiography • Discus the correct body position, part position, central ray, and • center point for specific positions for each projection. • Critique and evaluate chest radiographs based on position, • collimation and central ray, exposure, and structure best shown.
References • Text book of radiographic positioning and related anatomy; by • Kenneth L.Bontrager • Positioning in Radiography: By k.C.Clarke. • Websites • http://www.e-radiography.net/
Chest Anatomy • Thoracic cavity (chest) • Surrounded by boney thorax • Separated from abdomen by diaphragm • Muscular partition • Dome shaped • Lungs drape over diaphragm
Anterior Posterior Boney Thorax • ENCLOSE THE ORGANS • STERNUM (breast bone) • 12 PAIR OF RIBS • 12 THORACIC VERTEBRA • ATTACH UPPER EXTREMITY • 2 CLAVICLES • 2 SCAPULA
A A H H B B C C Respiratory System 1. Lungs • Lobes • Right 3 lobes • Left 2 lobes • Terminology • Apex • Hilum • Base • Costophrenic angles
Bronchial Tree 2. Bronchi • Air tubes leading into the lung • Right more vertical than left • Branching structure • Primary è 2ndary è • Only primary visible on PA projection P
Miscellaneous • Mediastinum contents • Trachea • Major vessels • Esophagus • Lymphatic's • Heart • Thymus
Technical Aspects • For chest radiography, a lead-rubber Gonad shield should be employed so to protect the abdomen below the chest (using vinyl-covered lead apron) around the waist for all patients of reproductive age, children, and pregnant women. • Low contrast ( long-scale contrast) contrast must be adopted using ‘High kV Technique ’ (100 - 130 kVp) with low mAs (3 mAs) at 72 inches (180 cm) FFD (SID). • Higher mA and short exposure times (0.01 s) must be used to reduce movement blur (due to movement unsharpness, • . • A moving focused grids must be used with the high kV technique. • For pediatrics and newborns • lower kV (60 – 70 KV) must be used with lower mAs • Higher-speed films and screens are used to reduce motion and dose • AP supine and laterals (dorsal decubitus) must to be done to exclude air- fluid levels
Technical Aspects • For geriatrics (old age) higher center point (CP) must be used because of less inhalation capability of old people that produces ‘shallow lung fields. • X-ray chest must be taken in full arrested second inspiration to show the lungs well expanded and full with ‘contrasting air’. • FFD for PA chest must be 72 inches (180 cm) to maintain the ‘natural’ size of the heart • which is usually less in PA than in AP, and prevent geometrical unsharpness • and magnification as a result of the increased OFD. • All chest radiographs must be taken in ‘standing’ erect to allow the diaphragm • to move down to show greater areas of the lung fields .
PA Chest (Erect) • Erect film shows pleural effusions, infections, Atelectasis, pneumo –thorax. Patient and Part Position • Patient erect, feet apart, chin rested on film top edge, hands on lower hips, elbows partially flexed, the shoulders rotated forward (to move the clavicles below apices), top of film 5 cm above the shoulders (to include the apices), exposure on 2nd arrested (inspiration), collimation and protection should be applied. • Instruct the patient to take in a breath, blow the breath out, and take another deep breath and hold it ( 2nd rested inspiration) Film: HD 35x43 cm (14x17 in) lengthwise (crosswise for large patients) CR: Horizontally 90 to film center. CP: T7 (Approximately at the level of inferior angle of the scapula)
PA Chest (Erect) Image Evaluation • The lung apices, costophrenic angles, and lateral margin of the ribs should be included in the film. • The scapulae should be moved lateral to the lung fields • The spine should be centered on the film
PA Chest (Erect) Image Evaluation • The heart should be adequately penetrated showing sharp outlines, with vascular markings near lateral lung margins.
PA Chest (Erect) Image Evaluation • The distance between the medial end of the clavicle and sternum ( sterno–clavicular joints ) should be equal in both sides.
PA Chest (Erect) Image Evaluation • 10 posterior ribs should be demonstrated above the diaphragm.
AP Chest (supine/semi erect) • For trolley and bedside patients to demonstrate pathology involving lungs, diaphragm, and the mediastinum. kV for bedside is 70-80 with a grid, for large patients 80-100 kV with grid , film cross-wise to eliminate possible lateral cutoff. Patient and Part Position Patient supine on trolley, trolley head raised into a semi erect position, film behind the patient. • Film: HD (14x17 in) crosswise. • CR:5 caudal to prevent clavicles • from obscuring the apices, • FFD100 cm, at least for supine. • CP:T7 (3-4 inches below the jugular notch). NB/ With this position it is impossible to show any fluid levels.
Lateral Chest (Erect) • Basic (additional) projection for localizing position of a lesion, or for the heart. A grid is used. Patient and Part Position Patient erect, turned with side of interest in close contact with the film, MSP parallel with film, arms folded over the head. Instruct the patient to take in a breath, blow the breath out, and take another deep breath and hold it ( 2nd rested inspiration) • Film: HD 35x43 cm (14x17 in). • CR: 90 horizontally. • CP: T7. (Approximately at the • level of inferior angle • of the scapula) • NB/ kV 125, at 6 mAs (with grid).
Lateral Chest (Erect) Image Evaluation • The lung apices, costophrenic angles, spine and sternum should be included in the film. • The thorax should be in the center of the collimated area • The heart should adequately penetrated showing sharp outlines, with vascular markings behind the sternum and heart. • Patient arms and chin should not superimposed over the upper lung • fields
Lateral Chest (stretcher /Wheelchair Patient) • For ill patient who can’t stand for an erect standing lateral Patient and Part Position Patient seated on stretcher or wheelchair with side of interest in close contact with the film, MSP parallel with film, arms folded over the head. Instruct the patient to hold breathing on rested inspiration • Film: HD 35x43 cm (14x17 in). • CR: 90 horizontally. • CP: T7.
Lateral Decubitus (AP Horizontal Beam) • For patients who unable to stand to demonstrate small pleural effusions (air-fluid levels) ,pneumothorax. A (DECUBITUS) marker or (ARROW) should be used. Patient and Part Position Patient lying on one side on radiolucent pad, chin and arms raised above head, patient back against a vertical cassette, knees flexed slightly, top of the cassette approximately 1 inch above the vertebra prominens. Film: HD 35x43 cm vertical on the couch edge. CR: Horizontally 90 to film center. CP: T7(3-4 inches inferior to jugular notch
Lateral Decubitus (AP Horizontal Beam) Image Evaluation • The lung apices, costophrenic angles, lateral margins of the ribs should be included in the film. • The thorax should be in the center of the collimated area • The heart should adequately penetrated with sharp outlines without over exposure of the lungs • Patient arms and chin should not superimposed over the upper lung fields
LAO/RAO Chest • For pathology involving the lung fields, trachea, and mediastinum structures (including the heart). • Patient and Part Position • Patient erect rotated 45 (left anterior shoulder against film for LAO, and • right anterior shoulder against film for RAO). • Patient feet should be separated slightly with weight equally on feet • Arm away from the film raised with hand on top of unit • Arm nearest the film flexed at elbow with hand on the hip without • obscuring the lower lungs • Film: HD 35x43 cm (14x17 in). • CR: horizontally 90 to film holder • CP: T7. (Approximately at the level of • inferior angle of the scapula) • NB/ For heart patient should be rotated • 55 to 60 in the LAO
LAO/RAO Chest Image Evaluation • The lung apices, costophrenic angles, lateral margins of the ribs should be included with out cut. • The heart should adequately penetrated with showing sharp outlines and without over exposure of the lungs • The width from the spine to the lateral margin of the thoracic cage of the side away from the film should be twice the width of the side contact with the film • ( This indicate true or correct oblique)
AP Lordatic Chest • To show right middle lobe collapse, interlobar pleural effusion. Patient and Part Position Patient seated or standing in erect AP with feet slightly separated and about 1 ft from the stand Bucky , The patient bends backward until the shoulders are supported by the stand Bucky. The back of the patient hand on the hip with moving shoulder and elbow forward to scapulae from the lung fields. • Film : HD 14x17 inches. • CR : Horizontally 90 to the center of IR • CP: Level of mid sternum (3-4 inches • inferior to jugular notch
Lordatic Chest • If the patient unable to perform the Lordatic position angle the CR 20 cephalic for AP Lordatic or 20 caudad for PA Lordatic
AP Upper Airway • For pathology ( e.g. soft-tissue swellings ) involving air-filled larynx and the trachea and their relation to thyroid, and the upper esophagus. Patient and Part Position Patient sitting or standing AP with MSP centered to the center of the Bucky Back of the head and shoulders against film, chin raised slightly so that RBL is 20 to the horizontal axis. 65-75 KV to visualize soft tissue, with 40 inches SID. • Film: 25x30 cm (10x12 in). • CR: horizontally 90 to film holder • CP: At level of T.1-2 • ( I inch above the jugular notch) • NB/ Exposure should be during slow inhalation to • fill the trachea with air.
Lateral Upper Airway • For pathology ( e.g. soft-tissue swellings ) involving air-filled larynx and the trachea and their relation to thyroid, and the upper esophagus. Patient and Part Position Patient seated or standing upright in the lateral position Patient arms positioned downside with dropping the shoulders back. chin raised slightly without body rotation 65-75 KV to visualize soft tissue with 72 in.SID. • Film: 25x30 cm (10x12 in). • CR: horizontally 90 to film holder • CP: C6-C7 Midway between thyroid • cartilage and jugular notch • NB/ Exposure should be during slow inhalation to fill • the trachea with air.