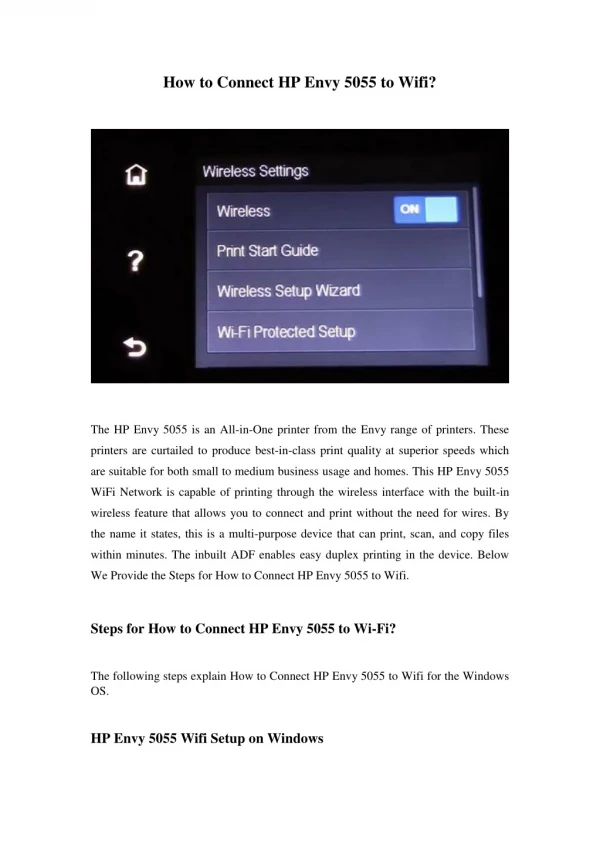
Download

1 / 10
100 likes | 116 Views
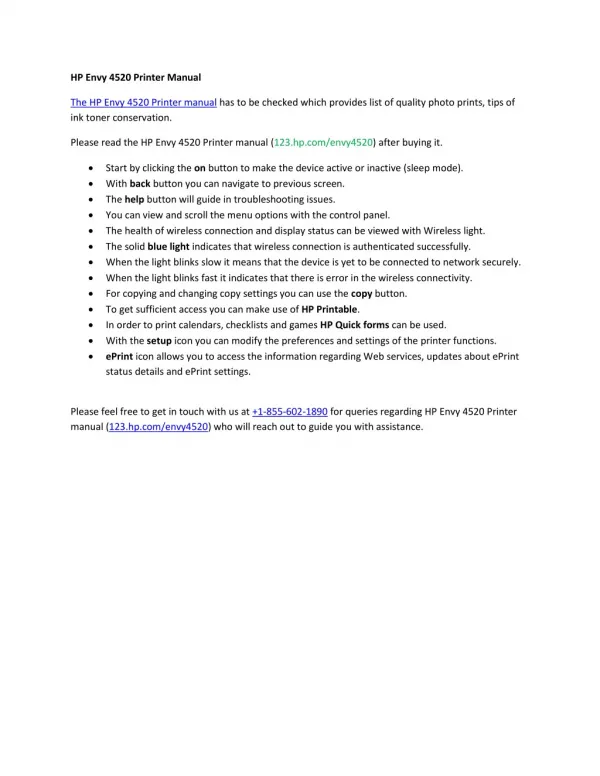
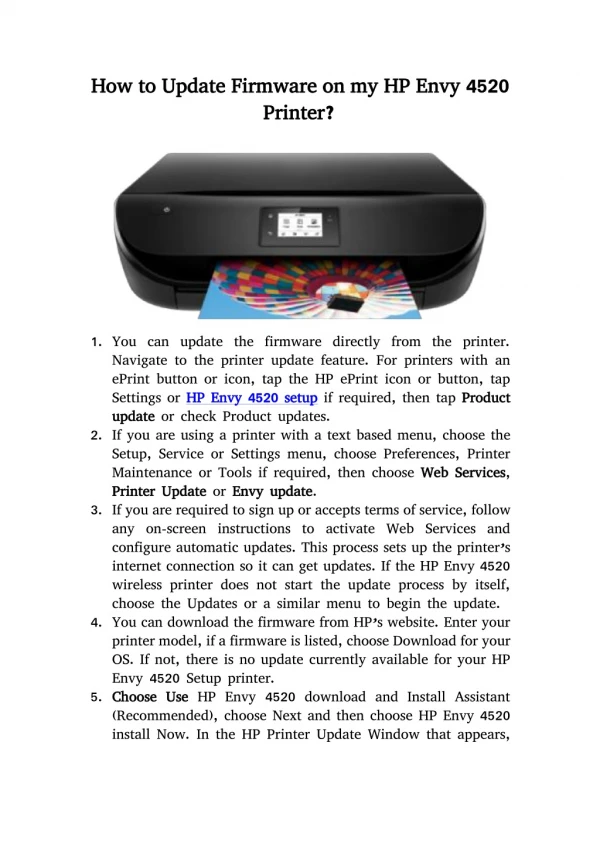
HP Envy 4520 Printer is an outstanding printing device because it performs various tasks such as copying, scanning and printing. The productu2019s design is sleek and easy. It has a stunning display on the touchscreen, great graphics, and courageous highlight. Connect HP Envy 4520 Printer to Computer, HP Envy 4520 Printer Setupttttttt

E N D
Step to Connect HP Envy 4520 Printer to WiFi Call us at:- USA:- +18886337151 UK:- +448081645280
Connect HP Envy 4520 Printer to WiFi • HP products, especially when we look at the laptops and computers, is often discovered to be troublesome to the users with its connectivity issues. The HP Error 651 is the most prevalent issue that you may often face. Such error issue appears mostly in the 7th, 8th and 10th version of the Windows operating system. • The central objective of our write-up is to satisfy our viewers with the ultimate sources and the solutions of the error. You may even have a trial of all the other local databases that are easily accessible. But most of those sites generally lack authenticity. Hence, it is very much risky and uncertain to follow them up with such topics
We, therefore recommend you to go through the entire article at the end of which we hope that you would be recovered from the situation that you are in. • All that you will have to do is to follow our instructions are present in the under-mentioned points. Hence work accordingly with your technical grievance efficiently eliminate the HP Error 651 in Windows 7/8 and 10. • The aforesaid error code occurs when users are trying to establish an internet connection with the help of PPPoE. So, one needs to Error 651 in Windows 7/8 and 10 with the help of HP Online Support professional team immediately. While this error occurs, users will be displayed a message as “Connections failed with error 651”. Follow methods to solve the problem faster.
When your Windows OS, irrespective of the versions that you are using, fail to establish an effective network connectivity the issue takes place. Trying for the establishment of internet connectivity but achieving failure is the cause of the alert. Breakdown of the server connection by utilizing PPPoE or any other similar issues are responsible for putting your device linkage under the severe problem. • Many a time, internet service providers are responsible for the HP technical drawback. • However, there lie precautions for the proper redressal of the difficulty. Following those measures, you will again be able to bring your device back to its initial condition.
Step to Connect HP Envy 4520 Printer to WiFi • Method 1: Restarting the device in safe mode • While users are working in the Safe mode, they need to press and hold the “Windows” button as well as the “R” button. • A “Run” command will automatically get displayed. • The next step which users need to do is to write in the “Run” window the “MSCONFIG” command • Press the “Enter” button which is there on the keyboard. • However, another window will appear and where users are supposed to left click on the “Boot” tab which can be found on the upper side of that window. • Users will automatically come across a “Boot options” where they need to click on the “Safe boot” icon. • Perform a thorough check of the box which is just next to the “Network” option just under the “options” section of the page. • Reboot the HP device as suggested by HP Support Helpline Number professional team. Perform as deep check whether the error code still exists or not?
Method 2: If the Above Solution did not seem to be Working out then, Try this one: • Press and hold the “Windows” button and then click the “R” button. • In the “Run” window, please enter the “MSCONFIG” command. • Press the “Enter” button and then, left click on the “Boot” option • Uncheck the box which is easily found just next to “Safe mode”. • Left click on the “General” option now. • From the features section, navigate to the “Selective Startup” icon • Uncheck all features to clear out the selections made by you completely. • Left click on the “Services” feature and then, again click on the “Disable all” option. • Click to choose the “Startup” option and then, disable each item which is there in the list. • Reboot the HP device now. • Once done, you will see that the device reboots again to the “MSCONFIG” window as done above • Left click on the “Services” option and again right click the “Hide all Microsoft services” feature. • Users again are suggested to left click on the “OK” button and reboot the device again. • Perform a proper check to see if still the issue persists • Left click on the “General” tab icon and choose the “Normal Startup” option. • Perform a reboot process of the device again
Alternate Productive Measures | HP connection failed with error 651 in Windows 7/8 and 10 • There is a lot of safety measures to treat the HP Error 651 in Windows 7/8 and 10. We have come up with an extremely user-friendly approach while constructing our effective suggestions. So, it will be less problematic for you in comprehending the solvable operation. • Technique 1: • Carry out a safe reboot in the Windows version 8 and 10. Then, you will have to log in the safe mode along with the feature of networking. And carry out the following modifications: • Hold on to the Windows and the “R” button while your device is under the safe mode. A “process” section will pop-up. Then type “MSCONFIG” under the “run” section. Then confirm it by “entering” on the keyboard.
Technique 2: • Try to disable all the initial settings of your HP device. • Similar to the first method, hold on to the Windows and “R” button. Enter “MSCONFIG” under the “Run “ window. Press the “enter” button from the keyboard. Then left click on the tab “Boot”. Ensure that the safe mode section is unchecked. Left click to open up the “General” tab. • Opt for the selective startup feature from under the general tab. Clear out all the specifications under selection from “check” to “uncheck”. Select the service option by clicking left and do the same click again to disable out all the rest of the options. • Then choose to startup and uncheck each of the items that are present in that list. Boot up the Windows device. Move on to the “MSCONFIG” section like you have seen above. Click on the service section and mask all the supports of the Microsoft characteristic. Left click on “OK” box and restart your device again. Analyze whether if you still have the error issue or not. • If no such error exists, then probably those were the startup applications to result in the 651 error. However, if the problem still subsists, then you will have to again move on to the “MSCONFIG” window. And then follow the steps back from that stage again. • Hence, these are only a few from the long list of other effectual techniques. You can avail of the rest of our IT solutions by contacting us if you are not successful with the application of the above steps.
Get in Touch with us Call us at:- • USA:- +18886337151 • UK:- +448081645280 Visit our Website:- • https://www.hptechnicalsupportphonenumber.com/blog/fix-hp-error-651-windows-78-10/