Configuring Windows Server
Configuring Windows Server. MIS 424 Professor Sandvig. Overview . In this exercise you will: Log onto Windows Server Create a new application pool Create a new web application Open Sql Server Management Studio Create a new Sql Server database Create a new Sql Server user


Configuring Windows Server
E N D
Presentation Transcript
Configuring Windows Server MIS 424Professor Sandvig
Overview • In this exercise you will: • Log onto Windows Server • Create a new application pool • Create a new web application • Open SqlServer Management Studio • Create a new Sql Server database • Create a new Sql Server user • Assign the user to the database • Read your database from web page
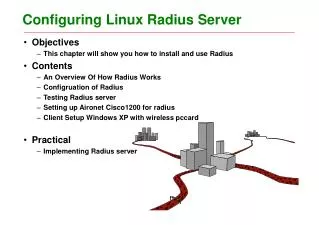
Steps • You will be provided with an instance of Windows Server 2008 hosted by on Amazon EC2 cloud • The next two slides display how an instance is launched from Amazon’s console
Instance • Each instance is assigned a public IP address • The following slide shows the instance management page
Instance Management • Next step is to get the instance password
Password • Amazon generates a private key for each account. • The private key is used to decrypt the password (next slide)
Password • Ta-da!
Login • Login to your instance using Remote Desktop • Your IP address and password are on the next page
View IIS Default • Developers need to see file extensions. • Navigate to the IIS root web folder • Change folder options to show file extensions
Permissions • While in the IIS root folder, check folder permissions. • Which permissions are assigned to anonymous web users?
View default web page • Open browser and view IIS default web page • Address is IP address of your instance
Modify default web page • Use Notepad to edit the default web page
Create a ASP.NET Application • Create a new folder named mis424Application
Create ASP.NET Application • Search for IIS using Windows search • Open IIS 7.0 Manager
Create a new application pool • Your application will be critically important so provide it with its own application pool
New Application pool • Give the application pool the same name as the application folder • Change framework to 4.0
Create new Application • Right click on your new folder and convert it to an application • Select your new application pool
Test your application • Use Notepad to create a file default.aspx with the following code: <%@ Page Trace="true" Language="C#" %> <script runat="server"> void page_load() { lblMessage.Text = ".NET Version: " + System.Environment.Version.ToString() + "<br> Application Pool: " + Request.ServerVariables["APP_POOL_ID"] ; } </script> <html> <head> <title>ASP.NET Test</title> </head> <body> <asp:label id="lblMessage" runat="server" /> </body> </html>
Database • You have now configured an ASP.NET application • The next step is to create a new SQL server database and link to it from your web application.
Create a new database • Open Sql Server Management Studio
Connect to Sql Server • Management Studio will automatically select your database server • Click “Connect”
Create new database • Name your new database “customers”
Create new table • You will be connecting an .aspx page to your database so make sure that all the names match the sample • Sql Server is case sensitive • custID is an identity field • custID is the primary key
Permissions • Permissions are needed to access the database from an application • You will create a new user named Webguest • For security reasons Webguest has only limited permissions • In the following steps you will: • Configure Sql Server to allow Sql server authentication • create a new Sql Server user • Assign user permissions to your database
Allow Sql Server Authentication • In Management Studio right-click on the database server and select Security • Change authentication mode
Restart Database • In Management Studio right-click on server and select restart
Add Sql user • Username: Webguest • Password:guest22 • Turn off “enforce password policy”
Assign Roles on Database • Limited roles: datareader and datawriter
Test login • Login to server using Sql Server Authentication • You now have two connections to database. One as an admin, one as Webguest
Test permissions • Try to view, add, update, and delete data • Try to add a new table
Connect Web to Database • Create a new file crud.aspx using this code • Replace data source with your database name from Sql Server Studio <%@ Page Language="C#" %> <!DOCTYPE html> <html xmlns="http://www.w3.org/1999/xhtml"> <head runat="server"> <title>Read Sql Server</title> <style type="text/css"> table {margin:10px auto; background-color:#fff;} td {padding:5px;} body {background-color:#ccc;} </style> </head> <body> <form id="form1" runat="server"> <div style="text-align:center;"> <h1>Read Sql Server</h1><hr /> <asp:GridView ID="GridView1" runat="server" AutoGenerateColumns="False" DataKeyNames="custID" DataSourceID="SqlDataSource1"> <Columns> <asp:CommandFieldShowEditButton="True" /> <asp:BoundFieldDataField="custID" HeaderText="custID" InsertVisible="False" ReadOnly="True" SortExpression="custID" /> <asp:BoundFieldDataField="name" HeaderText="name" SortExpression="name" /> </Columns> </asp:GridView> <asp:SqlDataSource ID="SqlDataSource1" runat="server" ConnectionString="Data Source=win-vuc09id4k05;Initial Catalog=customers;User ID=Webguest;Password=guest22" DeleteCommand="DELETE FROM [tblCustomers] WHERE [custID] = @custID" InsertCommand="INSERT INTO [tblCustomers] ([name]) VALUES (@name)" ProviderName="System.Data.SqlClient" SelectCommand="SELECT [custID], [name] FROM [tblCustomers]" UpdateCommand="UPDATE [tblCustomers] SET [name] = @name WHERE [custID] = @custID"> <DeleteParameters> <asp:Parameter Name="custID" Type="Int32" /> </DeleteParameters> <InsertParameters> <asp:Parameter Name="name" Type="String" /> </InsertParameters> <UpdateParameters> <asp:Parameter Name="name" Type="String" /> <asp:Parameter Name="custID" Type="Int32" /> </UpdateParameters> </asp:SqlDataSource> </div> </form> </body> </html>
Email links • Email your Amazon cloud links to Professor Sandvig: • default.aspx • Crud.aspx
Summary • Today you have: • Logged onto Windows Server • Created a new application pool • Created a new web application • Used Sql Server Management Studio to: • Create a new database • Create a new user • Assign the user to the database • Log in as the new user • Read your database from an .aspx application
Other things you could do: • Create your own Amazon EC2 instance (free but requires a credit card) • Copy your MIS 324 / MIS 424 assignments to Amazon • Setup a CMS • Download Microsoft Web Platform Installer • Select a CMS (see next page)