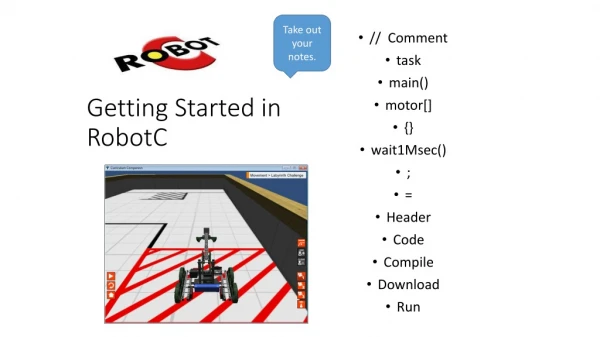
RobotC Programming
RobotC Programming. Making your robot move… Eric and Christina Grajales Mentor Exploding Bacon / DITU FTC Teams 1902 / 5454. Agenda. What is RobotC Diagram your Robot RobotC Setup and Configuration How to display text Your first program Reading the joystick Moving your robot Servos

RobotC Programming
E N D
Presentation Transcript
RobotC Programming Making your robot move… Eric and Christina Grajales Mentor Exploding Bacon / DITU FTC Teams 1902 / 5454 FTC Programming
Agenda • What is RobotC • Diagram your Robot • RobotC Setup and Configuration • How to display text • Your first program • Reading the joystick • Moving your robot • Servos • Timing • Sensors • Encoders • Useful Links • Questions FTC Programming
What is RobotC Industry Standard ‘C’ Programming Language + Programming Development Environment Complete and Total Solution for User Program Development + Interactive Run-Time Debugger + • Language extensions for robotics • Built-in variables for robotics devices • RobotC has 100s of already built functions to make programming your robot easier High Performance Firmware + Training and Curriculum Support FTC Programming
Diagram your Robot • How many Tetrix Motor Controllers are you using? • How many Tetrix Servo Controllers are you using? • How many NXT motors? • What Sensors are you using? FTC Programming
Diagram your Robot (cont) • Good time to build an electrical wiring diagram. • All this information is great for your engineering notebook FTC Programming
Diagram your Robot (cont) • Draw your configuration on paper • Name each motor, servo, sensor. Use names that describe each part and what it does: frontRightMotor frontLeftMotor, pincherServoLeft, etc FTC Programming
Lets Build a Test Platform • 1 Hitechnic Motor Controller • 1 Hitechnic Servo Controller • 2 Tetrix12 V Motors • 1 Tetrix Servo • 1 Lego Motor • 1 Lego Light Sensor • 1 Lego NXT with batteries • 1 Tetrix Battery and Switch • At least 1 Joystick Controller • Laptop • USB, Bluetooth, Samantha connection • Cables and connectors FTC Programming
Test Platform Wiring Diagram FTC Programming
RobotC Setup and Configuration • 1st time setup • Install and RobotC • Turn on NXT and connect NXT to computer via USB cable • Download latest firmware (V2.25 - NXT0819.rfw) • Note: If you upgrade from an older version of ROBOTC, make sure you upgrade your firmware as well. • Link via USB, name the NXT your team number • Disconnect USB Cable • Set RobotC platform type (NXT + Tetrix) FTC Programming
RobotC Setup The first time you fire up the ROBOTC IDE, there are a few quick things you will want to do before you begin programming a FTC robot. 1. Set menu level from basic to “Expert”. a. Window, Menu Level, Expert • 2. Set platform type to “LEGO Mindstorms NXT + TETRIX”. • a. Robot, Platform Type, LEGO Mindstorms NXT + TETRIX FTC Programming
Firmware Download latest firmware to NXT brick. * Note that this only needs to be done the first time you setup a new NXT brick with ROBOTC and when you upgrade your version of ROBOTC. ** Also note that the battery level must be high enough on the NXT before it will allow you to download new firmware. a. Make sure NXT is connected via USB and turned on. b. Open Link Setup dialog i. Robot, NXT Brick, Link Setup c. Select NXT in top left corner and press “F/W Download” button. d. Select .rfw file in default firmware directory in popup and press “Open”. i. For ROBOTC v2.03, the firmware file should be: “NXT798.rfw”. e. After a few moments, the Link Setup dialog box will display some verbose information in the Message Log and your NXT should beep several times and restart. When complete, you should see a series of messages similar to below in the Message Log: FTC Programming
ExerciseRobotC Setup and Configuration • Robot C Setup • Link via USB, Bluetooth, or Samantha to NXT • Open the Sample program “C:\Program Files\Robotics Academy\ROBOTC for MINDSTORMS\Sample Programs\NXT\LCD Examples\NXT Draw Spiral.c” • “Compile and Download” sample program to your NXT. • Run the sample program. FTC Programming
Tetrix Ranger FTC Programming
Get to Configuration Window FTC Programming
Textrix Controller Setup FTC Programming
Motor Setup FTC Programming
Sensor Setup FTC Programming
RobotC Pragma Setup #pragma config(Hubs, S1, HTMotor, HTServo, none, none) #pragma config(Sensor, S1, touch, sensorI2CMuxController) #pragma config(Sensor, S2, compass, sensorVirtualCompass) #pragma config(Sensor, S3, light, sensorLightActive) #pragma config(Sensor, S4, sonar, sensorSONAR) #pragma config(Motor, mtr_S1_C1_1, leftMotor, tmotorNormal, openLoop, encoder) #pragma config(Motor, mtr_S1_C1_2, rightMotor, tmotorNormal, openLoop, reversed, encoder) #pragma config(Servo, srvo_S1_C2_1, servo1, tServoStandard) #pragma config(Servo, srvo_S1_C2_2, servo2, tServoNone) #pragma config(Servo, srvo_S1_C2_3, servo3, tServoNone) #pragma config(Servo, srvo_S1_C2_4, servo4, tServoNone) #pragma config(Servo, srvo_S1_C2_5, servo5, tServoNone) #pragma config(Servo, srvo_S1_C2_6, servo6, tServoNone) //*!!Code automatically generated by 'ROBOTC' configuration wizard !!*// FTC Programming
Exercise • Setup the Ranger Configuration in RobotC FTC Programming
Task Main • Task main is used to tell the NXT where the beginning of your programs is. • The beginning and end of “task main” is denoted with curly braces “{ }” • When the program execution reaches the end of the main task, all robot activity stops. #include "JoystickDriver.c" // Tells ROBOTC to include the driver file for the joystick. task main() // All programs must have this task { while(true) { motor[rightMotor] = joystick.joy1_y1; motor[leftMotor] = joystick.joy1_y2; } } FTC Programming
Variables • Variables are the robot’s way of storing values for later use. They function as containers or storage for values. Values such as sensor reading can be placed in a variable and retrieved at a later time for convenient use. A variable is simply a place to store a value. Useful types: • Integer, or “int” values are numbers with no fractional or decimal component. • Floating point (“float”) numbers are so called because the decimal point “floats” around in the value, allowing decimal places to be used. • Strings (“string”): Text in ROBOTC is always a “string”. In ROBOTC, the word “Hello” is really a collection of letters – ‘H’, ‘e’, ‘l’, ‘l’, ‘o’ – “strung” together to form a single value. • Boolean (“bool”) values represent “truth” or “logic” values, in the form of “true” or “false”. Use variable names that make sense. What is more readable? a = b / c; Or speed = distance / time; FTC Programming
Conditional Statements • If statements are pretty self explanatory. If a, then b. • The syntax (grammar of programming) of an if statement is If(4 < 100) { Do stuff; } • If else statements run if the if statement was false. These are useful for when there are multiple cases of an instance. else if (4 == 100) { Do stuff; } • Else statements follow the if before it. If the if statement was false then the else statement will run. else { Do stuff; } FTC Programming
Boolean Logic • == equals • < less than • > greater than • <= less than or equal to • >= greater than or equal to • && and • || or • NO (0 < a < 100)!!!! Use &&! ((0 < a) && (a < 100)) FTC Programming
Loops • For loops run a certain number of times(in this case, 10). • Be careful of infinite loops (i--) For (int i = 0; i < 10; i++;) { code that will repeat; } FTC Programming
Loops (cont.) • While statements are used when you don’t know how many times the code will run. While (true) { do stuffffffffs; } • Do While statements always run at least once, and then follow the while loop. Do { more stuffffffssss; } While(true) FTC Programming
Comments Two ways to comment code: • Comments: // A single line • Comments: /* Section of code */ • Comment your code, next year when you read the code you’ll know what you did and why. // Move motor C forward with 100% power task main() { int motorspeed; /* Motor C forward with 100% power Do this for 3 seconds */ motorspeed = 100; motor[motorC] = motorspeed; wait1Msec(3000); } FTC Programming
How to display text Display text functions: • eraseDisplay() - Erases the complete NXT LCD display • nxtDisplayClearTextLine(nLineNumber) • nxtDisplayCenteredTextLine(nLineNumber, sString) • nxtDisplayCenteredTextLine(nLineNumber, sFormatString, parm1, parm2) • nxtDisplayString(nLineNumber, sFormatString, parm1, parm2, parm3) • nxtDisplayTextLine(nLineNumber, sFormatString, parm1, parm2, parm3) • nxtDisplayTextLine(nLineNumber, sString) Where nLineNumber is the NXT LCD line number and sFormatString specifier Output Example Code Example Output %d Signed decimal integer "%d" 4246 %f Decimal floating point "%f" 3.14159 %s String of characters "%s" ROBOTC FTC Programming
sFormatString Example • Read raw and normal light sensor data on the NXT • If you want to print “Raw: 333 Normal: 96” sFormatString will look like “Raw: %d Normal: %d” • Param1 and Param2 are variables, in this case the raw and normalized light sensor data. Generally, these are constructed in the beginning of the code with names like rawLightData and normalLightData. • nxtDisplayTextLine(2, “Raw: %d Normal: %d”, rawLightData, normalLightData); FTC Programming
How to display text (cont) When using FTC Template the NXT LCD displays Field Management System (FMS) information used by the Field Technical Advisor during competitions. • Line 0 NXT status line (do not touch) – Battery Status, Bluetooth enabled, etc • Line 1 FCS Mode (Waiting, Auto, Teleop) • Line 2 BLANK • Line 3 External Battery Voltage (Textrix 12 Volt battery) • Line 4 NXT Battery Voltage • Line 5 FMS Msgs count • Line 6 "Teleop FileName:" • Line 7 NXT Teleop file name Items in bold are refreshed every 200ms. DO NOT OVERWRITE THESE LINES! FTC Programming
task main() { int int_test = 1234; float float_test = 3.14159; eraseDisplay(); // Clear out the NXT LCD Screen nxtDisplayCenteredTextLine(2, “Hello”); nxtDisplayTextLine(3, “Data %d %f”, int_test, float_test); wait1Msec(5000); // Wait 5 seconds } How to display text (cont)Sample Program • “Compile and Download” sample program to your NXT. • Run the sample program. FTC Programming
Exercise • Using the example on the previous slide, compile and run the code on the virtual world robot. FTC Programming
Joystick Controller • Logitech PS2 type controller • 2 Joysticks • 10 Buttons • Access Joystick via built in functions: joystick.joy1_x1 joystick.joy1_y1 joystick.joy1_x2 joystick.joy1_y2 return integer ranges between -127 and 127 joy1Btn(button) // (button 1 thru 10) returns the a value of 1 (true) if pressed and a value of 0 (false) if not pressed. • Similar functions for Joystick2. • Must “#include "JoystickDriver.c "“ in your program FTC Programming
Joystick Controller (cont) Sample 1 #include "JoystickDriver.c" // Tells ROBOTC to include the driver file for the joystick.task main() { while(true) { if (joy1Btn(1)) // If Joy1-Button1 is pressed: { motor[motorA] = 100; // Turn Motor A On at full power } else // If Joy1-Button1 is NOT pressed: { motor[motorA] = 0; // Turn Motor A Off } }} Sample 2 #include "JoystickDriver.c" // Tells ROBOTC to include the driver file for the joystick. task main() { while(true) { motor[motorC] = joystick.joy1_y1; motor[motorB] = joystick.joy1_y2; } } FTC Programming
Tank Drive Forward Right FTC Programming Backward
Move Simple Bot Arcade Mode – only one joystick as controller// uses x1 and y1 from joystick1 void arcade(int x, int y) { int powY; int powRightMotor; int powLeftMotor; powY = y; if (x < 0) // if x negative, turning left; otherwise, turning right { powLeftMotor = (powY * (128 + (2 * x))/128); // left motor reduced for right turn powRightMotor = powY; // right motor not changed } else { powRightMotor = (powY * (128 - (2 * x))/128); // right motor reduced for left turn powLeftMotor = powY; // left motor not changed } motor[motorC] = powLeftMotor; motor[motorB] = powRightMotor; } task main() { while (true) { arcade(joystick.joy1_x1, joystick.joy1_y1); } } Tank Mode - uses both left and right joysticks to drive the robot. void tank(int y1, int y2) { motor[motorC] = y1; motor[motorB] = y2; } task main() { while (true) { tank(joystick.joy1_y1, joystick.joy1_y2); } } FTC Programming
Improving Drive Code While the Tetrix motors accept an output power range of 100 to +100, the analog sticks on the joystick return values between -128 to +127. This means if the analog stick is in the range under -100 or over +100, the value passed to the motor is simple transformed to -100 or +100. This is less than ideal because it reduces the usable range of the analog stick by about 20%. There is another issue related to dead zones within the physical joysticks themselves. Due to inaccuracies and tolerances within the manufacturing process, the analog sticks on most FTC joysticks will rarely return to a perfect zero when released. This has a tendency to cause a robot to slowing spin in a circle when no one is touching the analog sticks. A simple code solution is to account for a dead zone at low values for the analog sticks which can then be treated as zero. The basic formula: motorValue = (joystickValue / Max joystickValue) * max motorOutput int scaleForMotor(int joyvalue) { const int DEADZONE = 5; const int MAX_MOTOR_VAL = 100; const float MAX_JOY_VAL = 127.0; if (abs(joyValue) < DEADZONE) { // Check if joystick value is return 0; // less than deadzone } // Scale joystick value float ratio = joyValue / MAX_JOY_VAL; int scaledVal = ratio * MAX_MOTOR_VAL; // return scaled value return scaledVal; } A logarithmic scale to get fine grain control at lower speeds and quickly scale the power up at the end of the range. motorValue = (joystickValue^2 / Max joystickValue^2) * max motorOutput int scaleForMotor(int joyvalue) { const int DEADZONE = 5; const int MAX_MOTOR_VAL = 100; const float MAX_JOY_VAL = 127.0; if (abs(joyValue) < DEADZONE) { // Check if joystick value is return 0; // less than deadzone } // Scale joystick value int direction = joyValue / abs(joyValue); float ratio = (joyValue * joyValue) / (MAX_JOY_VAL * MAX_JOY_VAL); int scaledVal = ratio * MAX_MOTOR_VAL * direction; // return scaled value return scaledVal; } FTC Programming
Motor Control FTC Programming
Move your Robot Sample #include "JoystickDriver.c" // Tells ROBOTC to include the driver file for the joystick. void tank(int y1, int y2) { motor[LeftMotor] = y1; motor[RightMotor] = y2; } int scaleForMotor(int joyvalue) { const int DEADZONE = 5; const int MAX_MOTOR_VAL = 100; const float MAX_JOY_VAL = 127.0; if (abs(joyValue) < DEADZONE) { // Check if joystick value is return 0; // less than deadzone } // Scale joystick value float ratio = joyValue / MAX_JOY_VAL; int scaledVal = ratio * MAX_MOTOR_VAL; // return scaled value return scaledVal; } task main() { while (true) { tank(scaleForMotor(joystick.joy1_y1), scaleForMotor(joystick.joy1_y2)); } } FTC Programming
Exercise • Move your Robot • Write code to move the 12V tetrix motors with your joystick. • Compile and download it to your NXT • Run the code and move your joystick to see the motors turn. FTC Programming
What is a Servo? • There are two types of servos: Standard Servos and Continuous Rotation Servos (almost like a super low powered motor). • An example of when to use a standard servo would be the balance bridges from the FTC 2010 game. Many teams had a metal arm that would lower the bridge so that the robot could cross it. (Think moving in arcs) FTC Programming
Servos • servoValue[servo#] - Standard Servo OnlyThis read-only function is used to read the current position of the servos on a sensor port Servo controller. Values can range from 0 to 255. Center Point value 127. The value returned in this variable is the last position that the firmware has told the servo to move to. This may not be the actual position because the servo may not have finished the movement or the mechanical design may block the servo from fully reaching this position. To set the position of a servo, use the "servoTarget" or "servo" functions. • servo[servo#] = position or servoTarget[servo#] = position;This function is used to set the position of the servos on a sensor port Servo controller. Values can range from 0 to 255. The firmware will automatically move the servo to this position over the next few update intervals. (Be sure to give the servo some amount of time to reach the new position before going on in your code.) • servoChangeRate[servo#] = changeRate; Specifies the rate at which an individual servo value is changed. A value of zero inidcates servo will move at maximum speed. The change rate is a useful variable for "smoothing" the movement of the servos and preventing jerky motion from software calculated rapid and wide changes in the servo value. The default value is a change rate of 10 positions on every servo update which occurs. (updates occur every 20 milliseconds) FTC Programming
Servos Sample #include "JoystickDriver.c" task main() { while(true) { if (joy1Btn(1)) // If Joy1-Button 1 is pressed: { servoTarget[1] = 255; // Turn servo clockwise } else if (joy1Btn(3)) // If Joy1-Button 3 is pressed: { servoTarget [1] = 0; // Turn servo counter clockwise } else { servoTarget [1] = 127; // Center servo } }} FTC Programming
Exercise • Move your Servo • Write code to move the servo using a joystick button joystick. • Compile and download it to your NXT • Run the code and press the joystick to see the servo turn. FTC Programming
Timing Functions to pause the program for a desired amount time: wait1Msec(nMSec); wait10Msec(nTenMSec); • Program execution will wait for the specified number of clock units. Units can be in either 1-millisecond or 10-millisecond counts. The maximum interval that can be specified is either 32.767 seconds or 327.67 seconds depending on which function is used. There are four timers (T1, T2, T3 and T4) the user can program. These four timers can be individually be reset to zero within a program. Theses timers are useful for measuring elapsed time of events. ClearTimer(theTimer); • Timers start counting as soon as the NXT is powered on. A user's program should reset a timer before using it, so use this function to reset the value of the specified timer to zero. time1[theTimer], time10[theTimer], time100[theTimer] • These three arrays hold the current value of the respective timers. Each of the timer values can be retrieved in units of 1, 10 and 100 milliseconds depending on which array is used. For example, time1[T1] retrieves the value of timer T1 in units of 1-msec and time10[T1] retrieves the value using a 10-msec tick. FTC Programming
Timing Sample #include "JoystickDriver.c" task main() { ClearTimer(T1); // Resets Timer T1 to 0 while(time1[T1] < 5000) // Loop for 5 seconds { // do something in loop wait1Msec(500); // Wait ½ second }} FTC Programming
Types of Sensors • Light Sensor • Detects amount of light (grayscale); two modes: with flashlight and without • Touch Sensor • Detects if the sensor hit something • Ultrasonic/Sonar Sensor • Detects how far an object is from the sensor • Gyro • Detects angle based off initialized 0 • Compass • Detects True North FTC Programming
Sensors SensorType[] – • The SensorType array is used to specify what type of sensor is connected to a certain port. Most users should not have to use this functionality and should use the Motors and Sensor Setup instead. Example: SensorType[sonarSensor] = sensorSonar; SensorRaw[] • This array value will return the "raw" (un-normalized) value of a sensor. Usually this is the raw A-D converted value, which is an analog value between 0 to 1023. SensorValue[] • This array value returns the value of the sensor in a normalized fashion. Rather than returning a raw value of 0 to 1023, ROBOTC will interpret the data from the "SensorType" and return a more accurate representation of the sensor's data. An example of this is the Light Sensor, which will return a percentage value from 0 to 100. FTC Programming
Sensor Sample #include "JoystickDriver.c" task main() { wait1Msec(50); //the program waits 50 millisecond to initialize the light sensor // 0 black, 100 white while(SensorValue[lightSensor] > 80) //keep looping while the light sensor's value is greater than 80. { motor[leftMotor] = 75; //leftMotor is run at a 75 power level motor[rightMotor] = 75; //rightMotor is run at a 75 power level } motor[leftMotor] = 0; //leftMotor is stopped motor[rightMotor] = 0; //rightMotor is stopped } FTC Programming
Exercise • Using the previous Light Sensor sample • Compile and run inside Virtual World • Use the “Learning RobotC Tables” • In VW, select the Utilities Tab, Light Sensor Table, Position F to run the example. FTC Programming
Tetrix Motor Encoders Enables your robot to move a fixed distance, rotate to a specific position, or move at a constant speed. The technique to measure the movement of your robot is called odometry, it requires an encoder that translates the turns of the wheel into the corresponding traveled distance. The Tetrix Encoder measures rotation 1440 ticks per revolution – if robot is geared you will need to compute gear reduction factor and wheel size to computer distance travelled per encoder tick. FTC Programming