ECS-tools for the CCPC/Tell1 (a tutorial in 3 acts):
440 likes | 652 Views
ECS-tools for the CCPC/Tell1 (a tutorial in 3 acts):.

ECS-tools for the CCPC/Tell1 (a tutorial in 3 acts):
E N D
Presentation Transcript
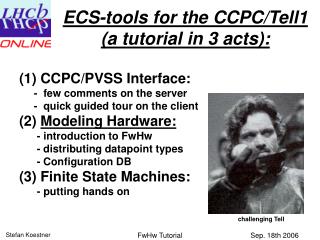
ECS-tools for the CCPC/Tell1 (a tutorial in 3 acts): (1) CCPC/PVSS Interface: - few comments on the server - quick guided tour on the client(2) Modeling Hardware:- introduction to FwHw - distributing datapoint types - Configuration DB(3) Finite State Machines:- putting hands on challenging Tell FwHw Tutorial
FwHw Tool: Generic tool to define registers for SPECS and CCPC hardware types. Each register is represented by a datapoint with elements: writings, writingsStatus, readings, readingsStatus, operation and settings. hardware abstraction just write to a register (specify name) or monitor it without having to know all the details of the hardware behind. Registers can be subscribed all the specific settings (e.g. addresses) are sent to the server where they are stored in a list. Services are launched for reading and writing on the server side. Commands to trigger a writing or reading do not have to send all the specific settings again. “Wir wollen sein ein einzig Volk von Brüdern,in keiner Not uns trennen und Gefahr.Wir wollen frei sein, wie die Väter waren,eher den Tod, als in der Knechtschaft leben.Wir wollen trauen auf den höchsten Gottund uns nicht fürchten vor der Macht der Menschen.” A hardware type containing registers can be inserted to another hardware type. FwHw Tutorial
in a nutshell… • Use the tool in order to model your hardware as a PVSS datapoint type. A datapoint is the main concept inside PVSS, thus your hardware has to be somehow represented by datapoints. • The tool allows to let this happen in an organized way. • Besides this it gives you more convenience than the PARA module and saves you a lot of time. • (2) Check if a datapoint type of the hardware you are using already exists and import it to your project. (e.g. Beetle, TTCRX, etc. already exist) If you define a new one share it with other users. • (3) Don’t care about the connectivity with DIM – the tool does it for you! • (4) Use the framework functions to access the created registers and start developing your DCS. The famous recipes: In addition the tool allows you to define your own recipes. At the start up of your detector, you want to have certain settings written to a predefined bunch of registers for initialization. This is exactly what happens if you apply a recipe. FwHw Tutorial
How to declare a hardware type (=DPT) … FwHw Tutorial
FwHw Tool: 1.) Create hardware type (e.g. BEETLE) 2.) Choose of which type it shall be (SPECS,CCPC) This defines which register types are provided. (the required parameters differ between types) Hw types can also be provided as being generic, meaning that their behavior (SPECS or CCPC) is determined later. (when inserting to a board – this way a component can be used for SPECS and CCPC) FwHw Tutorial
FwHw Tool: 3.) Create register corresponding to hardware (e.g. Vfs) 4.) Choose type of register (which bus is used) select which register types shall be displayed FwHw Tutorial
FwHw Tool: Creation of registers can also be done in a massive way: placeholder {c1} and {c2} used in register name However, removal not massive! FwHw Tutorial
FwHw Tool: Create another hardware type with the name testboard of type ‘CCPC’ registers can be assigned but also existing hardware types can be inserted…. FwHw Tutorial
FwHw Tool: 4.) FEM of type BEETLE is now part of the testboard 1.) Select testboard and click ‘Insert’. A list of already created hardware types pops up. 2.) Double click on the hardware type you want to insert. A window pops up to specify name of inserted hardware. 3.) Give the name you want to call the hardware: FwHw Tutorial
FwHw Tool: Select hardware type and clicking ‘Generate’ button, automatically generates a PVSS script reproducing the same result as by clicking. This is useful if you want to apply minor changes later! FwHw Tutorial
FwHw Tool: Documentation of the complete FwHw library can be found under: http://lhcb-online.web.cern.ch/lhcb-online/ecs/FwHw/default.html ‘ADVANCED’ tab: scripts can be edited and executed Create new script Scripts can also be saved to disk with ‘File/Save as’ and opened from there. Due to a PVSS feature this is the only way to edit long scripts! (using e.g. wordpad) After executing the script you have to click ‘Refresh’ in tab ‘TYPE’ for updating! Clears system from all existing hardware types FwHw Tutorial
main() { dyn_dyn_anytype defaultSpecificSettingsList; dyn_anytype defaultCommonSettingsList; dyn_string registersNameList; dyn_int registersTypeList; // =========================================== // CREATE HARDWARE TYPE 'BEETLE' // =========================================== if (fwHw_createType("BEETLE", FWHW_GENERIC)) DebugTN("Hardware type 'BEETLE' created!"); else DebugTN("Error when creating hardware type 'BEETLE'!"); // =========================================== // CREATE REGISTER(S) FOR HARDWARE TYPE 'BEETLE' // =========================================== dynClear(registersNameList); dynClear(registersTypeList); dynAppend(registersNameList, "Vfs"); dynAppend(registersTypeList, FWHW_I2C); dynAppend(registersNameList, "Register1Nr0"); dynAppend(registersTypeList, FWHW_I2C); dynAppend(registersNameList, "Register1Nr1"); dynAppend(registersTypeList, FWHW_I2C); if (fwHw_createRegisters("BEETLE", registersNameList, registersTypeList)) DebugTN("Register(s) of hardware type 'BEETLE' created!"); else DebugTN("Error when creating register(s) for hardware type 'BEETLE'!"); // =========================================== // CREATE HARDWARE TYPE 'testboard' // =========================================== if (fwHw_createType("testboard", FWHW_CCPC)) DebugTN("Hardware type 'testboard' created!"); else DebugTN("Error when creating hardware type 'testboard'!"); // =========================================== // INSERT HARDWARE 'FEM' (OF TYPE 'BEETLE') IN HARDWARE TYPE 'testboard' // =========================================== if (fwHw_insert("testboard", "BEETLE", "FEM")) DebugTN("Hardware 'FEM' (of type 'BEETLE') inserted in hardware type 'testboard'!"); else DebugTN("Error when inserting hardware 'FEM' (of type 'BEETLE') in hardware type 'testboard'!"); } Example script of the hardware type ‘testboard’ which we have created so far. (a bit shortened) FwHw Tutorial
FwHw Tool: In the PARA module the structure created so far looks like this. This structure is then copied to any instantiation of the hardware type. The common settings (the name of the Ccpc if hardware type is CCPC) is stored in ‘settings’. Inserted hardware can inherit this settings. The specific settings of registers are stored as a string to minimize DPs. Writing 0 (write), 1 (read) or 2 (write/read) to ‘operation’ triggers DIM command. Status (success?) is read back as well as data in case of readings. Data written to writings triggers command and sends down the data. FwHw Tutorial
How to instance a hardware (=DP) and apply the parameter settings (addresses of registers etc.) … FwHw Tutorial
FwHw Tool: To create an instance of your hardware type, select the type under the tab ‘TYPE’ first! Then switch to ‘HARDWARE’. 1.) check if type is correct. 2.) Type name of the instance and click create. 3.) Confirm the creation. FwHw Tutorial
FwHw Tool: Click on the parent and edit the common settings. Click ‘Save’ and confirm. (common settings are propagated downwards) FwHw Tutorial
FwHw Tool: To edit specific settings, select register and edit the required parameters (they are similar as explained in the CCPC/PVSS interface above – check their meaning if unsure) For both, specific and common settings, default values can be applied. These are actually stored in the internal datapoint shown above: as _defaultSettings… FwHw Tutorial
FwHw Tool: In version 1.8 upwards two new buttons have been introduced: ‘Save as Default Settings’ and ‘Apply as Default Settings’ The specific settings can either be saved as default settings or the default settings can be applied as specific setting to the hardware type selected. The two buttons act also downwards to the inserted hardware children. FwHw Tutorial
{main() { if (!fwHw_createType("BEETLE",FWHW_GENERIC)){ DebugTN("Error in creating HwType! (BEETLE)"); } //Beetle Register declaration: dyn_string BeetleList; dyn_int BeetleListType; BeetleList = makeDynString("Itp", "Ipre", "Isha", "Ibuf", "Vfp", "Vfs", "Icomp", "Ithdelta", "Ithmain", "Vrc", "Ipipe", "Vd", "Vdcl", "Ivoltbuf", "Isf", "Icurrbuf", "Latency", "ROCtrl", "RclkDiv", "CompCtrl", "CompChTh", "CompMask", "TpSelect", "SEUCounts"); BeetleListType = makeDynInt(FWHW_I2C, FWHW_I2C, FWHW_I2C, FWHW_I2C, FWHW_I2C, FWHW_I2C, FWHW_I2C, FWHW_I2C, FWHW_I2C, FWHW_I2C, FWHW_I2C, FWHW_I2C, FWHW_I2C, FWHW_I2C, FWHW_I2C, FWHW_I2C, FWHW_I2C, FWHW_I2C, FWHW_I2C, FWHW_I2C, FWHW_I2C, FWHW_I2C, FWHW_I2C, FWHW_I2C); if (!fwHw_createRegisters("BEETLE",BeetleList, BeetleListType)){ DebugTN("Error in creating Registers! (BEETLE)"); } //define default specific settings dyn_dyn_anytype defaultBeetle; defaultBeetle[1] = makeDynAnytype(0,0x70,0,1,"",0,0,0,0); // Itp defaultBeetle[2] = makeDynAnytype(0,0x70,1,1,"",0,0,0,0); // Ipre defaultBeetle[3] = makeDynAnytype(0,0x70,2,1,"",0,0,0,0); // Isha defaultBeetle[4] = makeDynAnytype(0,0x70,3,1,"",0,0,0,0); // Ibuf defaultBeetle[5] = makeDynAnytype(0,0x70,4,1,"",0,0,0,0); // Vfp defaultBeetle[6] = makeDynAnytype(0,0x70,5,1,"",0,0,0,0); // Vfs defaultBeetle[7] = makeDynAnytype(0,0x70,6,1,"",0,0,0,0); // Icomp defaultBeetle[8] = makeDynAnytype(0,0x70,7,1,"",0,0,0,0); // Ithdelta defaultBeetle[9] = makeDynAnytype(0,0x70,8,1,"",0,0,0,0); // Ithmain defaultBeetle[10] = makeDynAnytype(0,0x70,9,1,"",0,0,0,0); // Vrc defaultBeetle[11] = makeDynAnytype(0,0x70,0xa,1,"",0,0,0,0); //Ipipe defaultBeetle[12] = makeDynAnytype(0,0x70,0xb,1,"",0,0,0,0); //Vd defaultBeetle[13] = makeDynAnytype(0,0x70,0xc,1,"",0,0,0,0); //Vdcl defaultBeetle[14] = makeDynAnytype(0,0x70,0xd,1,"",0,0,0,0); //Ivoltbuf defaultBeetle[15] = makeDynAnytype(0,0x70,0xe,1,"",0,0,0,0); //Isf defaultBeetle[16] = makeDynAnytype(0,0x70,0xf,1,"",0,0,0,0); //Icurrbuf defaultBeetle[17] = makeDynAnytype(0,0x70,0x10,1,"",0,0,0,0); //Latency defaultBeetle[18] = makeDynAnytype(0,0x70,0x11,1,"",0,0,0,0); //ROCtrl defaultBeetle[19] = makeDynAnytype(0,0x70,0x12,1,"",0,0,0,0); //RclkDiv defaultBeetle[20] = makeDynAnytype(0,0x70,0x13,1,"",0,0,0,0); //CompCtrl defaultBeetle[21] = makeDynAnytype(0,0x70,0x14,1,"",0,0,0,0); //CompChTh defaultBeetle[22] = makeDynAnytype(0,0x70,0x15,1,"",0,0,0,0); //CompMask defaultBeetle[23] = makeDynAnytype(0,0x70,0x16,1,"",0,0,0,0); //TpSelect defaultBeetle[24] = makeDynAnytype(0,0x70,0x17,1,"",0,0,0,0); //SEUCounts if(! fwHw_setDefaultSpecificSettings("BEETLE",BeetleList,defaultBeetle)) DebugTN("Error in defining default specific settings! (BEETLE)"); } Again everything can be done via scripting: Example script of the BEETLE chip including specific settings. FwHw Tutorial
FwHw Tool: After all settings are applied, the registers can be subscribed. This means that the settings are transferred to the server, where they are stored into lists. Services and commands are invoked on the server side. Since this step a communication via DIM between server and PVSS client is established and the ‘abstracted’ framework functions for manipulating registers can be applied. (e.g. monitoring) http://lhcb-online.web.cern.ch/lhcb-online/ecs/PVSS_CCPC/default.html FwHw Tutorial
FwHw Tool: For reading and monitoring registers, select hardware type and click ‘View/Recipes’. (don’t forget to subscribe first!) A window pops up with all the registers belonging to the hardware type. For monitoring registers, select register from list (shift select works) click on ‘Monitoring…’ and choose Start/Stop. Clicking ‘Refresh’ reads all the registers. FwHw Tutorial
FwHw Tool: To make a copy of a complete hardware (including settings), the hardware has to be selected and the ‘Clone’ button clicked. Confirm creation of clone. ( ‘+’ in front of hardware indicates a hierarchical structure) FwHw Tutorial
FwHw Tool: A screenshot with the current view of the PARA module. The datapoint type ‘testboard’ has three instances: The default, the clone and myTestboard. specific settings stored as string FwHw Tutorial
Giving a hardware type to a friend or getting one … FwHw Tutorial
How to distribute the hardware model (DP) Simplest solution: Make sure your script works properly and save it as .txt file Users can easily open it with the script editor and execute it Or: distribute the datapoints of your hardware as framework components Go to Graphical Editor and click on ‘System Management’. (Some call it the ‘sheep’) FwHw Tutorial
How to distribute the hardware model (DP) Inside ‘System Management’ choose ‘Database’ and click on ASCII manager Inside ‘ASCII Manager’ edit the name of your Component and tick ‘Datapoint types’, ‘Data points’, ‘Aliases and comments’ and ‘Original values’. FwHw Tutorial
How to distribute the hardware model (DP) 1.) Browse DP tree and select your datapoint representing the hardware. 2.) After clicking ‘Ok’ you still have to add it to your DP selection list by clicking ‘insert’. 3.) Click ‘Start’ to generate your datapoint list. The datapointlist is stored now under: C:/ProjectName/dplist/TestComponent.dpl Make sure that what is inside is what you want! FwHw Tutorial
# ascii dump of database # DpType TypeName HwTypeGENERICBEETLE.HwTypeGENERICBEETLE 1#1 settings 25#2 Vfs 41#19:HwRegisterI2C Register1Nr0 41#33:HwRegisterI2C Register1Nr1 41#34:HwRegisterI2C Register1Nr2 41#35:HwRegisterI2C Register1Nr3 41#36:HwRegisterI2C Register1Nr4 41#37:HwRegisterI2C Register1Nr5 41#38:HwRegisterI2C Register2Nr0 41#39:HwRegisterI2C Register2Nr1 41#40:HwRegisterI2C Register2Nr2 41#41:HwRegisterI2C Register2Nr3 41#42:HwRegisterI2C Register2Nr4 41#43:HwRegisterI2C Register2Nr5 41#44:HwRegisterI2C HwTypeCCPCtestboard.HwTypeCCPCtestboard 1#1 settings 25#2 FEM 41#3:HwTypeGENERICBEETLE # Datapoint/DpId DpName TypeName ID _defaultSettingsGENERICBEETLE HwTypeGENERICBEETLE 54278 _defaultSettingsCCPCtestboard HwTypeCCPCtestboard 54280 myTestboard HwTypeCCPCtestboard 54281 mySecondBoard HwTypeCCPCtestboard 54282 # DpValue ElementName TypeName _original.._value _original.._status _original.._stime myTestboard.settings HwTypeCCPCtestboard "pctell07" 0x101 11.07.2006 20:05:57.326 myTestboard.FEM.settings HwTypeCCPCtestboard "pctell07" 0x101 11.07.2006 20:05:57.357 myTestboard.FEM.Vfs.settings HwTypeCCPCtestboard "" 0x101 11.07.2006 19:23:49.565 myTestboard.FEM.Vfs.operation HwTypeCCPCtestboard "1" 0x101 11.07.2006 20:29:49.333 myTestboard.FEM.Vfs.writingsStatus HwTypeCCPCtestboard 0 0x1000141 11.07.2006 20:29:33.506 myTestboard.FEM.Vfs.readingsStatus HwTypeCCPCtestboard -1 0x1000101 11.07.2006 20:29:49.333 myTestboard.FEM.Vfs.readings HwTypeCCPCtestboard 0x1000141 11.07.2006 20:29:33.506 myTestboard.FEM.Register1Nr0.settings HwTypeCCPCtestboard "0,80,0,16,,0,0,5,1" 0x101 11.07.2006 20:27:25.198 myTestboard.FEM.Register1Nr0.operation HwTypeCCPCtestboard "1" 0x101 11.07.2006 20:29:49.333 myTestboard.FEM.Register1Nr0.writingsStatus HwTypeCCPCtestboard 0 0x1000141 11.07.2006 20:29:33.506 myTestboard.FEM.Register1Nr0.readingsStatus HwTypeCCPCtestboard -1 0x1000101 11.07.2006 20:29:49.333 myTestboard.FEM.Register1Nr0.readings HwTypeCCPCtestboard 0x1000141 11.07.2006 20:29:33.506 myTestboard.FEM.Register1Nr1.settings HwTypeCCPCtestboard "" 0x101 11.07.2006 19:23:49.565 myTestboard.FEM.Register1Nr1.operation HwTypeCCPCtestboard "1" 0x101 11.07.2006 20:29:49.333 myTestboard.FEM.Register1Nr1.writingsStatus HwTypeCCPCtestboard 0 0x1000141 11.07.2006 20:29:33.506 myTestboard.FEM.Register1Nr1.readingsStatus HwTypeCCPCtestboard -1 0x1000101 11.07.2006 20:29:49.333 myTestboard.FEM.Register1Nr1.readings HwTypeCCPCtestboard 0x1000141 11.07.2006 20:29:33.506 …… As PVSS is unfortunately dumping all datapoint dependencies you have to remove unnecessary stuff and slim it down to something like shown here. It is supposed that people trying to use your component have already installed the FwHw tool. (containing the other dependencies) FwHw Tutorial
How to distribute the hardware model (DP) You can also select by datapoint type. 1.) Select your hardware from datapoint type list 2.) Append it to the DPT selection list 3.) Click ‘Start’ to generate your datapoint list Unfortunately for bigger hardware types (e.g. the Tell1 board) each dependency has to be inserted separately. (shift-select does not work) FwHw Tutorial
How to distribute the hardware model (DP) For the component you have to create a directory (e.g. fwTell1DP) containing a subdirectory ‘dplist’. The directory path you have to sepecify in the installation tool when installing the component into your project. Copy the datapointlist you created before into the directory ‘dplist’. FwHw Tutorial
How to distribute the hardware model (DP) A .xml file (it is in the root of your project directory) with the same name as the directory supplies the installation tool with the necessary information: <component> <name>fwTell1DP</name> <version>1.0</version> <date>10.07.2006</date> <dplist>./dplist/Tell1_structure.dpl</dplist> <file>./fwTell1DP.xml</file> </component> (to make more clear: when you click into your component directory you see the .xml file and the dplist folder containing the Tell1 datapoint list.) Documentation on the installation tool can be found under: http://itcobe.web.cern.ch/itcobe/Projects/Framework/Download/Components/ComponentInstallation/fwInstallationUCSurvey.pdf FwHw Tutorial
Get & View Tell1 Hardware Get the DPT model of the Tell1 board from: http://lhcb-online.web.cern.ch/lhcb-online/ecs/PVSS_DPTs/default.html Install either the whole fwTell1DPT component with fwInstallation tool into your project. (it is basically the .dpl file) Or import the Tell1Script.txt file with the script editor and execute it. Additional nodes (datapointelements) which are not registers are required: ‘status’ (string) and ‘files’, containing ‘pof’ (string), ‘jam’ (string) and ‘cfg’ (string). Note: ‘local’ element types are also supported by the FwHw tool from version 1.8 upwards. FwHw Tutorial
Get & View Tell1 Hardware After generating the Tell1DPT you can choose the instance myTell1 (or create your own instances as shown before). You can select a subcomponent (e.g. TTCRX) of the board and subscribe the whole registers contained by this subcomponent. (this is recursive) This means that for these registers a DIM connection between PVSS and server is established. From now on read and write or monitoring access is granted. FwHw Tutorial
Get & View Tell1 Hardware The ‘View/Recipes’ button shows all registers contained by the subcomponent. Editing the data field and pressing Enter launches a Write/Read command Clicking ‘Refresh’ reads all registers and updates the list. FwHw Tutorial
How to define recipes and applying them … (make sure first that your hardware model and access to registers work properly!) FwHw Tutorial
Recipes To define recipe types go to the tab ‘Type’ select your hardware and click ‘Recipe Types’. All registers belonging to the hardware type are shown. Double click on register name changes the store flag: Y = to be stored N = not stored inside recipe By default you can choose to store all or the opposite. (it is useful if you have many registers on your hardware and you want to select just a few of them or disable just a few of them) FwHw Tutorial
Recipes To define various recipes of a certain type and to assign values go to the tab HARDWARE and click ‘View/Recipes’. Make sure you have selected the top node including all registers you want to have in a recipe. From the panel popping up click ‘Recipes’. And edit the Recipe name field. Clicking on the ‘Save’ button extends the panel (see next slide) and you can select the recipe type. Last writings or readings can be shown as register value. FwHw Tutorial
Recipes After the panel has extended choose the recipe type. Afterwards just the registers belonging to the type are shown. The values are assigned by editing the text field and pressing Enter. Click ‘Ok’ to save the recipe. The panel shrinks and you can restart the procedure to define various recipes of the same type with different values assigned to them. A recipe type can contain registers from different hardware instances (Tell1s). The panels are showing just the registers of the currently chosen instance. When applying recipes just registers belonging to the chosen hardware are written. FwHw Tutorial
Note: The recipe type bundles basically the hardware registers together with which you want to communicate (write values to them when applying recipe). You can store different values to this bundle of registers (recipe) under different recipe names. In the experiment a recipe type could for example bundle all the registers of the TTCRX or Beetle chip. Then you have different running conditions like PHYSICS, COSMICS or TESTRUN for which you want to apply different register settings. So you create different recipe names (e.g TTCRX_PHYSICS, TTCRX_COSMICS) of the same recipe type to store the different settings. Later in the FSMs you can launch a configuration command from the top node with a parameter assigned to it (e.g. ‘PHYSICS’). According to this parameter, you can apply the appropriate recipe name to the hardware. Remark: you can bundle also registers of different boards together in one recipe type. The tool however shows you just the registers of the currently selected DP of the board. FwHw Tutorial
Recipies To apply a recipe, choose from the scroll box a recipe you have previously defined. Click Apply and the values of the recipe are written to the corresponding registers. After the writing has finished ‘Done!’ pops up. FwHw Tutorial
Recipies A new feature is that after pressing the ‘View/Recipes’ button it can be decided which values (readings or writings) are assigned: ‘Show Writings’: assigns the latest written values to the registers belonging to hardware type. ‘Show Readings’: assigns the values found under datapoint element ‘readings’. This allows you for example to write the default settings from the .cfg file to the hardware and read them back to the datapoints. From ‘readings’ you can assign them to the register list from where they enter into the recipes. FwHw Tutorial
From User to User: Please send comments about useful information, which you were missing in the slides before! It will be posted here. FwHw Tutorial
Conclusion: Tool allows to define hardware components as datapoint types. The complete model of the Tell1 board is already available as DPT. Allows for quick checks and monitoring of registers. Recipes can be defined and applied. All the functionality of the framework functions is accessible via panels, which eases the development. The subscription and unsubsription was revised and is optimized for speed (fwHw1.5). In general the future efforts will focus on increasing the performance of critical tasks. (reading/writing of registers) Panels are supposed to be final. Subscribed registers are automatically resubscribed when server stops and restarts. (from fwCcpcScript.ctl) “Es ist ihm keine Frist gegeben;Es stürzt ihn mitten in der Bahn,Es reißt ihn fort vom vollen Leben.Bereitet oder nicht, zu gehen,Er muß vor seinen Richter stehen!” FwHw Tutorial
Note: Documentation on the framework functions and installation guide can be found under: http://lhcb-online.web.cern.ch/lhcb-online/ecs/FwHw/default.html Again the panels are not supposed to be adapted into your ECS system - more a toolkit which eases your development. Register definition is the last abstraction layer before it comes to the finite state machines with which you are building your expert system. After this abstraction the user can act on the datapoints without knowing the exact specifications of the hardware. The framework functions to access the registers come with the CCPC/PVSS interface. (tutorial_1) “Eidgenossen! Sind alle sanften Mittel auch versucht? Vielleicht weiß es der König nicht, es ist Wohl gar sein Wille nicht, was wir erdulden. Auch dieses letzte sollten wir versuchen, Erst unsre Klage bringen vor sein Ohr, Eh' wir zum Schwerte greifen. Schrecklich immer, Auch in gerechter Sache, ist Gewalt; Gott hilft nur dann, wenn Menschen nicht mehr helfen.” FwHw Tutorial