
SAP IK11 Tutorial: Odometer Adjustment Procedure
E N D
Presentation Transcript
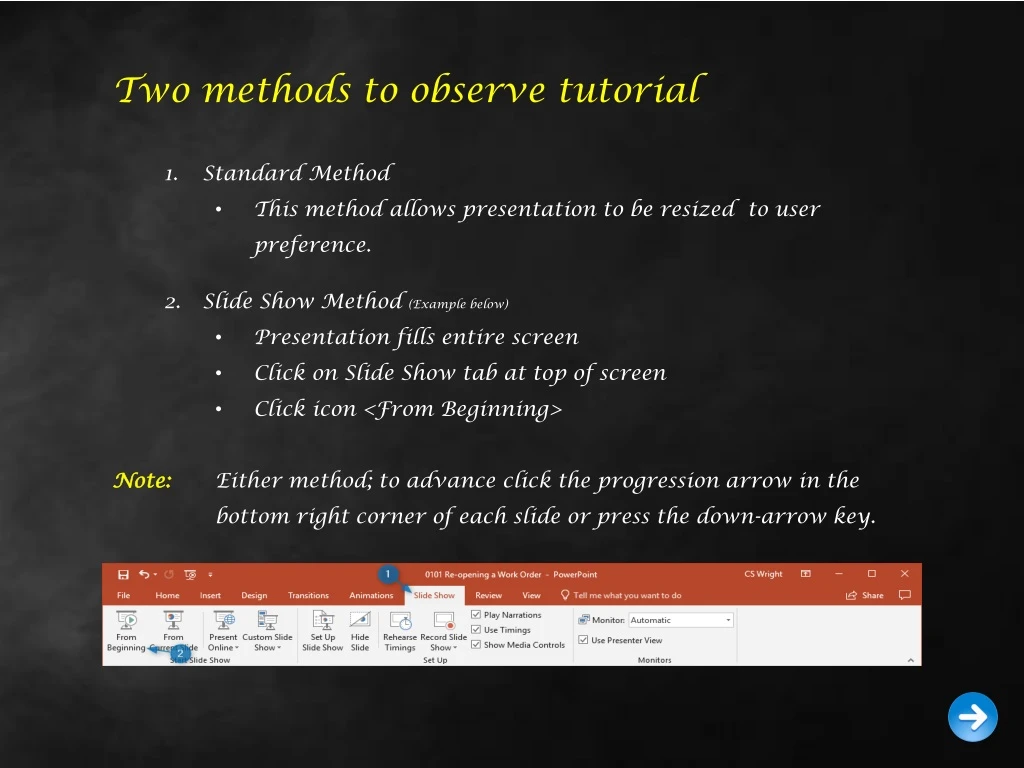
Two methods to observe tutorial • Standard Method • This method allows presentation to be resized to user preference. • Slide Show Method (Example below) • Presentation fills entire screen • Click on Slide Show tab at top of screen • Click icon <From Beginning> • Note: Either method; to advance click the progression arrow in the bottom right corner of each slide or press the down-arrow key.
Welcome to BSIP 101 Transaction Procedures Odometer Upward Adjustment Instructor: Stephen Wright DPI Technical Consultant
Purpose:Use this procedure to adjust odometer readings upward.
One transaction is required to complete this procedure: • IK11 Let’s get started -
From the SAP R/3 Easy Access screen box type IK11 or from your favorites menu, select transaction IK11 – Create Measurement Document Your screen should look similar to the example at the right.
A new window opens: Create Measurement Document:Initial Screen Input: • Enter the vehicles measuring point; or if uncertain click on the Matchcode icon for access to a new search window that allows for Equipment number to be used.(Matchcode icon demonstrated on next slides)
A new window opens: Restrict Value Range Input: • Enter the vehicles equipment number; or if uncertain click on the Matchcode icon for access to a new search window that allows you to search by vehicle inventory icon. (Matchcode icon demonstrated on next slides)
A new window opens: Display Equipment: Equipment Selection • General Data Tab (Input) • Inventory number – Enter the vehicle’s inventory number. • Click the Execute icon ; the software will return to previous screen and auto populate the Equipment Number.
A new window opens: • Restrict Value Range • The window now contains a valid Equipment number. • Tip: It also provides a description for an additional validity check. • Click the Continue icon or press the <Enter> key to progress.
A new window opens: • Measurement Position • Input: • Select Odometer from Measurement position column. This may be accomplished by either double clicking on the word Odometer; or by clicking once on the word Odometer (This action highlights the line), and then clicking the Continue icon . • Tip:This will allow the initial screen to be populated with the vehicles measuring point.
A new window opens: • Create Measurement Document: • Initial Screen Input: • Measuring Point - Auto populates. • Measuring Date -Enter the appropriate date in which the odometer reading is changing. Tip: Time - Input a time that will not interfere with data entry. (Usually use 2300 hours for 11 pm) • Click the Measurement Document Icon
A new window opens: • Create Measurement Document: • General Data Input: • Counter reading -Enter the new odometer reading. • Press the <Enter> key; this will cause the difference field to auto populate. • Important! Check the counter reading difference field and assure that the field displays a reasonable number of miles to advance the odometer. If accurate click the Save icon Otherwise see the instructions on the next slide.
A new window opens: • Create Measurement Document: • General Data • If the difference field is accurate click the Save icon Do NOT click save if the value is inaccurate; instead see the instructions on the next slide.
STOPif: • The difference field displays a number that is not reasonable. • If a yellow message displays stating that “The counter reading entered will lead to a counter overflow” • What to do: • Verify the mileage; make necessary change if needed. If mileage is correct; back out without saving. Go to BSIP support webpage http://www.ncbussafety.org/BSIP/SupportRequest.html and click on the application Vehicle Odometer Change Request. Complete the application and click the submit button.
Questions Email: Stephen.Wright@dpi.nc.gov
Thank You! Stephen Wright DPI Technical Consultant