Download
1 / 14
140 likes | 514 Views
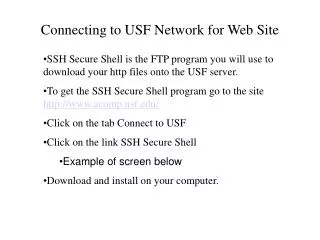
Connecting to USF Network for Web Site SSH Secure Shell is the FTP program you will use to download your http files onto the USF server. To get the SSH Secure Shell program go to the site http://www.acomp.usf.edu/ Click on the tab Connect to USF Click on the link SSH Secure Shell

E N D
Connecting to USF Network for Web Site • SSH Secure Shell is the FTP program you will use to download your http files onto the USF server. • To get the SSH Secure Shell program go to the site http://www.acomp.usf.edu/ • Click on the tab Connect to USF • Click on the link SSH Secure Shell • Example of screen below • Download and install on your computer.
Basics Creating a Web Site on the USF Server • The USF helios server can be used by students for publishing a Web site. • Please observe the following rules: • You cannot place ASP or cgi scripts on the server. • Do not place pornographic materials on the server. • Do not place copyrighted materials on the server unless attribution is noted. Instructions • Go to http://security.usf.edu and click on Downloads • Click on Secure Shell (ssh) • Download ssh (you will need your net id and password to access this) • You can load your site to http://helios.acomp.usf.edu to the public html folder • Your server site will be identified separately by your net id and password • The URL for your site will be: http://helios.acomp.usf.edu/~yournetid
USF Academic Computing http://www.acomp.usf.edu/
Starting the SSH Secure Shell Program After installing the program an icon like this ----------- will appear on your desktop. Click on this icon to initiate the logon process. Connect Icon You can also hit the Enter key or Spacebar
Starting the SSH Secure Shell Program The Connect to Remote Host window will popup. Fill in the fields like this: Host Name: http://www.acomp.usf.edu User Name: your USF Logon Name Click on the Connect button
Starting the SSH Secure Shell Program The Host Identification window will appear asking if you want to save the new host key to the local database? Answer No. Enter in your USF logon password.
Starting the SSH Secure Shell Program Click OK You are now connected to USF’s server. Click on the New File Transfer Window Icon
Using The Program understanding the screen Delete from server New Folder on Server Refresh This side your computer This side is USFs Server
Using The Program Double click on the file to open up your public_html folder This side your computer This side is USFs Server
Using The Program The program now works just like Windows Explorer. You can click on the files you need and drag them over to the server or use the copy/paste function.
Using The Program You may need to set the properties if the page displays unauthorized to view. Click on all the files using the shift or control keys and highlight the files. Right click after highlighting the files and choose properties.
Using The Program According to the USF help desk: Folders must have the permission mode 744 and files use the permission mode 644 (achieved by un-checking the Execute Owner box). Hit OK and the permissions are now set.
Using The Program • All your files are now on the USF Server. • Things to Remember: • If you change anything in your files on your personal computer, make sure to copy any new or adjusted files to the USF server as in the above example. • Verify the permissions on the new files you add. • Server name is helios.acomp.usf.edu • Logon ID and password are your MyUSF logon id and password. • Good Luck and Happy Coding!