Download
1 / 18
460 likes | 1.93k Views
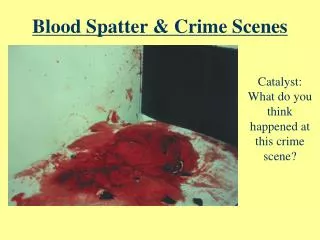
Bloodstain Science. BLOOD SPATTER ANALYSIS or Blood Pattern Analysis = BPA. What do we learn from blood spatter? Type of weapon # of blows A ssailant (right/left-handed) Position/movements of victim & assailant during & after attack Order of wounds

E N D
Bloodstain Science BLOOD SPATTER ANALYSIS or Blood Pattern Analysis = BPA
What do we learn from blood spatter? • Type of weapon • # of blows • Assailant (right/left-handed) • Position/movements of victim & assailant during & after attack • Order of wounds • How long ago crime was committed • Whether death was immediate or delayed
REVIEW from “BLOOD BASICS & DETECTION”… What are several methods for detecting traces of blood at a crime scene?? Test? _________________ Spray? _______________ Look? ________________ HemaStix
Satellite Spatters Spines Parent Drop Blood SPATTER Analysis: TERMS & VOCAB. • Origin/Source – The place from where the blood spatter came from or originated. • Angle of Impact – The angle at which a blood droplet strikes a surface. • Parent Drop – The droplet from which a satellite spatter originates. • Satellites Small drops of blood that break of from the parent spatter when the blood droplet hits a surface. • Spines – Pointed edges of a stain that radiate out; help determine the direction from which the blood traveled.
Projected Bloodstains • When a force is applied to the source of the blood • Low, medium, or high impact spatters, cast-off, arterial spurting, expiratory blood blown out of the nose, mouth, or wound. • Transfer or Contact Bloodstains • When a wet, bloody object comes in contact with a surface; may be used to identify an object or body part. Types of Bloodstain Patterns • Passive Bloodstains • Patterns created due to gravity • Drops, drip patterns, blood pooling
BLOOD SPATTER SCIENCEvideo clips http://app.discoveryeducation.com/player/view/assetGuid/B9627EC9-BFC5-4A69-BB35-768AFDC8CF67 YOUTUBE: The Science of Murder, Blood Spatter, KTNV-TV, Dave Malkoff
Angle of Impact“The tail tells the tale” 90 degrees – 60 degrees – 30 degrees – 10 degrees –
Blood Spatter Labs • You will be creating sample drop patterns using single drops and multiple drops. We will also investigate the effect of motion and the angle of impact on blood spatter. • This can be messy! Be very careful to keep the blood on the paper and not on yourself, the table, or floor. • Hold you hand as steady as possible when making the drops. Brace your wrist against the meter stick to help you. • Get your materials from your teacher – paper, black marker, meter stick, goggles, and a bottle of blood. If you make a mess, clean it up immediately!
Lab 1: Single Droplets • Label two large pieces of construction paper as shown below. Single Drops Group Members Single Drops Group Members Keep your drops in the correct area of the paper. 25 50 75 100 • To do the lab, hold the dropper bottle or pipette so that the tip is 25 cm from the paper. GENTLY squeeze so that ONE drop of blood is released and lands in the correct location on your paper. It should NOT hit the meterstick. • Repeat TWO more times at this height for a total of three drops. • Continue making drops of blood on your paper, but put the drop in a different area of the paper and change the height each time. • When you are done, analyze your results and answer the questions on your worksheet. Make a mistake? Use a paper towel to wipe it off your paper!
Lab 1 Questions Use your results to answer these questions. What did you notice about the diameter of the parent droplets as you increased the height of the drop? How do the spines compare from the different heights?
Lab 2: Multiple Droplets • Label a long piece of butcher paper (2 -3 meters in length) as shown below. Multiple Drops Group Members Keep your drops in the correct area of the paper. 25 50 75 100 • To do the lab, hold the dropper bottle upside down so that the end of it is 25 cm from the paper. GENTLY squeeze the bottle so that ONE drop of blood is released and lands in the correct location on your paper. The drop should NOT hit the meterstick. • Without moving the pipette, release ONE more drop onto the first drop at that height. If you make a mistake, wipe it off with a paper towel and try it again, or adjust your location on the paper (same height) for another go. • Continue making drops of blood on your paper so you have three sets for each height. • When you are done, analyze your results and answer the questions on your worksheet. Clean up your area and put away your materials before you leave class.
Lab 2 Questions Use your results to answer these questions. What happened when one drop landed on top of another one? What did you notice about the diameter of the parent droplets as you increased the height of the drop? What do you notice about the diameter of the satellite spatter as you increased the height of the drop?
Walking Direction Lab 3: Motion Droplets • During this lab, you will see how motion affects the size and shape of the droplets and spines. You will need a long piece of butcher paper (4-5 meters in length) and tape to secure it to the floor. • To do the lab, you will need to hold the pipette so that your hand is out and away from your body (waist level), but is still over the paper. • Start off walking at a SLOW WALKING RATE along the paper strip from one end to the other and GENTLY squeeze the bottle as you walk so that blood is released ONE DROP at a time. Be sure that all the drops land on your paper strip. • Repeat this procedure using a NORMAL WALKING RATE and a FAST WALKING RATE. Miss the paper? Use a paper towel to wipe it off the floor! • When you are done, analyze your results and answer the questions on your worksheet. Clean up your area and put away your materials before you leave class.
Lab 3 Questions Use your results to answer these questions. Draw a sketch of the droplets showing the size, shape, and/or distance between them at each speed in the chart below. What did you notice about the shape of the droplets as you increased your walking speed? What did you notice about the spines as you increased your walking speed? What did you notice about the distance between the droplets as you increased your walking speed?
Lab 4: Angle of Impact Clipboard & Paper Angle Guide • You will be creating sample drop patterns created by droplets landing at different angles from the same height. • Label 3 pieces of copy paper with your names and then indicate the angle for each droplet - 15o, 45o, and 60o. • Place the first piece of paper on the clip board and align the clipboard with the 15o line. Hold the pipette of blood at a height of 50 centimeters from the top of a table. • GENTLY squeeze the pipette so that ONE drop of blood is released and lands on the paper. Repeat two more times at this angle. • Continue testing by dropping blood from a height of 50 centimeters at each of the other angles. Height of50 cm • When you are done, answer the questions on your worksheet. Clean up your area and put away your materials before you leave class.
Lab 4 Questions Use your results to answer the question. What did you notice about the shape of the droplets as you increased the angle of the paper?
Which of the three blood droplets shown would have been created by a wound in the lower part of the leg? Explain. If you have a blood droplet as shown at right, what does it tell you? Explain. Quick Review If you find a trail of blood with droplets that are round and close together, what could this mean?