Obstetrics and Gynecology
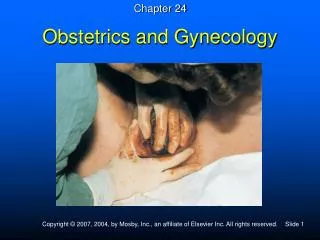
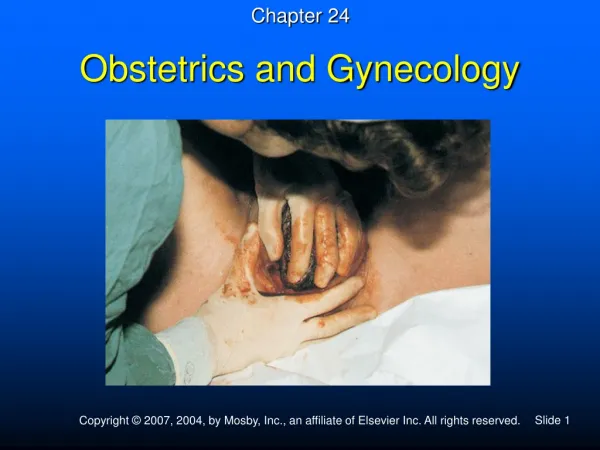
Chapter 24. Obstetrics and Gynecology. Case History.

Obstetrics and Gynecology
E N D
Presentation Transcript
Chapter 24 Obstetrics and Gynecology
Case History A 16-year-old girl reports to the high school nurse’s office with severe abdominal pain. The EMTs arrive just after she gives birth to a premature 4-pound baby boy. The girl is hysterical, the baby is not breathing, and there is a large amount of blood pooling on the sheets.
Obstetrical Emergencies • Two patients to care for • Emotionally charged situation • Best management for unborn is dynamic management of mother. • Maintain vital signs and oxygenation. • Be familiar with the steps for dealing with complications.
Anatomy and Physiology • Uterus • Fundus, body, cervix • Vagina • Ovaries • Endocrine glands • Egg production • Fallopian tubes • Usual site of fertilization
Pregnancy • Implantation occurs about 7 days after fertilization • Outermost cells become the placenta. • Amniotic sac (membranes) • Amniotic fluid • Cushions and maintains temperature • May become stained with fetal feces (meconium) • 20% of infants with meconium-stained fluid will have some respiratory distress – avoid aspiration. • Umbilical cord • Two arteries and one vein
Physiologic Changes of Pregnancy • Anatomic changes • Increased blood supply • Organ crowding • Uterus becomes an abdominal organ. • More prone to injury
Cardiovascular Changes • Heart rate increases 15 - 20 beats per min. • Blood pressure drops in second trimester. • Hypovolemia or hypotension affects fetus first because blood is redirected to major organs.
Supine Hypotensive Syndrome • Vena cava is compressed by weight of fetus. • After 20th week of pregnancy • Inhibits return of blood to heart • Blood pressure drops.
Transporting the Pregnant Patient • Transport on the left side – avoid supine position. • If respiratory difficulty, sit patient up. • For spinal precautions, place wedge (towels or a pillow) under the right side of the spine board or manually displace uterus toward the left side.
Pulmonary Changes • Respiratory rate remains the same or may increase slightly • Tidal volume increases 50%. • Fetal demand for oxygen = increased oxygen consumption • Relaxation and upward displacement of the diaphragm may cause shortness of breath.
Gastrointestinal Changes • Progesterone slows the GI tract and relaxes the cardiac sphincter (between the stomach and the esophagus) • Stomach remains full longer. • Aspiration • Indigestion • Vomiting • Constipation
Genitourinary Changes • Urinary bladder becomes abdominal organ. • Compression causes urinary frequency, urgency, and retention. • Bladder is more prone to injury. • Infections are more common. • Bladder infections may cause preterm labor. • Uterine blood flow is greatly increased with potential for huge blood loss. • Blood flow to kidneys is also greatly increased.
Emergency Childbirth • First stage of labor • Onset of contractions to fully dilated cervix • Averages 14 hours for first pregnancy • Time contractions from beginning of one contraction to beginning of next. • Amniotic sac may rupture at any time, even before the onset of contractions. • Toward the end of first stage patient cannot walk or talk during contraction. • Fear and pain release substances that intensify the uterine contractions; calming the patient can slow the process and possibly prevent prehospital delivery.
Second Stage of Labor • “Pushing stage” • Begins with fully dilated cervix and ends with birth of the baby • Average time 1 hour with first baby, much faster with second baby • Fetal head exerts pressure on the rectum, causing an intense urge to push.
Third Stage of Labor • Delivery of the placenta • Uterus decreases in size after the baby is born. • Placenta is squeezed off the wall of the contracting uterus. • Painless contraction of the uterus into a hard ball • Lengthening of the cord • Gush of blood
Assessment of the Labor Patient • Obtain SAMPLE history. • Visual examination if any of the following: • Patient cannot walk or talk during contractions. • Patient is in so much pain she cannot answer your questions. • Patient appears to be pushing. • Patient tells you, “The baby is coming!”
Important Questions • Is this your first pregnancy? • History of rapid labors or cesarean sections? • Onset of labor and how far apart are contractions? • Have membranes ruptured and what color was the fluid? • Is there vaginal bleeding or “bloody show”? • When is your due date? • Problems with pregnancy or history of medical or surgical problems? Allergies? Diabetes? • Time of last oral intake?
Look for bulging of the perineum. Examine during a contraction. Presenting part may recede between contractions until crowning occurs. Visual Examination
Personal Protection • Abundance of blood and body fluids in childbirth puts EMT at risk. • Hepatitis • HIV • Other pathogens carried by blood and body fluids • Personal protective equipment • Goggles • Fluid-resistant gown • Gloves • Mask
Putting on Protective Clothing • Apply goggles or mask with shield and gown first. • Pull gloves on over the cuffs of the gown so fluids do not seep in.
Removing Protective Equipment • Gown and gloves should be removed inside out as if they were one article. • Dispose of soiled articles as medical waste. • Frequent handwashing is best defense against the spread of disease.
Preparing for Delivery • Position mother on stretcher in semi-sitting position with knees bent and legs spread apart. • Allows you to transport if you encounter complications mid-delivery • If possible, have patient deliver inside ambulance for the same reason. • Also provides privacy
Unwrap the OB Kit • Place two towels on mothers abdomen and one under her buttocks. • Baby will be placed on towels on her abdomen. • Towel under her hips will absorb fluids. • The blue towel can be used to support the perineum.
Using the OB Kit • Use the 4 4s to clean blood and mucus from the infant’s face before suctioning with the bulb syringe. • Reserve the cord clamps and bulbs for delivery. • The clean waterproof pad is placed under the mother with the sanitary pads after delivery.
Delivery • Control delivery of the head with one hand on the back of baby’s head and one supporting the perineum with a towel.
After the Head Is Born • Support head with one hand while clearing mucus and blood from infant’s face with 4 4s. • Suction the infant’s mouth first with a bulb syringe. • Take care to squeeze bulb before inserting it or you will blow material farther into the baby’s air passages • Baby may take a huge breath after first suction . This is why you must clear mouth first; suctioning nose first might cause aspiration of the huge clog of blood, meconium, or mucus that might be in the mouth. • Next, suction the nostrils.
Checking for a Cord • After the mouth and nose are suctioned, check for a cord around the neck. • If the cord is loose, you may be able to pull it over the baby’s head. • Never stretch or pull hard on the cord; it may break and cause the infant to hemorrhage.
Tight Cord • If cord is tight around neck, clamp in two places and cut between clamps.
Delivery of the Shoulders • Most out-of-hospital deliveries will occur without “extra help.” • If the shoulders do not deliver right after the head, tell the mother to push while you support the head with both hands and give gentle downward traction to guide the anterior shoulder under the pubic bone.
Delivering the Posterior Shoulder • When the anterior shoulder is visible, guide the head upward to deliver the posterior shoulder. • Do not use excessive force or twist the neck.
Catching the Baby • Slide your hand along the emerging body and prepare to catch the feet. • Be prepared. The baby is slippery and may shoot out suddenly!
Immediate Care of the Infant • Hold the infant at the level of the vagina. • Wipe mucus from the infant’s face with gauze. • Suction the mouth, then the nostrils. • Compress bulb before placing it in the mouth or nose.
Clamp and Cut the Cord • Place the first clamp 1 inch from the baby’s abdomen. • Place a second clamp 2 inches away from the first clamp. • Make sure the clamps are locked securely before you cut the cord. • Be careful not to cut the baby.
Third Stage Care – Delivery of the Placenta • Signs the placenta will soon deliver • Lengthening of the cord • Gush of blood • Contraction of the uterus into a raised globular shape (painless) • Have a basin or plastic bag ready for the placenta. • If the placenta has not delivered by the time baby is resuscitated and wrapped and the mother cleaned, proceed to the hospital.
Never Pull on the Placenta or Cord! • There may be an abnormal placenta, such as this one with an extra lobe. • The cord may break off inside, causing the mother to hemorrhage through the open vessels.
Fourth-Stage Care • After the placenta has delivered, control the bleeding. • If the uterus does not contract and the mother starts to hemorrhage, support the lower part of the uterus with one hand just above the pubic bone (to prevent uterine prolapse) and massage the top of the uterus with the other hand.
Make Mom Comfortable • Remove wet towels from Mom’s abdomen and under her buttocks. • Place a clean towel under her and a sanitary pad between her legs. • Cover her with a warm blanket. • Allow her to nurse after you have examined infant (only if the baby did not require resuscitation). • Suckling helps contract the uterus. • Can also restore the infant’s glucose supply.
Before the Mother Nurses • Examine for a cleft palate. • May require more suction • Do not allow nursing. • Check for spinal cord defects.
Spinal Cord Defects • Place infant in prone position. • Cover defect with moistened sterile gauze. • Wrap loosely or hold in place with blanket. • CPR takes precedence.
Four Objectives of Newborn Care • Provide warmth. • Continuously evaluate respirations, heart rate, and color. • Provide airway and adequate ventilation through positioning, suction and, if needed, oxygen and PPV. • Provide cardiac compressions if heart rate <60 bpm.
Neonatal Resuscitation – Initial Steps • 5% - 10% of infants will require resuscitation. • If meconium-stained fluid, suction mouth and nose before proceeding. • Place on towels and dry infant, then remove wet linen. • Place infant in neutral position and stimulate to cry by rubbing the back twice or flicking soles of feet. • As infant cries, more mucus may be brought up; turn head to side and suction inside cheek as needed.
Three Criteria of Neonatal Resuscitation • Respirations • Heart rate • Color
Respirations • The most important aspect of neonatal resuscitation • Must be sufficient to fully expand lungs and remove fluid from alveoli • Time is critical – delay will cause blood vessels in the lungs to remain constricted, preventing oxygen from reaching the baby, even with PPV
Absent or Inadequate Respirations • Begin PPV (bag <750 mL; newborn lungs hold only 20-30 mL of air) • Oxygen reservoir for 90%-100% oxygen • 40-60 breaths/minute for 15-30 seconds
After 30 Seconds of PPV • Check the heart rate for 6 seconds. • If <100, or infant still not breathing, continue PPV. • If <60, begin chest compressions. • Always continue PPV with chest compressions.
Newborn Chest Compressions • Compress to a depth of 1/3 of the anterior-posterior diameter of the chest. • Interpose 1 breath after 3 compressions. • Rate is 120 events (30 respirations and 90 compressions) per minute.
After 30 Seconds of PPV and Chest Compressions • Recheck the heart rate • If <60, continue both PPV and chest compressions and proceed to hospital. • If >60, stop compressions. • If <100 or infant still not breathing adequately, continue PPV. • If >100 and infant breathing adequately after resuscitation, administer free-flow oxygen (5-7 L/min).
Check Color • If adequate respirations and heart rate <100, check color. • Observe mucous membranes . • Acrocyanosis is normal. • If pale, mottled, or cyanotic, give 100% free-flow oxygen. • If cyanosis persists despite oxygen, give a 30-second trial of PPV.