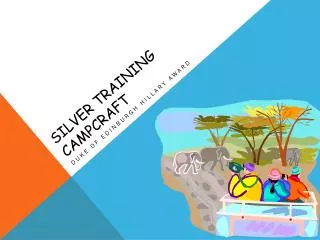
Silver Training
Silver Training. Duke of Edinburgh Hillary Award. First Aid. Make sure that at least one person on the trip has a current First Aid certificate Remember Dr ABC D – Danger – make the area safe (for yourself, others, injured) R – Response – is the injured conscious? Can they respond?

Silver Training
E N D
Presentation Transcript
Silver Training Duke of Edinburgh Hillary Award
First Aid • Make sure that at least one person on the trip has a current First Aid certificate • Remember Dr ABC • D – Danger – make the area safe (for yourself, others, injured) • R – Response – is the injured conscious? Can they respond? • A – Airways – clear mouth, tilt head back, lift chin • B – Breathing – chest rising and falling, sounds of breathing, breath on cheek • C – Circulation – if not breathing, are there signs of life? Skin pale? What happens when you press the skin or fingernail? http://www.ehow.co.uk/video_4951759_make-outdoor-first_aid-kit.html HOW TO MAKE AN OUTDOOR FIRST AID KIT
First Aid – Roles of group members • Leader – site management • - safety of group and injured • - delegates tasks to group members • Most experienced First Aider – patient care and monitoring • - may need an assistant • - prioritise care if numerous injured • An effective communicator – seeks help through radio transmission • Everyone else – make shelter, food, drink etc
First Aid – Secondary Survey • Check and record breathing and pulse • Talk to patient and companions to obtain • - history of accident • - medical history • Full examination to determine any further injuries • Make sure you are wearing gloves
First Aid – Look and feel for • Bleeding • Unusual colour • Tenderness and bruising • Lack of symmetry • Loss of sensation • Try to treat patient in the position in which they are found
First Aid – Head • Inspect and gently palpate skull • Check for lacerations, bleeding, depressions, bruising
First Aid – Face • Fluid from ears, nose, mouth • Inspect eyes and check for pupil symmetry and reaction to light • Look for any broken teeth • Check skin colour, temperature, moisture • Check for any obvious fracture of the jaw
First Aid – Neck • Gently inspect and palpate for tenderness, deformities and rigidity
First Aid – Chest • Check for bruising • Check for asymmetry of movement • Gently palpate for tenderness and deformity
First Aid – Back • Check for muscle spasm along spine • Look for bruises, injuries, entry or exit wounds • Back injuries can be very serious, because the spinal cord is a vital nerve
First Aid – Abdomen • Look for bruising, penetrating injuries • Check for distension and masses • Palpate (with warm hands) for rigidity
First Aid – Pelvis • Palpate gently for tenderness and deformity
First Aid – Extremities • Look for deformities • Gently palpate for tenderness and deformities • Check for bruising • Check for regularity of pulse • Check for strength and sensation • Check for symmetry
First Aid – Remember • Warmth, comfort, reassurance • Patient minder to watch and monitor them constantly • Record keeping is essential – all significant events • Monitoring – vital signs – breathing, pulse, temperature – every 30 minutes
First Aid – Foreign Bodies • Bugs or plant matter in eyes, ears, nose • Try not to inflame by prodding or rubbing • EYES – wash out with clean water or pull top eyelid over bottom lid • EARS and NOSE – do not stick anything in to try to dislodge object
First Aid – Fractures • Excessive force can cause fractures • - open – bone protrudes through skin blood loss and severe risk of infection • - closed – skin is intact but there can still be severe internal bleeding • - complicated – broken bone is at risk of injuring vital organs such as lungs • - stress – abnormal movement causes stress to bone over time
First Aid – Signs and Symptoms of Fractures • A break or crack may be heard • Intense pain • Observable deformity • Painful movement in that region • Loss of strength in that region • Tenderness when gentle pressure applied • Swelling and bruising • Visible bleeding with open fractures • Grating sound as broken ends move against each other
First Aid – Management of Fractures • Do not test by moving bones against each other • Assess severity of injury • Determine course of action based on severity of injury • Be aware of risk of infection of open wounds • Donut of bandages / clothes to protect open wound from knocks • Splint area if possible to avoid movement of fracture site • Patient may be able to continue eg broken arm if properly supported • If patient can’t continue, seek help
First Aid – Diarrhoea • Unpleasant – especially in the bush • Can be accompanied by dehydration, nausea and vomiting • Steps to take to avoid diarrhoea: • Remember personal hygiene when toileting and preparing food • Use only treated water (do not drink directly from streams) • Avoid eating left over food • Wash dishes and utensils well • Treatment for diarrhoea • If available, take anti-diarrhoea medication • Continue to drink sips of boiled water to avoid dehydration • Electrolyte drinks are useful to maintain strength (May be carried with first aid kit) • Bury all faecal wastes (including toilet paper) to avoid possible cross contamination.
First Aid – Recovery Position • If a patient is unconscious or semi conscious and still breathing • Check mouth for any obstructions • Kneel down by patient’s chest • Place one arm across the patient’s chest and the other at 90oto their body • Bend up the leg on the same side as the arm across the chest • Gently roll the patient to their side • Make sure the patient is stable and cannot move from this position • Continue to monitor levels of consciousness. • Must be placed on back if breathing stops – for resuscitation