Download
1 / 6
0 likes | 26 Views
The Wavlink Halo Base Pro AC1200 setup kit, equipped with three mesh routers, facilitates a streamlined process for accelerating internet connectivity. Whether you reside in a ranch-style, multi-story, or L-shaped home, this device ensures stable internet signals throughout. Explore and apply the instructions provided here to effectively configure and utilize this WiFi kit.<br><br>

E N D
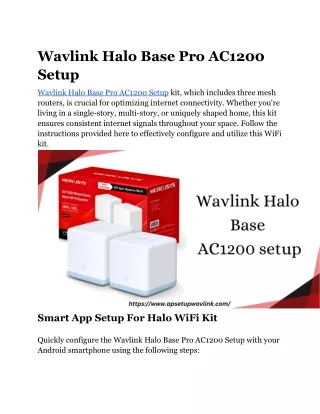
Wavlink Halo Base Pro AC1200 Setup Wavlink Halo Base Pro AC1200 Setup kit, which includes three mesh routers, is crucial for optimizing internet connectivity. Whether you're living in a single-story, multi-story, or uniquely shaped home, this kit ensures consistent internet signals throughout your space. Follow the instructions provided here to effectively configure and utilize this WiFi kit. Smart App Setup For Halo WiFi Kit Quickly configure the Wavlink Halo Base Pro AC1200 Setup with your Android smartphone using the following steps:
● Connect the Wavlink Kit: Use the provided power cables, ethernet cables, and power adapter to connect the Wavlink satellites. Plug the power adapters into power outlets. ● Install the Wavlink App: Open the Google Play Store on your device and search for the Wavlink app. Install the correct app and allow your device to complete the installation process. ● Log In: After installation, log in to the app on the next screen. ● Configure Settings: Follow the on-screen instructions to perform necessary tasks such as selecting the network, language, and time zone. Choose the desired working mode for the WiFi kit. ● Complete Setup: Once you've configured the advanced settings for the halo, reconnect your device to it Connect Devices Through Touch Link To connect additional or guest devices to the Wavlink Halo network using the touch link feature, follow these steps: ● Open Wireless Network List: Access the wireless network list on your device. ● Use Touch Link Feature: Move the device closer to the top panel of the Wavlink Halo and touch the device head to the touch link button on the halo. ● Automatic Connection: Allow the device to automatically scan the network without manually entering the SSID name and password. By following these steps, you can effortlessly connect more devices to the Wavlink Halo Base Pro AC1200 setup network using the touch link feature. Troubleshooting Halo Kit Working Issues
If you experience slow internet or frequent disconnections with the Wavlink Halo Base Pro AC1200 setup, try these fixes: ● Check LEDs: Check the LEDs on the Wavlink Halo to identify any connection errors. ● Proper Placement: Ensure all components in the WiFi kit are placed within the required range of each other. ● Examine Cable Connections: Verify cable connections between the components of the Wavlink Halo Base Pro AC1200 setup kit. ● Stable Power Supply: Confirm the Wavlink WiFi kit is receiving a stable and uninterrupted electricity supply. ● Update Web Browser: Verify the web browser version of the networked device to ensure it is up to date. ● Reconnect Device: Disconnect the networked device from the halo kit and establish the connection again. Unplug the Kit To troubleshoot further, follow these steps: ● Unplug the Kit: Disconnect the Wavlink Halo Base Pro AC1200 setup kit from the power outlet. ● Disconnect Wires: Additionally, disconnect the ethernet and power adapter wires. ● Wait: Allow the entire kit to remain unplugged for a short duration. ● Reconnect: Subsequently, reconnect and plug in the halo kit after the designated period. ● Consider using a different location and ensuring the use of the latest wires during the reconnection process.
Reset the Halo Kit To address errors and reset configurations, use the reset button on the Wavlink Halo Base Pro AC1200 Setup: ● Press and Hold: Press and hold the reset button until the halo device begins the resetting process. ● Wait: Allow the reset process to complete. ● Reconfigure: Once the reset is done, reconfigure the halo kit using the smart app. Wavlink Halo Base Pro AC1200 Setup Specifications The Wavlink Halo Base Pro AC1200 boasts the following specifications: ● Wireless Standard: IEEE 802.11ac/a/n/g/b ● Dual-Band Technology: 2.4GHz and 5GHz
● Data Rate: Up to 1200Mbps ● Number of Mesh Routers: Three ● Mesh Technology: Yes ● Touch Link Functionality: Yes ● Ethernet Ports: Included ● Working Modes: Multiple modes available ● LED Indicators: Yes ● Smart App Compatibility: Yes ● Security Features: Enhanced network security ● Power Supply: Reliable and uninterrupted ● Compact Design: Space-saving and suitable for various environments Experience high-speed internet, advanced mesh technology, and versatile working modes with the Wavlink Halo Base Pro AC1200 setup. Wavlink Halo Base Pro AC1200 Setup Key Features Discover the exceptional features of the Wavlink Halo Base Pro AC1200 setup: ● High-Speed Connectivity ● Mesh Technology ● Touch Link Functionality ● Dual-Band Technology ● Ethernet Ports ● Compact and Sleek Design ● Smart App Compatibility ● Enhanced Security Features ● Versatile Working Modes ● LED Indicators
Experience advanced functionality and reliable performance with the key features of the Wavlink Halo Base Pro AC1200 setup.