Mastering PowerPoint Collaboration Techniques for Effective Presentations
Enhance your PowerPoint skills with essential collaboration techniques. Learn how to insert, delete, and modify comments; protect and inspect files; create digital signatures; and compress presentations for finalization. Master the art of saving presentations as PowerPoint shows, running them with interactive tools, and packaging for CD delivery. This comprehensive guideline ensures you can effectively collaborate with others on your presentations, incorporating feedback and keeping your work organized and secure.

Mastering PowerPoint Collaboration Techniques for Effective Presentations
E N D
Presentation Transcript
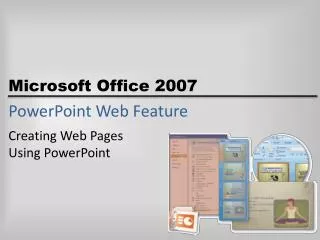
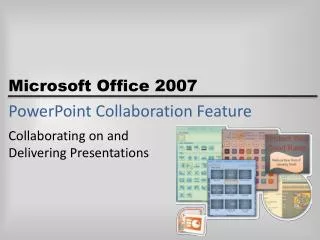
PowerPoint Collaboration Feature Collaborating on and Delivering Presentations
Objectives • Insert, delete, and modify comments • Inspect and protect files • Compress files and mark them as final • Create a digital signature • Save files as a PowerPoint show • Run shows with pens and highlighters • Package presentations for a CD Microsoft Office 2007: Complete Concepts and Techniques
Plan Ahead • Ask for and accept criticism • Select an appropriate password Microsoft Office 2007: Complete Concepts and Techniques
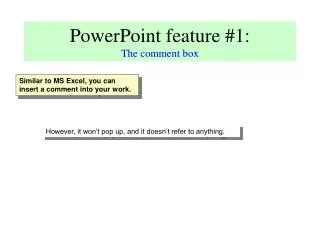
Inserting a Comment • Start PowerPoint and then open the presentation, Recreational Biking, from the Data Files for Students • Click the Next Slide button to display Slide 2 • Click Review on the Ribbon to display the Review tab • Click the Insert Comment button, which is labeled New Comment, in the Comments group to display a comment box at the top of Slide 2 • Type Check to verify these statistics are current when giving the presentation. in the comment box • Click anywhere outside the comment box to close the comment box • Click the Next Slide button twice to display Slide 4 Microsoft Office 2007: Complete Concepts and Techniques
Inserting a Comment • Click after the second bullet and then click the Insert Comment button to display a comment box to the right of the bullet • Type Locate a study finding that bicycling is an excellent way to relieve stress and then replace this paragraph with that information. in the comment box • Click anywhere outside the comment box to close the comment box • Click the Next Slide button to display Slide 5 • Click the word, Price, in the table and then click the Insert Comment button to open a new comment box on the table • Type Verify current prices at local bike shop. in the comment box • Click anywhere outside the comment box to close the comment box Microsoft Office 2007: Complete Concepts and Techniques
Inserting a Comment Microsoft Office 2007: Complete Concepts and Techniques
Modifying a Comment • Display Slide 2 and then click the comment marker to display the comment on Slide 2 • Click the Edit Comment button in the Comments group to open the comment box • At the end of the current text type Good sources are www.usacycling.org and www.imba.com (International Mountain Bicycling Association). in the comment box • Click the Next Comment button, which is labeled Next, in the Comments group to display the comment on Slide 4 • Click the Edit Comment button and then type Ask Rich at the bike store for information on current studies. in the comment box Microsoft Office 2007: Complete Concepts and Techniques
Modifying a Comment Microsoft Office 2007: Complete Concepts and Techniques
Saving the Presentation • With a USB flash drive connected to one of the computer’s USB ports, click the Office Button and then display the Save As dialog box • Type Recreational Biking Revised in the File name text box to change the file name • Click Computer in the Favorite Links section, double-click your USB flash drive in the list of available drives, and then click the Save button to save the document on the USB flash drive with the new file name Microsoft Office 2007: Complete Concepts and Techniques
Hiding and Showing Markups • Click the Show Markup button in the Comments group to hide the comment on Slide 4 • Display Slide 5 to view the slide with no comments showing • Click the Show Markup button to display the comment marker on Slide 5 • Click the Next Comment button, which is labeled Next, in the Comments group to display the Slide 2 comment Microsoft Office 2007: Complete Concepts and Techniques
Hiding and Showing Markups Microsoft Office 2007: Complete Concepts and Techniques
Deleting a Comment • With Slide 2 displayed, click the Delete Comment button in the Comments group to delete the comment Microsoft Office 2007: Complete Concepts and Techniques
Deleting a Comment Microsoft Office 2007: Complete Concepts and Techniques
Identifying Presentation Features Not Supported by Previous Versions • Click the Office Button and then point to Prepare on the Office Button menu to display the Prepare submenu • Click Run Compatibility Checker to open the Microsoft Office PowerPoint Compatibility Checker dialog box • View the comments in the Summary area regarding the two features that are not supported by earlier versions of PowerPoint • Click the OK button to close the Microsoft Office PowerPoint Compatibility Checker dialog box Microsoft Office 2007: Complete Concepts and Techniques
Identifying Presentation Features Not Supported by Previous Versions Microsoft Office 2007: Complete Concepts and Techniques
Removing Inappropriate Information • Click the Office Button, point to Save As on the Office Button menu, and then click PowerPoint presentation • Type Recreational Biking Duplicate in the File name text box and then click the Save button to change the file name and save another copy of this presentation • Click the Office Button and then point to Prepare on the Office Button menu • Click Inspect Document in the Prepare submenu to display the Document Inspector dialog box • Click the Inspect button to check the document Microsoft Office 2007: Complete Concepts and Techniques
Removing Inappropriate Information • When the inspection report is displayed, click the Remove All button in the Comments and Annotations area to remove the comments from the presentation • Click the Close button to close the Document Inspector dialog box Microsoft Office 2007: Complete Concepts and Techniques
Removing Inappropriate Information Microsoft Office 2007: Complete Concepts and Techniques
Setting a Password • Click the Office Button and click Save As on the Office Button menu to display the Save As dialog box • Click the Tools button to display the Tools menu • Click General Options in the Tools menu to display the General Options dialog box • Type Biking4me in the ‘Password to open’ text box • Click the OK button to display the Confirm Password dialog box Microsoft Office 2007: Complete Concepts and Techniques
Setting a Password • Type Biking4me in the ‘Reenter password to open’ text box • Click the OK button in the Confirm Password dialog box • Click the Save button in the Save As dialog box to add the password to the document • Click the Yes button in the Confirm Save As dialog box to replace the existing presentation Microsoft Office 2007: Complete Concepts and Techniques
Setting a Password Microsoft Office 2007: Complete Concepts and Techniques
Compressing a Presentation • Display Slide 4 and then click the bicycle picture to select it • Click Format on the Ribbon to display the Format tab under Picture Tools • Click the Compress Pictures button in the Adjust group to display the Compress Pictures dialog box • Click the Options button in the Compress Pictures dialog box to display the Compression Settings dialog box • Click Screen to select the Screen (150 ppi) option • Click the OK button to close the Compression Settings dialog box • Click the OK button to close the Compress Pictures dialog box and to compress all pictures in the presentation Microsoft Office 2007: Complete Concepts and Techniques
Creating a Digital Signature and Adding It to a Document • Click the Office Button and then point to Prepare on the Office Button menu to display the Prepare submenu • Click Add a Digital Signature on the Prepare submenu to display the Microsoft Office PowerPoint dialog box • Click the OK button to display the Get a Digital ID dialog box • Click ‘Create your own digital ID’ and then click the OK button to display the Create a Digital ID dialog box Microsoft Office 2007: Complete Concepts and Techniques
Creating a Digital Signature and Adding It to a Document • Type Mary Halenin the Name text box • Type mary_halen@hotmail.com in the E-mail address text box • Type Mary's Bike Shop in the Organization text box • Type Los Angeles, CA in the Location text box Microsoft Office 2007: Complete Concepts and Techniques
Creating a Digital Signature and Adding It to a Document • Click the Create button to display the Sign dialog box • Click the Sign button to display the Signature Confirmation dialogbox • Click the OK button to close the Signature Confirmation dialog box and display the Signatures task pane • Click the Close button in the Signatures task pane so that it no longer is displayed Microsoft Office 2007: Complete Concepts and Techniques
Creating a Digital Signature and Adding It to a Document Microsoft Office 2007: Complete Concepts and Techniques
Marking a Presentation as Final • Click the Office Button and then point to Prepare on the Office Button • Click Mark as Final (shown in Figure 21 on PPT 313) to display the Microsoft Office PowerPoint dialog box • Click the Yes button to invalidate the signatures in the presentation • If necessary, click the OK button to display a second Microsoft Office PowerPoint dialog box indicating that the presentation is final Microsoft Office 2007: Complete Concepts and Techniques
Marking a Presentation as Final Microsoft Office 2007: Complete Concepts and Techniques
Saving a File in .PPS Format • Click the Office Button, point to Save As on the Office Button menu, and then click PowerPoint Presentation • Type Recreational Biking Show in the File name text box • Click the Save as type arrow to display the Save as type list • Click PowerPoint Show in the Save as type list • Click the Save button to save the Recreational Biking presentation as a PowerPoint show • Click the Yes button in the Microsoft Office PowerPoint dialogbox to remove all signatures in the presentation Microsoft Office 2007: Complete Concepts and Techniques
Saving a File in .PPS Format Microsoft Office 2007: Complete Concepts and Techniques
Highlighting Items on a Slide • Click the Slide 1 thumbnail in the Slides tab and then run the slide show • If the Slide Show toolbar is not visible, move the mouse pointer on the slide • Click the pointer arrow on the Slide Show toolbar to display the shortcut menu • Click Highlighter and then drag the mouse over the word, Fitness, until the entire word is highlighted • Move the mouse and then click to highlight any area of the slide Microsoft Office 2007: Complete Concepts and Techniques
Highlighting Items on a Slide Microsoft Office 2007: Complete Concepts and Techniques
Changing Ink Color • Click the Next Slide button on the Slide Show toolbar to display Slide 2 • Click the pointer arrow on the Slide Show toolbar and then click Ballpoint Pen on the shortcut menu • Click the pointer arrow on the Slide Show toolbar and then point to Ink Color • Click the color Green in the Standard Colors row Microsoft Office 2007: Complete Concepts and Techniques
Changing Ink Color • Drag the mouse around the third bulleted paragraph, 152.3 mph - , to draw a line around this text • Right-click the slide to display the Popup menu • Click End Show to display the Microsoft Office PowerPoint dialogbox • Click the Discard button to end the presentation without saving the annotations Microsoft Office 2007: Complete Concepts and Techniques
Changing Ink Color Microsoft Office 2007: Complete Concepts and Techniques
Packaging a Presentation for Storage on a Compact Disc • Insert a CD-RW or a blank CD-R into your CD drive • Click the Office Button and then point to Publish on the Office Button menu • Click Package for CD to display the Microsoft Office PowerPoint dialog box • Click the OK button to display the Package for CD dialog box • Type Biking in the Name the CD text box Microsoft Office 2007: Complete Concepts and Techniques
Packaging a Presentation for Storage on a Compact Disc • Click the Copy to CD button to package the presentation files • Click the No button in the Microsoft Office PowerPoint dialogbox to not include linked files • When the files have been written, click the Close button in the Package for CD dialog box • Click the No button to not copy the files to another CD Microsoft Office 2007: Complete Concepts and Techniques
Packaging a Presentation for Storage on a Compact Disc Microsoft Office 2007: Complete Concepts and Techniques
Quitting PowerPoint • Display the Office Button menu and then click the Exit PowerPoint button to close all open documents and quit PowerPoint • If a Microsoft Office PowerPoint dialog box is displayed, click the Yes button to save the changes Microsoft Office 2007: Complete Concepts and Techniques
Summary • Insert, delete, and modify comments • Inspect and protect files • Compress files and mark them as final • Create a digital signature • Save files as a PowerPoint show • Run shows with pens and highlighters • Package presentations for a CD Microsoft Office 2007: Complete Concepts and Techniques
PowerPoint Collaboration Feature Complete Collaborating on and Delivering Presentations