Download
1 / 42
420 likes | 560 Views
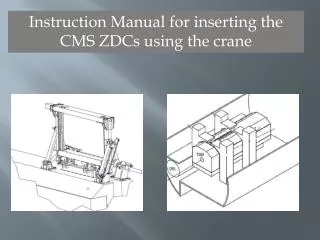
Instruction Manual for inserting the CMS ZDCs using the crane. ZDC REMOVAL PROCEDURE STEP 1 : Set up Test control system above ground 3 Moving Materials 4

E N D
Instruction Manual for inserting the CMS ZDCs using the crane
ZDC REMOVAL PROCEDURE • STEP 1: Set up • Test control system aboveground 3 • MovingMaterials 4 • Cables connections 5-6 • Layingof Cables. 7 • Test crane movementwithoutpayload 8 • Bringsarcophagus to TAN 9 • Install rotation servo motor 10-12 • Control System Activation 13-15 • Crane rotation (to SARCO) 16-17 • Install elevator servo motor 18 • STEP 2: Extraction of ZDC • Rotate crane to TAN and lower elevator to ZDC 19 • Aline elevator to ZDC 20 • Fasten vertical elevator to ZDC 21 • Extract the ZDC 22 • Rotate crane and insert ZDC in SARCO 23 • Unfasten ZDC 24 • Store ZDC in bunker 25 • Continued on next page
ZDC REMOVAL PROCEDURE • STEP 3 : Insertion of steel bars • Raise crane to make space for steel bars 26 • Bring steel bars to TAN using transpallet 27 • Lower elevator to steel bars 28 • Fasten elevator to steel bars 29 • Extraction of bars and rotation over TAN 30 • Insertion of bars in TAN 31 • Disconnect elevator from bars 32 • STEP 4: Clean up • Move empty crane over sacro 33 • Disconnect servo motor from vertical elevator 34 • Move empty crane back over TAN 35 • Take empty sarco back to bunker 36 • Remove rotation servo motor 37 • Pull up control cables 38 • Disconnect Cables from control system Connections 39-40 • Bring materials back 41
STEP 1 Op. 1: Test control system above ground. 1. B90 power cable 2. B90_RES cable 3. B63 power cable 4. B63_RES cable 5. Fake switch cable, shown in insert. 6. SPARE 7. Handset cable 8. 220v 15A___________________ Time :5 min Operators : A and B 8 7 3 2 1 6 5 4
STEP 1 • Op. 2: Moving Materials • Bring downstairs control cabinet , remote control, motors, cables • Reference List : • Control Cabinet • Remote Command Handset • Baldor BSM90 Servo motor (Rotation) • Baldor BSM63 Servomotor(vertical axis) • Cables • ____________________ • Time :15 min • Operators : A and B 1 5 2 3 4
STEP 1 Op.3: Cable Connections (A) Control System Installation (with cables connections) ____________________ Time :10 min Operators : A and B
STEP 1 Op.3: Cable Connections (B) Control System Installation (cables connections) Reference List : 1. B90_PWR cable 2. B90_RES cable 3. B63_PWR cable 4. B63_RES cable 5. Limit_Switchcable 6. SPARE 7. Handset cable 8. 220v 15A ____________________ Time :5 min Operators : A and B 8 7 3 2 1 6 5 4
STEP 1 Op.4: Layingof Cables From the Control System to the ZDC Crane. ____________________ Time :5 min Operators : A and B 20meters 15meters
STEP 1 Op.5: Test crane movement without payload Run the crane forward and backward through its entire range of motion without a payload. ____________________ Time :10 min Operators : A and B One near TAN the other at the staging area
STEP 1 Op.6: Bring sarcophagus to TAN. Using the transpallet bring and empty Sarcophagus to the TAN. ____________________ Time :5 min Operators : A
STEP 1 Op.7: Install rotation servomotor (A) 1) Connect the BaldorBSM90 Servo motor to crane 2) Connect cables to motor ____________________ Time :10 min Operators : A and B 1 2
STEP 1 • Op.7: Install rotation servomotor (B) • Baldor BSM90 Servo motor (Rotation) : Assembly to the crane • ____________________
STEP 1 • Op.7: Install rotation servomotor (C) • BaldorBSM90 Servo motor (Rotation) : Fastening • ________________
STEP 1 Op.9: Control System Activation(A) 1.Power-ON(LV) 2.Emergency Stop&Key enabling system for HV 3. Switch control of HV motor power ____________________ Time :2 min Operators : B 1
STEP 1 Op.9: Control System Activation(B) 1.Power-ON(LV) 2.Emergency Stop&Key enabling system for HV 3. Switch control of HV motor power ____________________ 2
STEP 1 Op.9: Control System Activation(C) 1.Power-ON (LV) 2.Emergency Stop&Key enabling system for HV 3. Switch control of HV motor power ____________________ 3
STEP 1 Op.10:Crane rotation to SARCO (A) Push the command button and keep it pushed to rotate the crane to SARCO ____________________ Time :5 min Operators : B Indicator light (move DOWN) Indicator light (move UP) command button (move DOWN) command button (move UP) Indicator light (rotate to SARCO) Indicator light (rotate to TAN) command button (rotate to SARCO) command button (rotate to TAN)
STEP 1 Op.10:Crane rotation to SARCO (B) Wait until the crane is completely extended over the SARCO ____________________
STEP 1 • Op.8: Install elevatorservomotor • 1) Connectcables to BaldorBSM63servomotor • 2) Connectmotorto the crane. • ____________________ • Time :4 min • Operators : A and B
STEP 2 Op.1: Rotatecrane to TAN and lower elevator to ZDC Bring back the crane in the starting position over the TAN. Thenlower the OverheadBeam of the Vertical Elevator close to the ZDC Module ____________________ Time :5 min Operators : B a b
STEP 2 Op.2:Aline elevator to ZDC Lower the OverheadBeam of the Vertical Elevatoruntil the holes on Lifting Bridge shoe (1) are Alined with the holes on the ZDC supports (2) ____________________ Time :2 min Operators : A and B 1 A 2 View « A »
STEP 2 Op.3:Fastenvertical elevator to ZDC Fastening of the Lifting Bridge shoe to the ZDC supports withscrews and nuts Reference List : 1. M12 screw (4) 2. M12 Nut (4) ____________________ Time :3 min Operators : A and B 1 2
STEP 2 Op.4: Extract the ZDC Lift the ZDC calorimeter out of the TAN ____________________ Time :2 min Operators : B
STEP 2 Op.5:Rotate crane and insert ZDC in SARCO Rotate the crane until completely extended over the SARCO Insert the ZDC calorimeter into the SARCO ____________________ Time :4 min Operators : B
STEP 2 Op.6: Unfasten ZDC Remove the 4 screws and the 4 nuts from the ZDC supports ____________________ Time :1 min Operators : A
STEP 2 Op.7:Store ZDC in bunker Bring the sarcophagus containing the ZDC to the bunker ____________________ Time :4 minutes Operators : A
STEP 3 Op.1: Raise crane to makespace forsteelbars. Raise the OverheadBeam of the Vertical Elevator 10cm ____________________ Time :2 min Operators : B a
STEP 3 Op.2:Bring steel bars to TAN using transpallet ____________________ Time :5 minutes Operators : A
STEP 3 Op.3:Lower elevator to steel bars Lower the OverheadBeam of the Vertical Elevatoruntil the holes on Lifting Bridge shoe (1) are Alined with the holes on the supports of the steel bars (2) ____________________ Time :1 min Operators : B 1 A 2 View « A »
STEP 3 Op.4:Fasten elevator to steel bars Fastening of the Lifting Bridge shoe to the steel bar supports withscrews and nuts Reference List : 1. M12 screw (4) 2. M12 Nut (4) ____________________ Time :4’ Operators : A and B 1 2
STEP 3 Op.5: Extraction of bars and rotation over TAN Extract the bars from the SARCO Rotate the crane until the bars are over the TAN. ____________________ Time :5 min Operators : B
STEP 3 Op.6: Insertion of bars in TAN Lower the steel bars into the TAN ____________________ Time :3 min Operators : B
STEP 3 Op.7: Disconnect elevator from bars Unscrewnutsthatlinkbridge shoe to the bars and thenremovescrews. Reference List : 1. M12 screw (4) 2. M12 Nut (4) ____________________ Time :1 min Operators : A and B 1 2
STEP 4 Op.1: Move empty crane over sarco Lift the elevator bar and rotate crane over emptysarco ____________________ Time :4 min Operators : B
STEP 4 • Op.2: Disconnectservomotorfrom vertical elevator • UnboltBaldorBSM63 Servomotor • 2 disconnect cables • ____________________ • Time :2 min • Operators : A and B 1 2
STEP 4 Op.3: Move empty crane back over TAN Rotate crane over emptysarco ____________________ Time :3 min Operators : B
STEP 4 Op.4:Takeemptysarco back to bunker ____________________ Time :4 minutes Operators : A
STEP 4 • Op.5: Remove rotation servomotor • UncableBaldorBSM90servo motor • Loosen and remove bolts • Take off motor • ________________ • Time :4 min • Operators : A and B 2 1 3
STEP 4 Op.6: Pull up contol cables Gather up the cables from the Control System to the Crane. ____________________ Time :2 Operators : A and B 20meters
STEP 4 Op.7: Disconnect Cables from control system Connections (A) ____________________ Time : 4 Operators : A and B
STEP 1 Op.7: Disconnect cable from contorl system (B) Reference List : 1. B90_PWR cable 2. B90_RES cable 3. B63_PWR cable 4. B63_RES cable 5. Limit_Switchcable 6. SPARE 7. Handset cable 8. 220v 15A ____________________ Time :3 min Operators : A and B 8 7 3 2 1 6 5 4
STEP 4 • Op. 8: Bring materials back • Bring control cabinet , remote control, motors, and cables upstairs. • Reference List : • Control Cabinet • Remote Command Handset • Baldor BSM90 Servo motor (Rotation) • Baldor BSM63 Servomotor(vertical axis) • Cables • ____________________ • Time :15 min • Operators : A and B 1 5 2 3 4