Download
1 / 22
220 likes | 240 Views
Learn to design a short animation in Alice world with an easy tutorial. Follow the detailed steps to choose backgrounds, add objects like a kangaroo, save your work, set methods, and play your created animation. Discover the basics of computer programming through Alice software. Enhance your animation skills with Duke University's helpful guide.

E N D
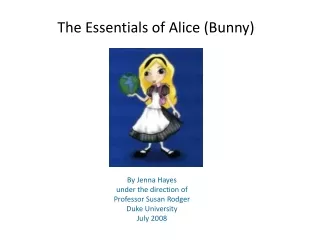
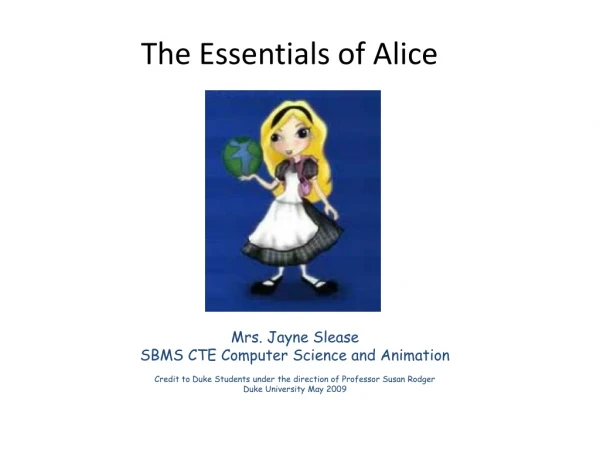
The Essentials of Alice Mrs. Jayne Slease SBMS CTE Computer Science and Animation Credit to Duke Students under the direction of Professor Susan Rodger Duke University May 2009
This tutorial will teach you how to create a short animation in an Alice world. Follow the steps and use the pictures to help find things on your screen. Step 1: Choosing a Background Step 2: Adding an Object When you open Alice, the first thing you must do is choose a background for your animation. You have six choices. Select the templates tab to see the background choices. For this tutorial, choose the sand background, and then click Open. Next, you will add an object. The object will be the main character in your Alice animation. Click on the green Add Objects button under your viewing screen.
Step 2 (continued): Adding an Object At the bottom of your screen, a library of objects will appear. Click on Animals, and then scroll to the right and click on “Class Kangaroo”, and then click “Add Instance to World.” Click the green Done button to the right to exit the object-adding screen. A kangaroo will appear in your viewing screen. Your Alice world now contains a kangaroo!
Saving your world • Also, while you’re working on your Alice world, this box will pop up about every 15 minutes. • You should always click Save right now. This way, if Alice crashes, or if your computer crashes, you will have backups of your world and will not lose all of your work!
Saving your world • Before we do anything else, let’s save our world. You should also always do this before you close out of Alice. • Click on Fileat the • top left-hand corner • of your screen, and • then click on • Save World.
Saving your world • In the box that pops up, name your world island, and save it in a place that you will be able to find again, such as in a folder on your Desktop.
Top left Step 3: Finding the methods Object Tree To control the kangaroo’s actions, we must use commands called methods. To find a list of methods the kangaroo can do, click on the word kangarooin the object tree, which is the list of objects in your world at the top left of the screen. Below the object tree, click on the methods tab to see a list of methods. Bottom Right
Method • A method is a series of instructions given to objects that describe actions to take. • All objects in Alice have some methods already built-in. • The vast majority of objects can “say”, or “move”, or “turn”, and so forth. • However, we can write our own methods for objects that are built from smaller ones. This is one of the fundamental ideas in computer programming - using smaller methods as building blocks for more complex commands.
Method (cont.) For instance, or example: Let’s say I wanted to make an object walk realistically in Alice. Walking is more than just moving forward, right? I would write smaller methods that have the legs bend at the knees and move one at a time. I could write other methods that make the arms swing back and forth. I could then combine these methods into a larger “walk” method that would make the character walk like a human being.
Step 4: Adding Methods This is called the method editor, and this is where we will put a list of the methods that we want our kangaroo to carry out. Find the Do in orderbutton at the bottom of the method editor, and drag and drop it into the method editor. Now, when we drag and drop methods inside this Do in order, they will be carried out one by one, in the order that they are listed.
Step 4 (continued): Adding Methods Let’s make the kangaroo move backwards and then forwards again. Find the move method in the kangaroo’s list of methods, click on it, and drag it over to the Do in order. Release your mouse button to drop it there.
Step 5: Method Specifics When you drop the move method, you will see a gray drop down menu appear. Slide your mouse to backwards for direction. Then a list of amounts will appear; click on 5 meters. Your method editor should look like this when you’re done. This is your first Alice programming statement telling the kangaroo to move backwards, using the move method.
Step 6: Finishing the Method Let’s make the kangaroo move forward to its original position. Right click on the word move in the statement you placed in the editor and click make copy. Now you have the same statement twice. On the lower move statement, click on the small down arrow next to the word backward. A list of directions will drop down. Click on forward to change the direction of the second statement to forward.
Step 7: Playing Your World Now you can play your world, and your kangaroo will carry out the program in your method editor. Find the Play button in the upper left-hand corner of your screen, and watch your kangaroo in action. Click Restart to see the animation again, and click Stopwhen you are done.
Step 8: Editing your program What if you want to get rid of a statement from your method editor? Click on the leftmost part of the statement and drag it up to the trash can in the upper left-hand corner. When the outlines around both the trash can and method are green, drop the method to delete it. Try this on the kangaroo move forwardmethod. Both outlines are green.
Step 8 (continued): Editing your program Now how do you get your method back if you decide you want it after all? By clicking on the Undobutton in the upper left hand corner of the screen. You can use this button to undo any mistakes you make in Alice. It is very important, and will save you from a lot of frustration. Click on Undo to get back your kangaroo move forward method.
Step 9: Doing two methods at once You can also make your kangaroo carry out more than one method at once, by using Do together. Let’s make the kangaroo turn its tail and say “Crikey!” at the same time. Find the Do together button at the bottom of your method editor and drag and drop it under your Do in order.
Step 10: Moving a Specific Part We want to move only the tail so we need to find that specific part. Click the plus signto the left of kangaroo in the object tree. A list of the kangaroo’s parts will appear. Click on tail, and a list of the tail’s methods will appear below the object tree.
Step 10 (continued): Moving a Specific Part To make the tail turn, drag and drop the tail’s turnmethod into the Do together. On the drop down menu of directions, choose left, and then for the amount, choose 1 revolution (all the way around). Try playing your world to see what it looks like.
Step 11: Talking Click on the kangaroo in the object tree to display the kangaroo’s methods again. To make the kangaroo talk, click on the saymethod and drop it into the Do together under the turn method. On the drop down menu that appears, click on “other…” and then type in “Crikey!”. Then click OK.
Step 12: Adjusting the Timing Play your world to see how it looks so far. It seems that the kangaroo says “Crikey!” a little too quickly. To make the speech bubble stay on the screen longer, we can adjust the length of the method’s time. On the kangaroo say Crikey! method, click on the word “more…”. Select duration. You can see that the duration is set at 1 second, so change it to 2 seconds. Then play your world and see the difference in timing.
Step 13: Your Turn! When you are finished, your program will look like this: These are only the very basics of what you can do with Alice. It’s your turn to create! BASICS-Create a world; add three characters; have your characters discuss internet safety (something new you learned); put your characters in motion. See Rubric for additional requirements