Download
1 / 19
190 likes | 316 Views
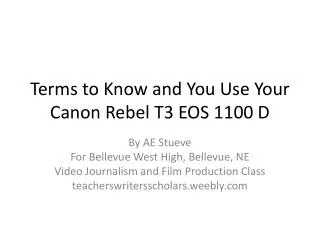
Terms to Know and You Use Your Canon Rebel T3 EOS 1100 D . By AE Stueve For Bellevue West High, Bellevue, NE Video Journalism and Film Production Class teacherswritersscholars.weebly.com. Shutter Button. The shutter button has two steps

E N D
Terms to Know and You Use Your Canon Rebel T3 EOS 1100 D By AE Stueve For Bellevue West High, Bellevue, NE Video Journalism and Film Production Class teacherswritersscholars.weebly.com
Shutter Button • The shutter button has two steps • PRESSING HALFWAY activates auto-focusing and the automatic exposure system that sets the shutter speed and aperture. • PRESSING COMPLETELY releases the shutter and takes the picture • DEFINITIONS: • APERTURE—the unit of measurement that defines the size of the opening in the lens that can be adjusted to control the amount of light reaching the sensor. Wide aperture allows for fast shutter speeds, thin aperture allows for slow shutter speeds
Aperture • Wider aperture allows for quick shutter speeds (faster photography) • Thinner aperture allows for slow shutter speeds (slower photography) • You can change aperture on your camera in “AV” mode by using your dial. • Wide aperture would be good for night photography and landscapes • Thin aperture would be good for day photography and more intimate settings
Depth of Field • The amount of your shot that will be in focus • Large depth of field means everything will be in focus • Small depth of field means only part of your photo will be in focus, everything else will be fuzzy • The DEPTH OF FIELD is controlled by aperture, distance from subject, and the length of the lens • There is an automatic depth of field setting on your camera
ISO • An indication of how sensitive a film is to light • The lower the number, the lower the sensitivity to light and the finer the grains in the shots you are taking. • Higher ISO settings are used for darker photographs • Lower ISO settings are used for lighter photographs • On your camera, you change the ISO setting using the “up” arrow on the cross keys
ISO cont. • When choosing the ISO setting, ask the following four questions: • Light – Is the subject well lit? • Grain – Do I want a grainy shot or one without noise? • Tripod – Am I using a tripod? • Moving Subject – Is my subject moving or stationary? • If there is plenty of light, you want little grain, you are using a tripod and your subject is stationary you will generally use a pretty low ISO rating. • However if it’s dark, you purposely want grain, you don’t have a tripod and/or you subject is moving you might consider increasing the ISO as it will enable me to shoot with a faster shutter speed and still expose the shot well. • Of course the trade off of this increase in ISO will be noisier shots. • Situations where you might need to push ISO to higher settings include: • Indoor Sports Events – where your subject is moving fast yet you may have limited light available. • Concerts – also low in light and often ‘no-flash’ zones • Art Galleries, Churches etc- many galleries have rules against using a flash and of course being indoors are not well lit. • Birthday Parties – blowing out the candles in a dark room can give you a nice moody shot which would be ruined by a bright flash. Increasing the ISO can help capture the scene.
White Balance • White balance is the process of removing unrealistic color casts from your photography • Your camera includes an auto-white balance application that can, at times, work incorrectly • Luckily for us, your camera has many different options for white balancing. It is up to you to decide the best setting for your photographs using the WB setting on the “down” arrow on the cross keys
Basic Shooting • Full Auto • Full Auto Mode (a green square on the dial) is the most basic type of shooting. In this mode, the camera essentially thinks for you. It is a good mode for beginning photographers to start their projects.
Basic Shooting • Disabling Flash • Photographers should use this setting in a place where flash photography is prohibited (it is a white square with a slash through the flash symbol on the dial). This mode also works well for capturing the particular ambience of a scene—for instance, a candlelight scene should not be flashed because it would ruin the mood of the scene, make it too bright.
Basic Shooting • Creative Auto Shooting • Unlike full auto, creative auto (symbolized by a white square with the letters “CA” inside it on the dial) allows you to change the depth of field, drive mode, and flash firing by pressing the quick control button (symbolized by a “Q” on the button) and using the arrows on the key pad to make your changes to the setup
Basic Shooting • Portrait • The portrait setting (symbolized by a picture of a face on the dial) blurs the background to make the subject stand out. It also makes skin tone and hair look softer than with the full auto mode • Tips • The further the distance between the subject and the background, the better • Focus on the face
Basic Shooting • Landscape • The landscape mode (symbolized by a white mountain line on the dial) is for wide scenery, night scenes, or to have everything in focus from near to far. Greens and blues also become more vivid and the image sharper than when using full auto
Basic Shooting • Close-ups • When you want to photograph flowers or small things up close, use the close-up mode (symbolized by a flower on the dial) • Tips • Use a simple background • Mode to the subject as close as possible
Basic Shooting • Sports • Shooting moving subjects, whether it is a child running, a moving vehicle, or an athlete, use the sports mode (symbolized by a man running on the dial).
Basic Shooting • Night Portrait • To shoot someone at night and obtain a natural-looking exposure in the background, use the night portrait mode (symbolized by a person standing on a black background with a star above him) • Tips • Keep person at least five meters away (16 feet) • Shoot with full auto also
Autofocus Mode • There are three Autofocus (AF) modes available on your camera. • Live Mode • Harder to achieve focus, takes longer than quick mode (the image sensor is used to focus) • Face Detection Live Mode • Image sensor detects a face before it focuses and shoots (subject must be looking at camera) • Quick Mode • Focuses quickly (the AF sensor is used to focus) although there is an interruption in the Live View image during photographing • To select a mode go to Menu, under one of the camera tabs select AF mode then pick the desired mode by hitting SET.
Manual Focus • First make sure your camera’s lens is set to MF (manual focus) • Move the magnifying frame (the arrow key pad) to the area you want to focus on • To magnify the image press the + magnifying glass image and it will change • Focus manually
Shooting Movies • Set the mode to the camera • Focus the subject • Shoot the movie by hitting the button that is an image of the camera, to stop recording, hit it again. • Remember, while the camera is filming there will be a red dot in the upper right hand corner of the frame. • All rules about photography (rule of thirds, white balance, etc) apply to filming movies as well.
Ready to photograph and film? • Hope so!