Download

1 / 18
180 likes | 196 Views
Configuring a custom SiFive RISC-V Core using SiFive Core Designer, programming on FPGA board, running Hello World with SiFive SDK in 30 minutes.

E N D
SiFive Core Designer From Custom CPU to Hello World in 30 Minutes Drew Barbier - Embedded World Feb 2019
SiFive Core Designer Your interface to SiFive RISC-V Core IP • All SiFive Core IPis configured and delivered via the SiFive Core Designer Web Portal • Simple, Easy to Use, Web Interface • Release Candidates are generated with click of a button and available from the Workspace • Release Candidates contain • RTL matching the configuration, including a testbench, and other collateral needed to realize the design • Documentation specific to the design • Customized bare-metal BSP for easy integration into SiFive’s SDKs • FPGA bitstreams for common FPGA development boards for easy software benchmarking of the RC
From Custom CPU to Hello World in 30 minutes Step 1 Configure a custom SiFive RISC-V Core using SiFive Core Designer Step 2 Use the FPGA bitstream from Step 1 to program a Digilent Arty FPGA board with the configured CPU Step 3 Use Freedom Studio and the SiFive SDK to program and run Hello World
Configure a SiFive RISC-V CPU • Web Interface to Configure SiFive Core IP • No Complex EDA tools or scripting languages to learn • What is configurable • ISA, Performance levels, Modes, Ports, Interrupts, Security, Debug, and much more! • What is the output • Verilog RTL and supporting collateral, an FPGAbitstream, software, and documentation SiFive Core Designer
Core Designer UI Walkthrough Go to the SiFive website and click “Start Designing” • https://www.sifive.com/ Choose a Core Series to start from • Start from a pre-configured Standard Core • Or start from scratch Name the Design and Start Clicking! • Change performance levels, memory maps, Privilege modes, Instructions Sets, Security, Debug, etc… Click Review and then Build • Launches SiFive’s cloud based infrastructure to render and verify the design Download from your SiFive Workspace
Too Many Choices? Start with a Standard Core Benchmarks FPGA Evaluations RTL Evaluations E31 Standard Core Definition FE310 Silicon Standard Core RTL and FPGA Evaluations are Available with a click-through License
Deploy the bitstream to the FPGA • Purchase a Digilent Arty https://store.digilentinc.com/arty-a7-artix-7-fpga-development-board-for-makers-and-hobbyists/ • Download Xilinx Vivado 2018.3 (Warning, HUGE 19GB) https://www.xilinx.com/products/design-tools/vivado.html • Open Vivado’s Hardware Manager Tool
Coming Soon The ability to flash Arty boards directly from Freedom Studio
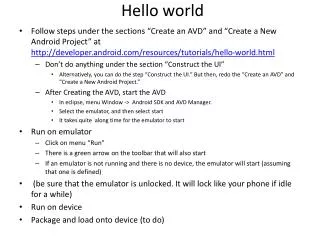
Download Freedom Studio • Freedom Studio is an Eclipse based IDE with • pre-built GCC and OpenOCD • Bundled examples for SiFive targets • Download Freedom Studio https://www.sifive.com/boards • Unzip to the desired installation directory • Or… Skip the IDE • Download pre-built binaries of GCC and OpenOCD from the same webpage • Use Freedom-E-SDK to build and debug your software using a makefile CLI based flow https://github.com/sifive/freedom-e-sdk
Build and Run the Software • File - Import - DevKit Examples - Browse • Select the zip that matches your core • Select the desired examples and click Finish • Control-B will build the entire workspace • Run - Debug - OpenOCD starts a JTAG Debug Session and Loads the program