Download
1 / 40
400 likes | 495 Views
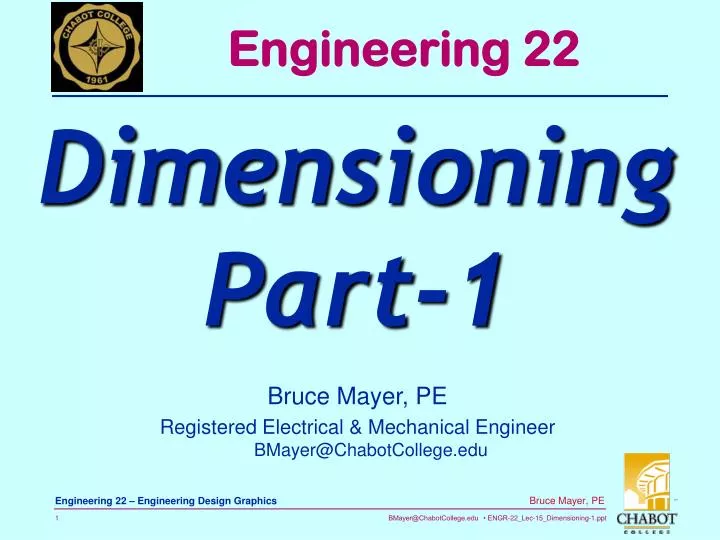
Engineering 22. Dimensioning Part-1. Bruce Mayer, PE Registered Electrical & Mechanical Engineer BMayer@ChabotCollege.edu. Chp.8 Learning Goals.

E N D
Engineering 22 DimensioningPart-1 Bruce Mayer, PE Registered Electrical & Mechanical EngineerBMayer@ChabotCollege.edu
Chp.8 Learning Goals • Apply Proper/Conventional Dimensioning Standards to Adequately Describe a Physical Object (e.g., a Machined Part) Such that It may be Properly Fabricated • Use AutoCAD to add Dimensions to Standard Orthographic Projection Views in Both Dimension-Line and BaseLine Forms
Dimensions • Dimensions are used to describe the sizes and relationships between features in Technical drawings • Dimensions are used to manufacture parts and to inspect the resulting parts to determine if they are acceptable. • Drawings with dimensions and notes often serve as construction documents and legal contracts. • ANSI/ASME Y14.5M-1994 is the current standard. Other standards may apply.
Standards for Different Fields • Standards are different in different engineering disciplines. • Most of the examples in this course will be of MECHANICAL parts. • Civil, Electrical, Construction, and other areas follow similar practices, but sometimes with less need for precision in measurements. • Dimensioned drawings are a part of a contractual document.
BaseLine Dims Dimension Offset/Gap Chained Dims Finish Mark Dim Terminology Extension Line Leader Dimension Line Dimension Value CenterLine
DimLine Example • Title =Drive Shaft, Pulley • Matl = SS-440C Round Bar
BaseLine Dim Example • Title =Bottom Plate • Matl = 11Ga (0.09” thick) 5052-H32 Al
Basic Dimensioning Concepts • Give SIZE and LOCATION of ALL features • Size of main feature • length, height, width • Size of other features (basic shapes) • prism, cylinder, wedge, cone, sphere • Locate other features with respect to the main feature
Dimensioning Practices • Place Dims for Maximum Legibility • Choose Dims for Maximum Utility • Depends on Fabrication Process
Dim vs Extension Lines • Shorter Dim Lines Closer to Object • Long Dim Lines Should Not Cross “Short” Extension Lines • Ext. Lines May Cross to Maintain Consistent Dim Gap • Avoid Dims INSIDE the Object or Object-Envelope • Dim lines should Line-up with Feature Lines (Visible, Hidden, Center) • Need a CLEAR ASSOCIATION with Dimensioned Feature.
Leaders • Leader A Thin Solid Line From an Object-Feature to A Note or Dim-Callout • Should be an INCLINED Line • Forms a Distinct Angle with the Part Feature • Typically use a 6mm (0.25”) Horiz. Shoulder • Leader to a Circle or Arc Should Be RADIAL
Nix Mixed Fractions • Unless Required for Some Very Unusual Reason Do NOT Use Fractional Dims • They are Effectively Obsolete • Continue to Exist Thru Inertia • NEVER Applied to meter-based linear Dims
Dual Dimensioning • Generally Not Recommended for Fab Dwgs • Potential for MisReading Dims • Make Drawing Look “Busy” • Good for Overall (Layout) or “FootPrint” Drawings Used as A Communication tool • Use Brackets to Distinguish Secondary Dim • Side-by Side • Over/Under
Activate Dimstyle Mgr ACAD Dual Dim → Dim Styl Mgr • Pick “Alternate Units” Tab
Dimension Directions • Two Basic Forms apply to the Reading Direction for Dimension Values • Aligned – Dim Values Line Up with Direction of the Dim’d Feature or Leader • Unidirectional – All Dims Horizontal • Strongly Preferred due to Ease of Reading
Arcs and Angles • CoOrd Method (b) More Accurate • Use Decimal Degrees (°) over °/’/” (deg/min/sec) • “R” Can Lead or Follow (Leading Preferred) • Leader Direction Should Run Thru Arc-Center
Dim Inside of Object • Whenever Possible Place Dims OUTside the Object • Complex Parts May Require Dims INside
CallOut ShortHand • ASME Y14.5M (Geometric Dimensioning And Tolerancing) Provides Standard Symbols for Common Features • Reduces the Length Of CallOut notes
Dimension Symbol Application Most Common
Choice of Dimensions • The Dimensions You Specify Determine The Way The Part Is Manufactured And The Way Tolerances Are Applied • Consider the Purpose Of The Part And Its Function In The Assembly • Consider how easy it will be to CHECK the measurement on the actual part • Fully dimension each part • Do not Overdimension, each Dimension should appear ONLY ONCE
Do Not Overdimension Redundant Dims Cause Confusion Give the DIAMETER of Circular shapes, the RADIUS of Arcs No redundant or superfluous dimensions Give SIZE Dimensions for FEATURES. Give LOCATION dimensions to show how features RELATE to one another. Dimension Choice Guidelines
Rectanglular View Center Lines Contour Dimensioning • Dim Where Contour Shape is Most Fully Displayed • Do Not Dim to HIDDEN Lines if Possible
Mating Parts → Consistent Dims • Mating Features should Be Dim’d In the SAME Manner on Both Parts to Ensure Proper Fit
Placement of Dimensions • RULES-OF-THUMB for dimension placement help ensure that others will be able to interpret your drawing • Where placement practices conflict, remember that your goal is to clearly communicate the purpose of the drawing • Use the practice you feel will make the drawing easier to understand.
Avoid dimensioning on object. Avoid dimensioning to hidden lines. Place dimensions between views when possible. Group dimensions around a central view Give OVERALL dimensions where possible. Place dimensions where the View shows the feature SHAPE. i.e., Dim to CONTOUR i.e., to a CHANGE in DIRECTION Dimension from or between MACHINED surfaces Don’t dimension to Rectangular view CENTERLINES. Dim to Arc/CircleView Instead Placement Practices
Dimension Prisms (Long Bars) • Place Common Dim, Height or Width, BETWEEN Views
Dimensioning Cylinders • Place Common Dim, the Ø, BETWEEN Views • The ASME Y14.5 Symbol, Ø, Has Largely Replaced The Traditional “DIA.” Callout
Dimensioning Holes • If Possible, Callout to the CONTOUR View • If CONCENTRIC Holes (C’Sink or C’Bore) Leader Points to OUTer Circle
Location Dimensions • When Locating a Feature Relative to an Edge • Check with the Fabricator to Determine Which Corner Used As The Origin (Has been Upper Left) • Feature-To-Feature Dimensions Should be Shown in the Contour View Whenever Possible
Baseline Dimensioning Ø-Size Specifications • Becoming a De Facto Standard • No Tolerance Build Up • Matches the X-Y Translation Movement of Modern Machine Tools • Easier CNC Program Development
BaseLineDim Example • Relieves Drawing of Extension-Line “Rat’s Nests” • Generally Eliminates the Need for Dims Inside the Object “E” Ø Spec Local Note
Local Notes • Provide Important Supplementary Information • Characteristics • Brief • Careful Verbiage
Common (Global) Notes • Apply to the ENTIRE Drawing • Typically Placed in a “Note Block” • Notes Numbered Sequentially • Block Located in an “uncrowded” Corner of the Drawing
Dimensioning Summary • Good dimensioning is a combination of choosing dimensions which reflect your DESIGN INTENT, proper technique in creating the details of the dimension line, extension line, arrowheads and dimension values, and placing the dimensions on the drawing so that they can be read clearly. • DIMENSIONING drawings correctly can be as important, or MORE important than drawing the SHAPES correctly. • Good dimensioning requires PRACTICE and THOUGHT
Dimensioning Summarized • Dimension fully • Avoid redundancy • Do not dimension to hidden lines • Dimension diameter of holes (with Ldr) • Dimension radius of arcs • Place dimension on view that best shows feature (Dim to Contour) • Group associated dimensions
Dimensioning Super Summary • Ask yourself these questions: If I were Making this object or system: • Would I know the SIZE of every Feature (holes, notches, facets, cutouts, etc.)?¿? • Could I LOCATE every Feature relative to a significant OUTSIDE EDGE?¿?
All Done for Today MachinedPartDimensioning
Engineering 25 Appendix Time For Live Demo Bruce Mayer, PE Licensed Electrical & Mechanical EngineerBMayer@ChabotCollege.edu