Download
1 / 71
720 likes | 1.03k Views
Emergency Vehicle Operations Unit VI Theory and Principals of Vehicle Dynamics. Unit VI Objectives. The EVO will be able to identify reason why we crash The EVO will be able to describe the physical forces that influence vehicle handling

E N D
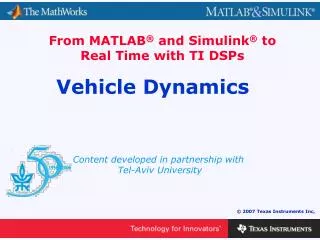
Emergency Vehicle OperationsUnit VITheory and Principals ofVehicle Dynamics
Unit VI Objectives • The EVO will be able to identify reason why we crash • The EVO will be able to describe the physical forces that influence vehicle handling • The EVO will be able to identify the dynamics and physics behind large vehicle behavior and their relationship to vehicle speed and size
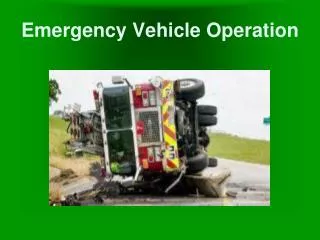
The manner in which the EV is driven to and from the emergency scene is the most important contributing factorthat affects crash avoidance. Excessive speed puts the EV driver in the position of: • Being unable to negotiate curves • Being unable to stop before hitting another vehicle • Being unable to stop before entering an intersection • Loosing control due to weight shift • Losing control due to right side wheels leaving road surface • Losing control from poor road conditions such as pot holes, speed bumps, wet, icy or snowy road surfaces
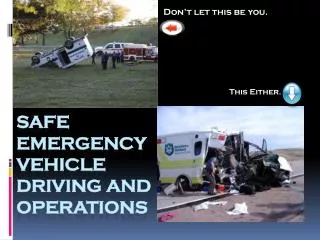
Why Do We Crash Emergency Vehicles Responding and Returning from Calls? • Drive too fast • Don’t Stop at Intersections • Don’t wear our seatbelts • Refuse to use spotters • Fail to understand the difference between these vehicles and personal automobiles
Vehicle Dynamics Let’s look at: Physical Forces Following Distances Braking Distances
Physical Forces Include: • Friction • Momentum • Inertia • Centrifugal Force IF THEY ARE EXCEEDED, CONTROL IS LOST!
Physical Forces • Always present • Understandable • Negative effects
Physical Force Function Of: • Size (mass) • Speed (velocity) • Highway Geometry • Which do you control??
Physical Forces • Inertia- Newton’s 1st • Momentum- Newton’s 2nd • Reaction-Newton’s 3rd • Friction- resistance to motion • Center of gravity • Velocity
Force • Engine = 42,000 lbs. • At 25 MPH = 47,250 lbs.. • At 55 MPH = 115,500 lbs.. • Ladder Truck= 56,000 lbs. • At 25 MPH = 63,000 lbs.. • At 55 MPH = 154,000 lbs..
EXAMPLES: • Driving too fast for weather, road, or tire conditions • Accelerating too hard • Braking inappropriately • Changing directions too abruptly KNOW THE CONDITIONS AND THE LIMITS AT WHICH TO STAY!
What is Friction? Friction is the resistance to slipping. Friction occurs whenever two surfaces rub together. Why is friction important for vehicle control?
It would be impossible to control a vehicle without friction. Friction enables the EV to stop, accelerate, and change direction.
Friction at the Brakes • The brake shoes pressing on the drums or pads clamping the disc create friction and slow the wheels. • The friction at the brake surfaces generates heat. • Heat due to excessive, hard braking creates brake fade. ( scary at best - deadly at it’s worst.)
Coefficient of Friction • Measures how slippery a road is • Dry asphalt has a value of 0.8 to 0.9 • Wet or icy roads drop to 0.2 or 0.3 • The lower the value, the longer it takes to come to a complete stop • Can’t drive the same on warm dry days as you can on cold rainy days
The Total Braking Distance = • Perception Distance • Reaction Distance • Brake Lag Distance • Braking Distance
Perception Distance - How far the vehicle travels when the need to brake occurs and the driver recognizes that need.
Reaction Distance – How far the vehicle travels as the driver reacts and applies the brake.(Perception/Reaction Distance based on 1.60 Second Reaction Time)
Brake Lag Distance – How far the vehicle travels from the time the brakes are applied and the vehicle begins to slow down.(Apparatus Equipped with Air Brakes –Air Lag Distance Based on 0.5 Seconds)
Braking Distance – How far the vehicle travels from the brakes starting to slow the vehicle and the vehicle coming to a complete stop.
Total Distance The total distance includes • Perception Distance • Reaction Distance • Brake Lag Distance • Braking Distance
Vehicle weight and speed affect stopping distance. The speed being equal, it will take a large tanker longer to stop than most pumpers.
2003 Seagrave Pumper w/Anti-Lock Air Brakes GVW 36,900 lbs. Reaction Time: 1.6 Seconds Air Lag Time: 0.5 Seconds This information obtained from: Stephen A. Coulon Fire Service Instructor, Collision Reconstruction Specialist, Adjunct Instructor N.Y. City Fire Department 181 Quinnipiac Ave North Haven, CT 06473 203-773-9829.
Emergency Vehicle Operations Stopping Distance • Perception Distance • Reaction Distance • Braking Distance • Speed, Weight, Road Surface • 60 MPH = 88ft/sec • 30 MPH = 44 ft/sec • Variables
What Happens to this Distance if the Coefficient of Friction drops from 0.8 to 0.2 because of ice?
AIR BRAKES Air brakes have many common applications in vehicles today. They can be found on school busses, dump trucks, fire trucks and most any vehicle over 15.000 pounds. Let’s first cover some basic terminology.
AIR BRAKES Air compressor and governor The air compressor pumps air into the storage tanks (reservoirs) this compressor can be driven by gears or most common a V-belt The governor controls the pressure going to the storage tanks. When the air pressure reaches 130 psi depending on the system requirements the governor will shut the compressor off until a pressure loss is detected.
AIR BRAKES Air storage tanks Storage tanks will hold enough air to allow the brakes to be used in the event the compressor stops working
AIR BRAKES Safety valve A safety relief valve is installed in the first air tank (quick build up tank) this protects the braking system from over pressuring. This safety valve in most vehicles will pop off at 150 psi, then reset itself.
AIR BRAKES Drain valve The tank drain valve, when opened, will allow any moisture or water to be drained from the air tank at its lowest point. This valve should be opened at least once a week for 2 to 3 seconds then closed.
AIR BRAKES Brake drums, shoes, and linings. Brake drums are located at the end of each axle and the wheels are bolted to the drums. The brake shoes and linings are located inside the drums and push against the inside of the drum to provide friction needed for stopping.
AIR BRAKES Air chamber Holds the parking brake spring and applies pressure to a piston that will push on the s-cam. This will put pressure on the slack adjuster then to the brake pads. Rear air chambers Front air chamber
AIR BRAKES Air supply gauge All air-braked vehicles have an air supply pressure gauge. This gauge allows the driver to see the pressure in the system at all times. This is also used to check for air leaks when the system is off.
AIR BRAKES Low pressure warning buzzer. This warning device will give the driver an audible warning in the event the system air pressure falls to the danger zone. In most fire trucks this alarm will sound at 60 < psi. Should this buzzer sound when the vehicle is in motion locate a safe location to pull the vehicle to a stop and check the system for damage.
AIR BRAKE INSPECTION NFPA 1915-10-3 3.12 THROUGH 3.12.10.10 The breaking system shall be inspected and maintained in accordance with the manufacture’s service recommendations . If no service recommendation exist the shortest interval recommendation by the braking system manufacture, based on time or mileage, shall be adhered to.
AIR BRAKE INSPECTION The braking system should be inspected at least once a week. Many full time fire departments require there emergency vehicles to be checked at the start of each shift. In the volunteer sector emergency response vehicles should be inspected at least once a week. The most important point to remember is to document each inspection and keep the records for not less than 5 years.
AIR BRAKE INSPECTION Wet dry switch (valve) This switch (valve) will reduce the braking capacity of the front wheels to about 50% of normal. This will help to control the vehicle on wet or icy roads. This switch should be in normal mode on dry roads.
AIR BRAKE INSPECTION The entire braking system should be inspected by an ASE certified mechanic once a year or every 3000 miles. There are some simple test that should be completed during all in-house inspections.
AIR BRAKE INSPECTION AIR LEAK-DOWN RATE NFPA 1915-10-3.12.10.9 With a fully-charged air system (typically 125 psi) turn the engine off and the wheels chocked and the barking brake off. Note the pressure and the time. For single system, unit there should not be more than a 3 psi drop in one minute. If the pressure drop is more than 3 psi the system should be inspected for damage or leaks.
AIR BRAKE INSPECTION PARKING BRAKE TEST PROCEDURE. With the system air pressure in the normal operating range and the driver in the vehicle with seatbelt on and the shifter in natural; the parking brake off, allow the vehicle to roll forward. Apply the parking brake and the vehicle should come to a rapid stop and prevent vehicle movement.
AIR BRAKE INSPECTION Compressor system The compressor system should also be inspected for safe operation. Areas to be inspected will be the drive belt, hose fittings, and mounting brackets. It should also be noted in the vehicle inspection form the pressure that the low air warning alarm starts and stops.
BRAKING TECHNIQUES Air brakes and steep grades (Hills) If you were faced with a 6% grade that went for a total distance of 6 miles and if you did not use any braking action during your decent. With a vehicle with a GVW (gorse vehicle weight) of 38,000 pounds your speed would climb to 238 mph this is called terminal velocity. Therefore we must learn how to brake on hills.
AIR BRAKE OPERATION Down hill braking For many years drivers of fire vehicles were taught to apply light steady brake pressure to keep vehicle speed in check during down hill braking. This method is still taught to this day however after much testing and research this theory has been proven WRONG.
AIR BRAKE OPERATION Down hill braking con’t SNUB braking is now the recommended method for downhill braking. This method works by allowing the vehicle to speed up to the desired or posted safe speed then applying the brakes and slowing the vehicle down 5 to 10 mph below the posted speed. Then allowing the speed to pick up and the process is repeated.
AIR BRAKE OPERATION Down hill braking con’t By applying the brakes in this method there is time to allow the brakes and the brake drums to cool to help control heat buildup as well as to reduce the chance of brake fade .
AIR BRAKE OPERATION Applying the parking brake. Whenever you bring the vehicle to a total stop with the transmission in neutral, you must set the brake. If you are on an incline, turn the steer wheels towards the curb on a decline. On an incline the wheels should be turned away from the curb.
Key points to remember 1. Inspect vehicle brake systems not less than once a week. 2. Document each inspection and keep records for 5 years. 3. Have brake systems inspected by an ASE certified mechanic every 3000 miles or once a year. 4. Insure a good driver training program is in place and train all new drivers on air brake systems.