Download
1 / 12
120 likes | 184 Views
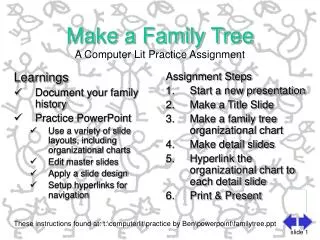
Learn how to document your family history using PowerPoint. Practice with various slide layouts, organizational charts, and hyperlinks. Create a family tree and detail slides. Print and present your masterpiece. Follow assignment steps for a Computer Literacy practice.

E N D
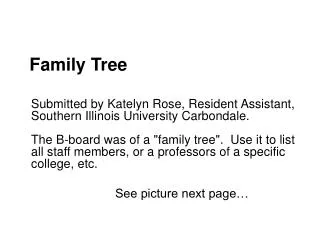
Learnings Document your family history Practice PowerPoint Use a variety of slide layouts, including organizational charts Edit master slides Apply a slide design Setup hyperlinks for navigation Assignment Steps Start a new presentation Make a Title Slide Make a family tree organizational chart Make detail slides Hyperlink the organizational chart to each detail slide Print & Present Make a Family TreeA Computer Lit Practice Assignment These instructions found at: t:\computerlit\practice by Ben\powerpoint\familytree.ppt
Step 1:Start PowerPoint • Start PowerPoint • Go File: New and choose an attractive presentation design template • Choose Create a new presentation using … Design Template • must work well with your family tree information - see the example slides in this handout for sample information • Save your design to your My Documents directory. Save and save again as you work!
Step 2:Make a title slide Make a title slide that includes: The [your last name] Family Tree[date][Computer Literacy] Example slide
Example slide 1 The McLuckie Family Tree May 6, 2002 Computer Literacy
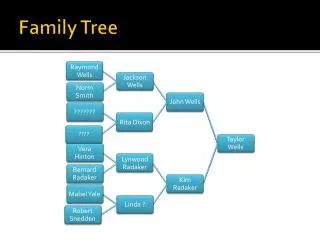
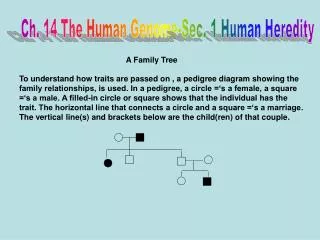
Step 3:Make a family tree • Use the organizational chart layout to make a family tree slide • Go Insert: New Slide, then Auto Layout: Organizational Chart • Make a box for each family member • Use connecting lines to show family relationships • A completed branch of a family tree includes: • Yourself • brothers & sisters • parents • one set of grandparents • (optional) uncles and aunts • (optional) cousins • See the next slide for the basic layout Example slide
Step 3b:Family Tree Layout Start with this basic layout, then add others as you need
Example slide 2 McLuckie Family Tree
Step 4:Make detail slides • Format a slide that lists the following information: • Full Name _____________________ • Born _____________________ • Where _____________________ • Status _____________________ • Occupation _____________________ • (optional) Add more information, such as Tlingit name, etc. • Make enough copies of the slide for each family member. To copy slides, go to the slide sorter, click on the member slide, then click and hold CONTROL + SHIFT + D for each copy. • Complete all detail slides by adding your data. You can get more genealogy information at: • http://www.ancestory.com • http://www.geneology.com • (optional) Add a picture to each slide. You will need to come to the open lab where I can assist you. Example slide
Example slide 3 Jordan McLuckie Full Name: Jordan Maricel Isaac McLuckie Born: September 19, 1997 Where: Juneau, Alaska Status: single Occupation: student at Hoonah Elementary School
Step 5:Hyperlink the slides • Hyperlink the organizational chart to the detail slide for each member • Draw a rectangle over the family member in the organizational chart • It is easiest to draw from the Drawing toolbar. • Right-mouse click and go Insert: Hyperlink -> Place in this document and link to their detailed slide. • Right-mouse click and go Format Autoshape and change the fill to “none” and the Line to “none” Click on Jordan for a sample hyperlink • From the Master Slide view, add navigation buttons for previous slide, next slide, and home (links to organizational chart)
Step 6:Print & Present • Save your presentation one last time to My Documents using the filename familytree • Go View: Header and Footer, Handouts tab and add your name as the header • Print handouts at 6 to a page • (Later) Present your masterpiece to class.
Grading Rubric • Saved your presentation to My Documents using the filename familytree.ppt • Printed handouts at 6 to a page with your name as a header • Family tree documented for one side of your nuclear family including your grandparents. • Used the following PowerPoint techniques: • Applied the organizational chart slide layout • Edited master slides • Applied a slide design • Set up hyperlinks for navigation • Inserted clip art, pictures and other visual objects fg