How to Get More Results Out of Your essential yoga books
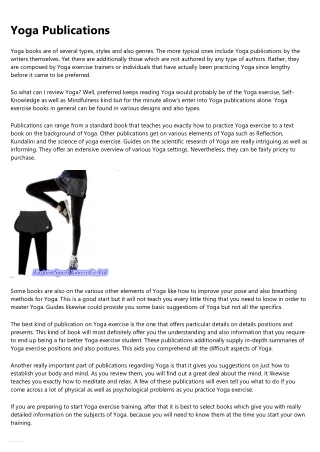
<h1>Buying Top Quality Yoga Exercise Books</h1> <p>Yoga publications usually are available in several styles and also classifications. There are the systematic publications, which tell you about the asanas and also the proper placement suggestions yet are rather dry and also dull. Then there are the yoga books which, though perhaps not as interesting as the other design, are much more insightful.</p> <p> </p> <p>Yet the books that are most practical to a trainee is none. One of the most valuable books are guides that offer the student pointers as well as techniques on how to move and also practice the presents correctly. If you can find such a publication, after that I would certainly claim you have actually discovered your best friend. They may not be yoga exercise publications. However, they can be fantastic overviews in the learning process of any type of type of yoga or any other yoga workout.</p> <p> </p> <p>Yoga exercise books can be found in different layouts. Some are in fact yoga exercise publications for beginners that advise the student how to do a present effectively. Others are publications that concentrate a lot more on finding out how to do a particular stance for details illness. These books are extremely practical to people who have particular disorders or injuries. Some are just plain publications concerning yoga.</p> <p> </p> <p>Some yoga publications have plenty of images that assist the viewers much better comprehend the positions. Others have brief text descriptions of the yoga presents or what to do if you are having a trouble with one. If you are brand-new to yoga, after that some of guides are better than others. The beginner publications are especially helpful, as they are basic to comprehend and can be done by anyone.</p> <p> </p> <p>Publications concerning yoga are additionally separated into various sections. There are publications which are targeted at the specialist as well as advanced professionals. These books instruct the yoga practitioner exactly how to perform the various postures in the best way so that he or she can feel much better. They likewise inform the specialist practitioner exactly how to make the posture and also stances extra difficult and effective.</p> <p> </p> <p>There are additionally books regarding basic yoga which are aimed at individuals that have no expertise regarding yoga exercise. These publications are designed as basic guides to the topic. as well as are indicated to be utilized as a basic reference by nonprofessionals, pupils and also also experts, especially students that have not yet chose whether they wish to take place to a much deeper level of yoga technique.</p> <p> </p> <p>Yoga books have come up in various costs as well as out there. They are generally priced according to the content of guide and also some may cost more than guides which concentrate on the advanced expert's publications.</p> <p> </p> <p>The very best method to locate books that fit your budget plan is to check out the web. There are many publications that are readily available online and also you can discover them by inputting the key words "yoga exercise books" into the internet search engine. You will certainly be swamped with books that are valued well within your budget plan.</p> <p> </p> <p>One of the best advantages of acquiring yoga exercise books is that you can take your time and also decide which ones are really worth purchasing. You may not obtain whatever you are searching for at a single store. So acquiring online aids you conserve money as well as the time too. This way, you can get publications according to your demands as well as make certain you are not wasting time by browsing through numerous web pages of books.</p> <p> </p> <p>Books on yoga exercise are always composed with high quality material. Also if you get the least expensive yoga books, they are still bound to provide you great details and aid you in your technique.</p> <p> </p> <p>If you are still unsure regarding whether to purchase one, after that you can always check out some cost-free ones before deciding. and see whether it is a great concept or otherwise. If you find that they are not really useful, then you can merely return them as well as obtain more ones completely free. in the future.</p> <p> </p> <p>There are lots of on the internet shops where you can buy yoga exercise publications for free or for a tiny price. so you can compare what they need to use as well as additionally inspect their delivery and returns plans prior to purchasing. Some online shops are likewise members of organizations such as the American Library Organization, which guarantees that guides which are received by you remain in good problem.</p> <h1>Acquiring Your First Yoga Exercise Schedule</h1> <p>Books on yoga exercise are a crucial enhancement to anyone's collection. There are literally thousands of enjoyable, informative, and motivational publications on yoga. From the a lot more mystical aspects of yoga exercise to the useful side of yoga exercise and health and fitness, books are plentiful on the numerous various facets of yoga exercise.</p> <p> </p> <p>Yoga publications on the market can be acquired in publication shops, specialty shops, online, and from self-publishing firms. The advantage of these publications is that they supply information in a style that's less complicated to find out. You do not need to go via a long process of finding out the different yoga positions as well as positions. These books offer you succinct, easy to understand guidelines.</p> <p> </p> <p>Yoga publications on the net to offer a good deal of information that isn't available in normal books. When you search for yoga publications on-line, see to it to look for books that provide you a good deal of info on how to include yoga exercise into your day-to-day live as well as exactly how it can profit your physical, psychological, psychological, as well as spiritual health and wellness.</p> <p> </p> <p>The other benefit of these publications is the cost. Most publications on yoga exercise expense around $20 or much less, although publications on different areas of yoga exercise such as shiatsu, yoga, tai chi, and so on</p> <p> </p> <p>. For a much more inexpensive option you can check out an on-line yoga exercise shop. There are numerous on-line shops where you can get yoga exercise publications and also various other yoga products for a really affordable. If you don't mind paying a little bit extra, there are likewise shops that supply yoga exercise courses online. This way you can get one of the most for your money by buying yoga exercise devices from a shop that's located in your area.</p> <p> </p> <p>Beginning your very own on-line yoga store is a great means to begin your very own company. If you offer various other products at your online store after that you're possibly interested in marketing yoga exercise things as well. If you want to make more cash with your on-line shop then you might wish to consider offering your clients price cuts or other incentives for purchasing from you.</p> <p> </p> <p>Another advantage of the yoga exercise publications available online is the wide variety of information you can access from them. If you have no prior knowledge at all in yoga, you can check out guides to find out whatever you might ever wish to know concerning yoga. If you're a trainee of yoga exercise, then you can check out the various settings, stances, poses, and the different reflection techniques to raise your level of focus, leisure.</p> <p> </p> <p>There's no requirement to invest money and time in going through several publications simply to find out just how to execute a couple of yoga placements. Yoga exercise books are a wonderful way to begin discovering exactly how to do yoga right now.</p> <p> </p> <p>Before you purchase any type of publications you should make certain that you check out a couple of reviews prior to buying. Publications generally come with a number of reviews and this is excellent due to the fact that it lets you see what other individuals think of the item. You'll have the ability to read viewpoints from both the pros and cons prior to you purchase, so you don't need to take any person's word for it.</p> <p> </p> <p>Something that I truly like regarding yoga books is that they include CDs that you can make use of as an instructional tool. when practicing your yoga exercise placements. You'll locate that these books have great deals of information as well as you can download a few of it onto your computer system.</p> <p> </p> <p>Among the most effective aspects of these books is that you can pay attention to sound when you're doing your yoga exercise presents. which will certainly aid you to relax. loosen up as well as get more involved in your yoga practice. Along with paying attention to the audio, you can additionally download and install some video tutorials of your yoga postures and read a few of the information in them.</p> <p> </p> <p>There are numerous advantages to purchasing your yoga books on-line. You can save money, yet you do not need to worry about losing useful time reading through publications. You can read the entire publication in a day or 2, or you can check out as long as you need. With yoga exercise publications on the internet you can get to the details you require to do yoga exercise from the comfort of your own residence.</p> <h1>Yoga Books</h1> <p>So what can you review, as a Yogi naturally, however as for Yoga exercise publications go, of course the best ones are of the Yoga, Self-Realization and Mindfulness selection but for today we are only going to talk about Yoga exercise publications. Yoga publications generally array from the basic Yoga exercise DVD courses to the most up to date and also biggest Yoga videos to the more specialized Yoga books that instruct much more than the fundamental Yoga exercise training courses.</p> <p> </p> <p>A basic newbie class can easily be taught via a Yoga exercise publication or on video clip as well as you will locate that there are lots of publications available to show you the fundamentals as well as just how to move from there. You can find out more concerning the different poses and also postures by reviewing an initial Yoga exercise publication. One of the most basic of yoga exercise books will typically consist of the basic yoga exercise postures like the Half-Tilt, the Half-Spinal Spin and the Half-Crimp which are straightforward, easy to find out, basic yoga settings that anyone can do.</p> <p> </p> <p>If you are looking for something advanced after that you will certainly wish to go to the Yoga DVDs as well as view them too. Yoga exercise DVDs include advanced settings like the Warrior II, the Warrior Ira, as well as the Warrior III. There are additionally DVDs that show you the basics and after that provide you a more advanced variation of it, so make certain to check out the Yoga exercise DVDs. If you are actually severe regarding exercising yoga exercise then you ought to take into consideration getting some professional help from a person who focuses on Yoga exercise. It is easier for you to grasp yoga as it gets easier with more technique.</p> <p> </p> <p>There are a couple of manner ins which you can locate Yoga exercise DVDs. One method is to head to your public library and also browse the yoga publications area. The library does have several yoga exercise publications that you may not find anywhere else. The various other way is to check out the net as well as go online to locate one of the most approximately day Yoga exercise DVDs offered on the marketplace right now.</p> <p> </p> <p>When you get on the web, check out the Yoga exercise DVD testimonials and see which ones are one of the most prominent. Once you locate a few of the more popular ones, seek reviews on guides and see which ones have the highest possible rankings. Go through those evaluations and determine which ones are the best and begin acquiring them from there.</p> <p> </p> <p>The benefit of purchasing Yoga DVDs is that you can try them out as well as get more of a suggestion of what Yoga is really like and also what your body needs to say when doing certain postures. You can actually get a concept of the different sorts of postures that you want to experiment with as well as if you recognized a bit regarding yoga exercise as well as body position.</p> <p> </p> <p>You will certainly additionally get access to other info on Yoga when you get Yoga exercise video clips. This can aid you obtain understanding right into the different techniques of doing Yoga exercise and also it gives you the opportunity to broaden your expertise on Yoga exercise if you wanted to. The video clips can give you an insight right into how to practice various positions without really being at the studio so that you can begin exercising them in the house and afterwards if you seem like you have the hang of them after that you can move onto the genuine point.</p> <p> </p> <p>If you are serious concerning learning just how to meditate as well as concentrate your mind as well as become aware of your ideas and also emphasis, then you require to check into purchasing a Yoga video that educates you the principles of this. This is just one of the devices that you will need to aid you come to be a far better person.</p>
97 views • 4 slides