Download
1 / 50
551 likes | 854 Views
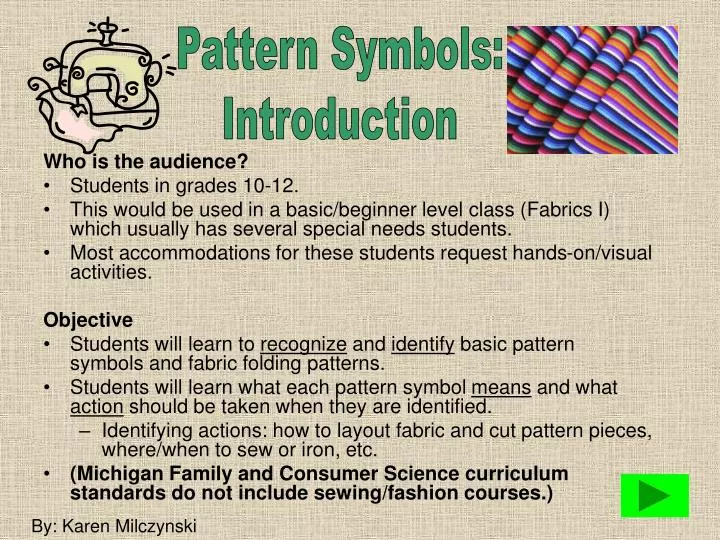
Pattern Symbols: Introduction. Who is the audience? Students in grades 10-12. This would be used in a basic/beginner level class (Fabrics I) which usually has several special needs students. Most accommodations for these students request hands-on/visual activities. Objective

E N D
Pattern Symbols: Introduction Who is the audience? • Students in grades 10-12. • This would be used in a basic/beginner level class (Fabrics I) which usually has several special needs students. • Most accommodations for these students request hands-on/visual activities. Objective • Students will learn to recognize and identify basic pattern symbols and fabric folding patterns. • Students will learn what each pattern symbol means and what action should be taken when they are identified. • Identifying actions: how to layout fabric and cut pattern pieces, where/when to sew or iron, etc. • (Michigan Family and Consumer Science curriculum standards do not include sewing/fashion courses.) By: Karen Milczynski
PATTERN SYMBOLS Pattern Symbols provide a great deal of sewing information.Most symbols will tell you the following information: - how to adjust your pattern to make it fit- how to sew pattern pieces together- how to sew on embellishments or details- how to lay your pattern on the fabric before cutting it
Begin with Part 1 below and explore the various symbols: Part 2: Pattern Symbols for Sewing Part 1: Pattern Layout & Cutting Symbols Coming soon!
Pattern Layout/Cutting Symbols:Explore each symbol below... Folds Notches Grainlines
Folds Before placing your pattern pieces onto your fabric to pin and cut out, there are many ways you can consider folding your fabric first. Most patterns indicate precisely how you should fold your fabric and lay out your pattern pieces based on how many yards of the fabric you purchased, the WIDTH of the fabric you purchased, and the style of the garment you are making. Why fold my fabric? - Because many patterns require you to cut 2 of the same pattern piece…By placing the pattern on top of 2 layers of fabric, you only have to cut once to get 2 pieces – what a time saver! - Certain pattern pieces need to be cut with symmetrical balance.Sort of like a butterfly… Still not sure what SYMMETRICAL means? Click on the butterfly.
Symmetry SYMMETRY or SYMMETRICAL DESIGNS occur when balance is seen in perfectly centered objects with a mirror image to the left and right of the center point. In other word, symmetry occurs in something that has a center point and all parts to the left and right of that center point match identically (or almost identically). A symmetrical object is considered to be balanced; like equal weight distribution on a scale. SYMMETRY
Fold It’s important to remember that when you cut a pattern on the FOLD, the symmetrical image of the pattern will occur when the piece is opened up. For example, the FRONT pattern piece 8A (LEFT) will look like the fabric piece on the RIGHT once it is cut out and unfolded (opened up.)
Folds ! Important ! * NEVER cut across the edge of the FOLD arrow. * NO! * Cutting across the folded edge will ruin the symmetrical shape. Instead of 1 symmetrical piece, you will have 2 separate pieces of fabric.
Folds Before placing your pattern pieces onto your fabric to pin and cut out, there are several ways you can consider folding your fabric first. Let’s learn the basics first… There are 2 MAIN fabric fold layouts. 1. Lengthwise Fold 2. Crosswise Fold
Folds 1. Lengthwise Fold Fabric on the bolt… Note: This is the most common fold that patterns will suggest.Remember, the cut/raw edges won’t likely match up – just line up the selvages and you’re okay.
Folds 2. Crosswise Fold Note: When matching the cut/raw edges together, remember that they will not likely match up perfectly. This is okay - just match the selvages at the top and bottom!
Folds * OH NO! The pattern piece below has been placed on the fold and pinned. It is now ready to be cut out, but the cut/raw edges aren’t even. What should we do? Unpin the pattern and refold the fabric so that the cut/raw edges match up. Ignore the selvages edges. A Begin cutting around the pattern - EXCEPT the folded edge. As long as the selvages are lined up it’s okay. The raw edges don’t have to line up. B
Niiiiiiiiiiiice! As long as the selvages are lined up at the top, it’s OKAY if the raw/cut edges are not!
Oops! Review Try again
Folds What type of fold is this? Lengthwise or Crosswise... Click below for the answer. If you said LENGTHWISE GRAIN, you’re right!!!
Folds What type of fold is this? Lengthwise or Crosswise... Click below for the answer. If you said CROSSWISE GRAIN, you’re right!!!
Folds * Special Folds: Double Fold
Folds QUIZ Which pattern piece below must be placed on the FOLD? Nope, try again Nope, try again YESSS! Nope, try again
Folds QUIZ At the store, most fabric comes off a bolt on the ____________ fold. A Lengthwise Crosswise B
Niiiiiiiiiiiice! Lengthwise
Oops! Review Try again
Folds QUIZ The fabric layout shown here is on the ___________ fold. A Lengthwise Crosswise B
Faaaantastic! Crosswise
Oops! Review Try again
Folds QUIZ The fabric layout shown here is on the ___________. A Lengthwise Fold Crosswise Fold B C Lengthwise Double Fold D Crosswise Double Fold
Good job! Now it’s time to learn about NOTCHES… Are you ready?
Oops! Review Try again
Notches What are notches?
Notches Where are notches found? Notches are found on various pattern pieces. From skirts to shirts, pattern pieces have notches to show where pieces should meet when being sewn together. Notice the single, double and triple notches.
Notches Long Sleeved Collared Button Down Shirt: Examine the FRONT, BACK, and SLEEVE pattern pieces below…
Notches How to match notches: First, the notches at the top (shoulder) of the FRONT and BACK pieces would be matched and sewn (pretty sides together.) Next, the SLEEVE pattern would be matched and sewn around the curve and then down the side.
Notches Which sleeve pattern would fit correctly where the pink arrow indicates? B A C
Niiiiiiiiiiiice! The double notches on the left and the single notch on the right indicate that this is the correct positioning of the SLEEVE pattern piece!
Oops! Be sure to double check the notches! Try again! Review Try again
Putting it together: Fold & Notches Now that you know the purpose of a FOLD and how to use NOTCHES… What will the pattern piece on the left look like once it is cut on the fold?* Click here for a HINT: A B C
Niiiiiiiiiiiice! Now it’s time to learn about GRAINLINES… Are you ready?
Oops! Review Try again
Grainlines Another way of looking at the grainline arrows on your pattern pieces is to always make sure the arrows run parallel with the selvage edge. This is much like parallel lines of a parking space…
Grainlines Notice how all of the grainline arrows on the pattern pieces below are parallel to the selvage edges regardless of where the fold is. Lengthwise Fold Crosswise Fold
Grainlines Sometimes, the grainline arrow appears on a diagonal on pattern pieces. This is referred to as "cutting on the bias."
Cutting on the Bias Why is the arrow on a diagonal instead of running parallel with the pattern piece? This is actually done by intent when creating a garment that requires a little give in the fabric or a flowy appearance like the skirt seen here.
Cutting on the Bias All of these garments below were cut on the bias to provide a well fitted/flowy look.
Grainlines QUIZ If I were to lay the following pattern piece on the yellow highlighted area, which direction would it be placed? Choose the correct pattern direction: A B C
Precisely! Notice how both of the grainline arrows on the pattern pieces are parallel to the selvage edges at the top of the lengthwise fold.
Oops! Pay close attention to the grainline arrows. Try again… Review Try again
Grainlines QUIZ Of the following images below, which one has NOT been cut on the bias? D A B C
Precisely! The grainline arrow does not indicate a bias cut on this pattern piece. Therefore, this skirt is not designed to be a flowy, form fitted bias cut skirt.
Oops! Sorry, this one has been cut on the bias. Try again! Review Try again
Almost done…Time for a class activity!In your groups, label the fabric folds and pattern pieces with the terms provided. Congratulations! Need some help ? Return to beginning