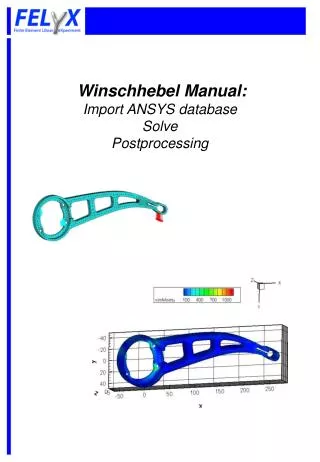
Postprocessing
Module 14. Postprocessing. Postprocessing Overview. There are many ways to review results in the general postprocessor (POST1), some of which have already been covered.

Postprocessing
E N D
Presentation Transcript
Module 14 Postprocessing
PostprocessingOverview • There are many ways to review results in the general postprocessor (POST1), some of which have already been covered. • In this chapter, we will explore two additional methods — query picking and path operations — and also introduce you to the concepts of results transformation, error estimation, and load case combination. • We will also introduce two productivity enhancement tools: • Results Viewer • Report Generator • Topics covered: A. Query PickingE. Load Case Combinations B. Results Coordinate SystemF. Results Viewer C. Path OperationsG. Report Generator D. Error EstimationH. Workshop January 30, 2001 Inventory #001441 14-2
PostprocessingA. Query Picking • Query picking allows you to “probe” the model for stresses, displacements, or other results quantities at any picked location. • You can also quickly locate the maximum and minimum values of the item being queried. • Available only through the GUI (no commands): • General Postproc > Query Results > Nodal or Element or Subgrid Solu... • Choose a results quantity and press OK PowerGraphics ON PowerGraphics OFF January 30, 2001 Inventory #001441 14-3
Postprocessing...Query Picking • Then pick any point in the model to see the results value at that point. • Min and Max will show the value at the minimum and maximum points. • Use Reset to clear all values and start over. • Notice that the entity number, its location, and the results value are also shown in the Picker. Automatically generate text annotation January 30, 2001 Inventory #001441 14-4
Postprocessing...Query Picking • Demo: • Continue from the last multi-load-step solution of rib.db • Plot SEQV for load step 1 • Query “Nodal Solu” SEQV at several locations, including MIN & MAX. (Switch to full graphics if needed.) • Switch to PowerGraphics and query “Subgrid Solu.” January 30, 2001 Inventory #001441 14-5
PostprocessingB. Results Coordinate System • All direction-dependent quantities that you view in POST1, such as component stresses, displacements, and reaction forces, are reported in the results coordinate system (RSYS). • RSYS defaults to 0 (global Cartesian). That is, POST1 transforms all results to global Cartesian by default, including results at “rotated” nodes. • But there are many situations — such as pressure vessels and spherical structures — where you need to check the results in a cylindrical, spherical, or other local coordinate system. January 30, 2001 Inventory #001441 14-6
To change the results CS to a different system, use: General Postproc > Options for Outp… or the RSYS command All subsequent contour plots, listings, query picks, etc. will report the values in that system. Default orientation RSYS,0 Local cylindrical system RSYS,11 Global cylindrical system RSYS,1 Postprocessing...Results Coordinate System January 30, 2001 Inventory #001441 14-7
Postprocessing...Results Coordinate System • RSYS,SOLU • Sets the results CS to “as-calculated.” • All subsequent contour plots, listings, query picks, etc. will report the values in the nodal and element coordinate systems. • DOF results and reaction forces will be in the nodal CS. • Stresses, strains, etc. will be in the element CS. (The orientation of the element CS depends on the element type and the ESYS attribute of the element. Most solid elements, for example, default to global Cartesian.) • Not supported by PowerGraphics. January 30, 2001 Inventory #001441 14-8
PostprocessingC. Path Operations • Another way to review results is via path operations, which allow you to: • map results data onto an arbitrary “path” through the model • perform mathematical operations along the path, including integration and differentiation • display a “path plot” — see how a result item varies along the path • Available only for models containing 2-D or 3-D solid elements or shell elements. January 30, 2001 Inventory #001441 14-9
Postprocessing...Path Operations • Three steps to produce a path plot: • Define a path • Map data onto the path • Plot the data 1. Define a Path • Requires the following information: • Points defining the path (2 to 1000). You can use existing nodes or locations on the working plane. • Path curvature, determined by the active coordinate system (CSYS). • A name for the path. January 30, 2001 Inventory #001441 14-10
Postprocessing...Path Operations 1. Define a Path (cont’d) • First activate the desired coordinate system (CSYS). • General Postproc > Path Operations > Define Path > By Nodes or On Working Plane • Pick the nodes or WP locations that form the desired path, and press OK • Choose a path name. The nSets and nDiv fields are best left to default in most cases. January 30, 2001 Inventory #001441 14-11
Postprocessing...Path Operations 2. Map Data onto Path • General Postproc > Path Operations > Map onto Path… (or PDEF command) • Choose desired quantity, such as SX. • Enter a label for the quantity, to be used on plots and listings. • You can now display the path if needed. • General Postproc > Path Operations > Plot Paths • (or issue /PBC,PATH,1 followed by NPLOT or EPLOT) January 30, 2001 Inventory #001441 14-12
Postprocessing...Path Operations 3. Plot the Data • You can plot path items either on a graph: • PLPATH or General Postproc > Path Operations > On Graph... • or along path geometry: • PLPAGM or General Postproc > Path Operations > On Geometry... January 30, 2001 Inventory #001441 14-13
Postprocessing...Path Operations • ANSYS allows you to define multiple paths, each with a unique name that you assign. Only one path can be active at a time. • Besides plots and listings, there are many other path capabilities, including: • Stress linearization — used in the pressure vessel industry to decompose stress along a path into its membrane and bending components. • Calculus functions — used in fracture mechanics to calculate J-integrals and stress concentration factors. Also useful in thermal analyses to calculate the heat lost or gained across a path. • Dot products and cross products — used widely in electromagnetics analyses to operate on vector quantities. January 30, 2001 Inventory #001441 14-14
Postprocessing...Path Operations • Demo: • Continue with rib postprocessing… • Plot nodes, then switch to CSYS,1 if desired • Define a path using nodes • Map SX or SEQV or other data onto path • Plot the path itself • Plot the path item on graph and on geometry • Define a second path elsewhere in the model and show how to toggle between the two. January 30, 2001 Inventory #001441 14-15
The finite element solution calculates stresses on a per-element basis, i.e, stresses are individually calculated in each element. When you plot nodal stress contours in POST1, however, you will see smooth contours because the stresses are averaged at the nodes. If you plot the element solution, you will see unaveraged data, which shows the discontinuity between elements. The difference between averaged and unaveraged stresses gives an indication of how “good” or how “bad” the mesh is. This is the basis for error estimation. PostprocessingD. Error Estimation savg = 1100 s = 1000 s = 1200 Elem 1 Elem 2 s = 1100 s = 1300 savg = 1200 January 30, 2001 Inventory #001441 14-16
Postprocessing...Error Estimation • Error estimation is available only in POST1 and is valid only for: • linear static structural and linear steady-state thermal analyses • solid elements (2-D and 3-D) and shell elements • Full Graphics (not PowerGraphics) If these conditions are not met, ANSYS automatically turns off error estimation calculations. • To manually activate or deactivate error estimation, use • ERNORM,ON/OFF • or General Postproc > Options for Outp... January 30, 2001 Inventory #001441 14-17
Postprocessing...Error Estimation • POST1 calculates the following error measures. • Stress analysis: • percentage error in energy norm (SEPC) • element stress deviations (SDSG) • element energy error (SERR) • maximum and minimum stress bounds (SMXB, SMNB) • Thermal analysis: • percentage error in energy norm (TEPC) • element thermal gradient deviations (TDSG) • element energy error (TERR) January 30, 2001 Inventory #001441 14-18
Postprocessing...Error Estimation Percentage error in energy norm (SEPC) • SEPC is a rough estimate of the stress error (or displacement, temperature, or thermal flux) over the entire set of selected elements. • Can be used to compare similar models of similar structures subjected to similar loadings. • SEPC is shown in the legend column of deformed shape displays. You can list it manually using PRERR or General Postproc > List Results > Percent Error. January 30, 2001 Inventory #001441 14-19
Postprocessing...Error Estimation • As a general rule of thumb, look for SEPC to be 10% or less. If it is higher, then: • Check for point loads or other stress singularities and unselect elements in the vicinity. • If it is still higher, plot the element energy error. The elements with high values of energy error are candidates for mesh refinement. SEPC = 34.5 SEPC = 10.2 January 30, 2001 Inventory #001441 14-20
Postprocessing...Error Estimation Element stress deviations (SDSG) • SDSG is a measure of the amount by which an element’s stress disagrees with the stress averages at its nodes. • You can plot SDSG contours using PLESOL,SDSG or General Postproc > Plot Results > Element Solu... • A high value of SDSG is not necessarily bad, especially if it is a small percentage of the nominal stresses in the structure. For example, this plate-with-a-hole model shows only a 1.5% stress deviation in the region of interest. SDSG at location of interest = ~450 psi, which is ~1.5% of ~30,000 psi nominal stress January 30, 2001 Inventory #001441 14-21
Postprocessing...Error Estimation Element energy error (SERR) • SERR is the energy associated with the stress mismatches at the nodes of the element. This is the basic error measure from which the other error quantities are derived. SERR has units of energy. • To plot SERR contours, issue PLESOL,SERR or General Postproc > Plot Results > Element Solu... • Generally, the elements with the highest SERR are candidates for mesh refinement. However, since SERR will always be highest at stress singularities, be sure to unselect those elements first. January 30, 2001 Inventory #001441 14-22
Postprocessing...Error Estimation Stress bounds (SMXB and SMNB) • The stress bounds can help you determine the potential effect of mesh discretization error on the maximum stress. • They are displayed on stress contour plots in the legend column as SMXB (upper bound) and SMNB (lower bound). • The bounds are not estimates of the actual maximum and minimum, but they do define a “confidence band.” Without other supporting verification, you have no basis for believing that the true maximum stress is below SMXB. January 30, 2001 Inventory #001441 14-23
Postprocessing...Error Estimation • Caution: If you don’t unselect elements near stress singularities, the stress bounds are meaningless, as shown below. SMXB = 18,102 SMXB = 4,773 January 30, 2001 Inventory #001441 14-24
Load case in database (computer memory) Load case on results file Combined load case in database overwrites previous contents PostprocessingE. Load Case Combinations • Whenever you solve multiple load steps, the results of each load step are stored as separate sets on the results file (identified by load step number). • A load case combination is an operation between two sets of results, which are called load cases. • The operation occurs between one load case in the database and the second load case on the results file. • The result of the operation — the combined load case — is stored back in the database. January 30, 2001 Inventory #001441 14-25
Postprocessing...Load Case Combinations Typical procedure: 1. Create the load cases 2. Read one load case into the database 3. Perform the desired operation January 30, 2001 Inventory #001441 14-26
Postprocessing...Load Case Combinations Create Load Cases • A load case simply acts as a pointer to a set of results. It requires two pieces of information: • a unique ID number • the results set it represents (load step and substep number) • Use the LCDEF command or General Postproc > Load Case > Create Load Case January 30, 2001 Inventory #001441 14-27
Postprocessing...Load Case Combinations Read One Load Case into the Database (memory) • Simply identify the results set by its load case number using LCASE or General Postproc > Load Case > Read Load Case. • Or use one of the standard “Read Results” choices in the postprocessor (SET command). January 30, 2001 Inventory #001441 14-28
Postprocessing...Load Case Combinations Perform the Desired Operation • Many operations are available as shown in the menu here. • Use the LCOPER command or General Postproc > Load Case > Add, Subtract, etc. • Remember that the results of the operation are stored in the database (memory). The combined load case is identified on plots and listings as number 9999. January 30, 2001 Inventory #001441 14-29
Postprocessing...Load Case Combinations • There are two useful options to save the combined load case: • Write a load case file • Append the load case to the results file • Writing a load case file (LCWRITE or General Postproc > Write Results) creates a file that is similar to, but much smaller than the results file. • The Append option (RAPPND or General Postproc > Load Case > Write Load Case) allows you to add the combined load case to the results file and identify it with a given load step number and time value. January 30, 2001 Inventory #001441 14-30
PostprocessingF. Results Viewer • The Results Viewer is a specialized postprocessing menu and graphic system. • Fast graphics for large models or models that have many time steps • Easy to use menu system for quick results viewing January 30, 2001 Inventory #001441 14-31
Hold CTRL key for multiple selection Postprocessing… Results Viewer • Can be created two different ways … • Use the POUTRES command before solving to write a jobname.pgr file during solution. • Solution > Output Cntrls > PGR file… January 30, 2001 Inventory #001441 14-32
Postprocessing… Results Viewer • Use the PGWRITE command after solution to write a jobname.pgr file. • General Postproc > Write PGR File… January 30, 2001 Inventory #001441 14-33
Postprocessing… Results Viewer • Open the Results Viewer from the General Post Processor. January 30, 2001 Inventory #001441 14-34
Postprocessing... Results Viewer Nodal/element/vector/trace results plots Query Results Element Plot Animate using PNG files List Results Capture/print image Results Set Locator January 30, 2001 Inventory #001441 14-35
The graphics window becomes “Context Sensitive”. Right Click on Model Postprocessing... Results Viewer Context-sensitive graphics window January 30, 2001 Inventory #001441 14-36
Postprocessing... Results Viewer Context-sensitive graphics window Right Click on Contour Legend January 30, 2001 Inventory #001441 14-37
Postprocessing... Results Viewer Context-sensitive graphics window Right Click on Contour Bar January 30, 2001 Inventory #001441 14-38
A time consuming part of any analysis is documenting the model and results. This procedure has been partially automated through the implementation of the ANSYS Report Generator. The Report Generator allows the user to quickly capture pictures, listings, tables, and other pertinent information. It also facilitates the creation of an HTML formatted file ready to be distributed to colleagues or posted to a web site. PostprocessingG. Report Generator January 30, 2001 Inventory #001441 14-39
Launching the Report Generator will shrink the graphics window and set the background to white. The “Capture Tool” will be opened allowing the user to grab plots, listings, and tables. Utility Menu> File> Report Generator… or ~eui,’euidl::report::toolbar::create’ Postprocessing… Report Generator Capture Tool January 30, 2001 Inventory #001441 14-40
Capture Tool Postprocessing… Report Generator Table Capture Animation Capture (multiple PNG files) Image Capture (single PNG file) Settings The Log File records all captures! HTML Report Assembler Listing Capture January 30, 2001 Inventory #001441 14-41
Postprocessing… Report Generator HTML Assembler . . . • A tool that allows quick organization of ANSYS graphics, tables, listings . • Log file can be used as an HTML template. • utilize parameter substitution • The generated HTML file can be used with Netscape Composer, Microsoft FrontPage, or any other HTML editor to finalize the report. January 30, 2001 Inventory #001441 14-42
Postprocessing… Report Generator • Insert TEXT • Insert any HTML FILE • possibly created outside ANSYS • Insert an IMAGE • possibly one from an external source like a digital photo • Insert DYNAMIC DATA • information specific to your current ANSYS run like version, run time, etc. • Insert a Report Heading • Including your name, analysis title, date, and company name January 30, 2001 Inventory #001441 14-43
Postprocessing… Report Generator • Insert information grabbed using the Capture Tool • Report Images • Contour plots, element plots, volume plots, graphs • Report Tables • Material properties, reaction forces, etc. • Report Lists • Stress along a path, constraints, etc. January 30, 2001 Inventory #001441 14-44
Postprocessing… Report Generator • Preview the report • Delete sections of the report • Move sections of the report up or down January 30, 2001 Inventory #001441 14-45
Postprocessing… Report Generator Dynamic Data January 30, 2001 Inventory #001441 14-46
PostprocessingH. Workshop • This workshop consists of five exercises: W12A. Connecting Rod W12B. Spherical Shell W12C. Axisymmetric Fin with Multiple Load Steps W12D. Results Viewer W12E. Report Generator Refer to your Workshop Supplement for instructions. January 30, 2001 Inventory #001441 14-47