Download
1 / 13
140 likes | 167 Views
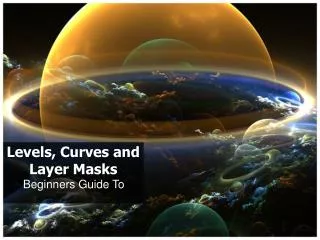
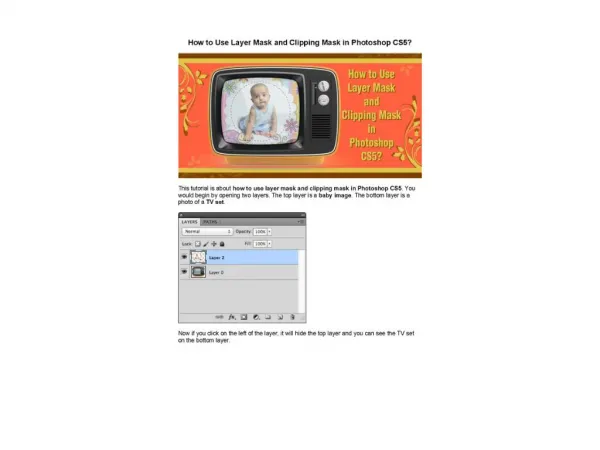
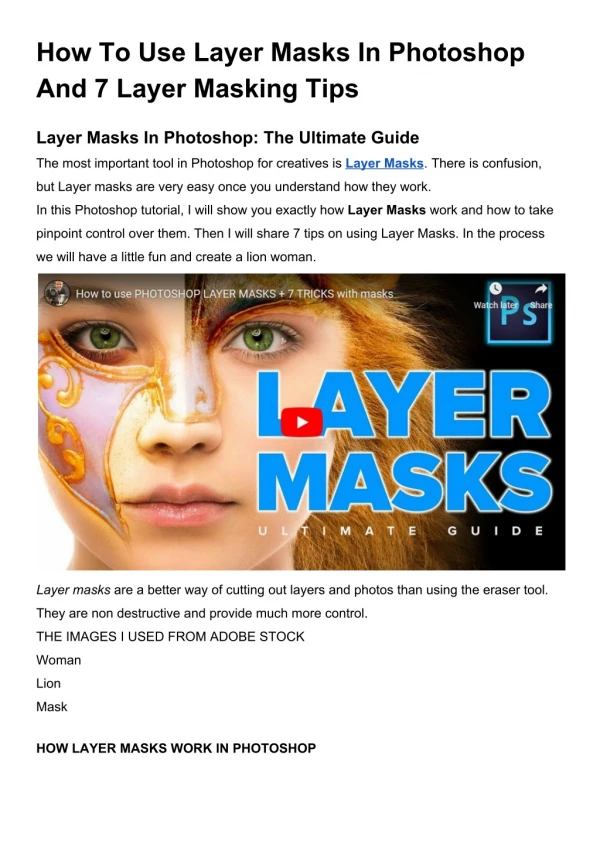
The most important tool in Photoshop for creatives is Layer Masks. There is confusion, but Layer masks are very easy once you understand how they work.<br>In this Photoshop tutorial, I will show you exactly how Layer Masks work and how to take pinpoint control over them. Then I will share 7 tips on using Layer Masks. In the process we will have a little fun and create a lion woman. http://bit.ly/30kSPaa

E N D
How To Use Layer Masks In Photoshop And 7 Layer Masking Tips Layer Masks In Photoshop: The Ultimate Guide The most important tool in Photoshop for creatives is Layer Masks. There is confusion, but Layer masks are very easy once you understand how they work. In this Photoshop tutorial, I will show you exactly how Layer Masks work and how to take pinpoint control over them. Then I will share 7 tips on using Layer Masks. In the process we will have a little fun and create a lion woman. Layer masks are a better way of cutting out layers and photos than using the eraser tool. They are non destructive and provide much more control. THE IMAGES I USED FROM ADOBE STOCK Woman Lion Mask HOW LAYER MASKS WORK IN PHOTOSHOP
Once you create a layer mask, it is white. White has no effect on the layer, painting with black will reveal the underlying layer. To mask a layer, select it and then click the Layer mask button at the bottom of the Layers panel. Note: You can’t apply a layer mask to a background. You need to unlock it first by clicking the padlock icon on the background in the layers panel. Once you have a layer mask, you will notice it is white. This has no effect on the layer. Choose the mask and paint on the image with a black brush, you will notice it hides the layer and you can paint it away. This is better than the eraser, because of you paint with white, the layer will come back.
Different shades of gray will produce corresponding opacity; 100% white is 100% opaque. 0% white (Black) is 0 opacity, and thus fully transparent. 50% gray would yield a result of 50% opaque. 25% gray would be 25% opaque etc. Watch the video above to see why I use the gray color, rather than the obvious transparency slider on a black brush. MASKING LAYERS IN PHOTOSHOP TO MAKE A LION WOMAN COMPOSITE. Here I am using the layer mask to punch out holes for the eyes to show through in the layer underneath. Just paint with a black brush, make sure the layer mask is selected.
If I hide the layer of the woman (click the eye icon next to the layer) You can now see the lions face showing through. Let’s hide the top layer for now and work on blending the woman face with the lions (Link at top of the page to find these images) Choose the layer mask next to the woman’s face. Press the D key, to reset the colors to black and white
Choose the gradient tool, set it to foreground to background. Linear, mode normal and transparency to 100. Click and drag the gradient through the image. You will see a blend. (If you are lost, look at the video, this text is best as a reference). Now, try dragging the gradient in the opposite direction. Completely different result. I’d like to keep
the gradient, but remove the lion for the eye area and just have the woman eyes showing nice and clean. Guess how we do it? Yes. We paint with a white brush to bring back the layer we are working on. (Black hides the layer and lets what’s underneath show through. White shows our layer and hides the layers beneath). Here is what it looks like when we have finished painting the eyes back. Let’s [aint more and show more of the lion and hide
the background. And the other side, Obviously this is too much and needs to be refined a bit. One of the things you will also notice is that it's a bit rough around the neck. Let’s use selections to help. Tip 1: Shift+Click on the layer mask to hide it.
Shift+Click on the mask once again to turn it back on. Now we will use the selection as a guide for better mask painting. With the mask selected and a white brush, paint inside the neck and chin area to paint away some of the lion fur. Select>Inverse to swap the selection to the outside of the face. Use a black brush and run around the edges of the neck to make a nice tight masking job and fill in the little holes. Tip #2 View just the the mask on canvas. Press The
Alt/Option key and click on the layer mask to see it on the document. Alt/Option click on it again to bring it back, Tip #3 View the mask overlay on canvas. Press the backslash key \ to toggle mask overlay Tip #4 Feather the mask. The edge of the neck and cheeks is too hard and abrupt, let’s soften it.
In the properties panel, move the Feather slider up just a little bit. You will see it softens the edge. (We used to do this by adding a Gaussian blur to the mask, which you can still do if you want to soften it in some areas only). Tip #5 Invert the mask. Choose the Invert button for the Properties panel, or select the mask and press Cmd/Ctrl+I to invert or swap the mask. Tip #5 Use Blending modes Let’s turn our top layer back on. It’s hiding everything. It’s really easy to bled everything in using blending modes. Choose the top layer. In the layers panel, where it says normal, click and change it to overlay.
Oh my! Look at that! We barely had to do anything and Layer Blending magic is hard at work.See a tutorial on Layer Blending modes here Grab my free Blending Modes ebook here, (if you are already subscribed to the mailing list, don’t sign up for the book because I include the link in the newsletters).
Grab a black brush and paint away the areas of the mask that you want to hide. Obviously this isn’t final art, the top mask needs to be nudged to the left a transformed a little. But this is a great starting place for you to continue playing around! Thanks for checking it out