Download
1 / 22
230 likes | 892 Views
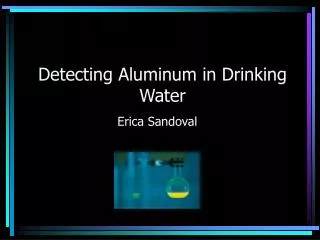
AquaGlo Water Detector Kit For Detecting Water in Jet Fuel. Step by Step Operation September, 2008. Design. The AquaGlo is designed to detect 1-12 ppm of water in jet fuel/kerosene to ASTM D3240

E N D
AquaGloWater Detector KitFor Detecting Water in Jet Fuel Step by Step Operation September, 2008
Design • The AquaGlo is designed to detect 1-12 ppm of water in jet fuel/kerosene to ASTM D3240 • It can be used for up to 5-60 ppm by reducing the sample size proportionately (1/5th sized sample multiplies the reading by 5) • It can be used on other hydrocarbons, but care must be used to prevent error. Contact us for further information • Sample pad holder operating pressure is up to 150 psi. For higher pressures, contact us directly • If the sample is not drawn from a flowing line of fuel, time and temperature changes will cause error due to the solubility of water in fuel • The Mark V (shown) is the latest version, but these procedures apply to both the Mark III and Mark V. Both meet the ASTM standard • Go to our website for the latest updated information on our products. www.gammontech.com
AquaGlo Models Mark V Mark III
Calibration • Calibrate before use, not needed more than once a day • Can be calibrated on battery or AC power • Calibration is the same for Mark 3 and Mark 5 units • Do not use an obviously damaged unit, even if it calibrates correctly • Do NOT mix Calibration Standards between units • Do not remove the Flourescing Standard or install in another unit.
Calibration Standard • On newer AquaGlo units, see code on bottom. It must match the code written on the calibrating standard • On older units, you must remove the 4 screws that hold the Flourescing standard in place, to read the code number on that standard. Ignore the set point number.
Calibration • Note the “Set Point” on the Calibrating Standard (the loose one) not the one mounted in the AquaGlo • Put the calibrating standard into the AquaGlo under the flap marked “Test Pad Here”, orange/yellow side inwards • Move lever to below the 1 mark on the scale
Calibration • Turn on the AquaGlo light unit • The light unit is working correctly if the small button glows
Calibration • Push the button in on the instrument pack and hold it
Calibration • Slowly move the lever up the scale while watching the meter needle. Stop moving the lever when the needle reaches the middle “0” mark • If you move it too far, return it to a point below 1 ppm and start again
Calibration • Release the button and read the scale at the lever. • If the reading matches the set point on the Calibrating Standard, the unit is calibrated
Calibration • If the reading does not match the set point on the Calibrating Standard, remove the screw from the side of the instrument pack, next to the meter. Using the jewelers screwdriver provided, turn the screw adjuster inside a small amount (less than ¼ turn) and try again
Calibration • If the reading is worse, turn the screw the other way and try again. • Repeat until you get the reading to match the set point.
Testing the Fuel • Establish flow in the system. Do NOT run the test simply under pressure, you will not get an accurate reading. What is needed is an average sample from flowing fuel. • The test should be run on a sample taken from a proper S/S sampling connection
Testing • First connect the pad holder without any pad and flush any contamination from the sample assembly. Flush at least 500 ml.
Testing • Open the sealed envelope that contains the AquaGlo water detector pad. Do not touch the pad with your fingers. The pad should be a uniform orange in color. If not, do not use it. The date is a manufacturing date, there is no expiration date • Using tweezers, place the pad in the outlet half of the pad holder, orange side up. • Run the test immediately or the pad will spoil from contact with humidity in the air
Testing • Connect pad holder to the sampling connection and flow 500 ml through the test pad and into the calibrated bottle provided. Then disconnect before removing pad.
Testing • Remove pad holder from sampling connection • Remove pad with tweezers • Using light pressure, blot off excess fuel between clean, dry paper towels. Do not rub
Testing • Place pad in AquaGlo, orange side inwards
Testing • With lever below the “1” mark, turn the AquaGlo on. Push and hold the button on the instrument pack and move the lever until the meter pointer settles at the center 0
Testing • With the needle settled at zero, read the water content at the lever on the scale in parts per million (ppm). One ppm is 1/10,000 of 1%. Write down the results immediately. • Shown below: 3.2 ppm
Testing • If the lever will not center the needle, the lever will be either at the 12 ppm end or the 1 ppm end of the scale when the needle moves toward the center of the meter scale. • If it is at the 12 ppm end, you have MORE than 12 ppm of water, and a serious problem on jet fuel. You can run the test again, using a new pad and a smaller amount of fuel, such as 100 ml. If you use 100 ml, this is 1/5 of a normal sample, so you must multiply the reading on the scale by 5 to get a corrected reading. This makes the 1-12 ppm scale now read 5-60 ppm. For example: A reading of 8 would actually mean 40 ppm. • If the lever is below the 1 ppm scale reading, record that you have less than 1 ppm of water. • Write down the results immediately.
Storage Turn the unit off when not in use. Clean only with a damp cloth, do not use chemical cleaners. If you have any leaks, contact GTP or our distributor Do not save the test pad, it will lose its reading rapidly no matter how you store it Keep the calibrating standard with the unit. If you lose a standard, we can supply a replacement, call for instructions