Download

1 / 3
30 likes | 50 Views
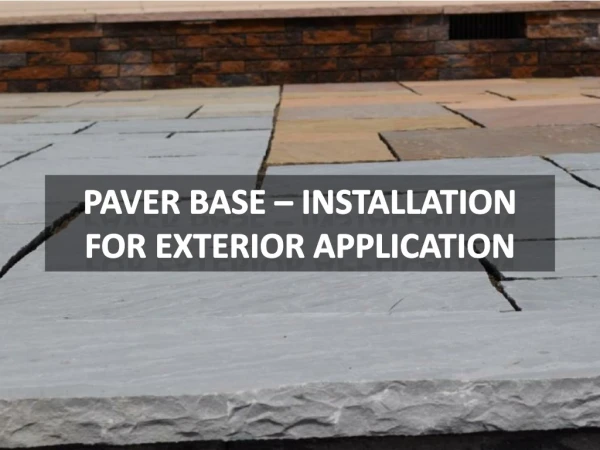
A patio is a great addition to your home. It increases the visual appeal of your property, which makes for a nicer living experience. It also improves resale value in case you are looking to sell your home in the future. Patios are highly functional; you can stage plants and furniture around them to create an attractive place to host family events. Or, you can simply use it as a place to relax. One of the best materials for creating a beautiful and functional patio are pavers. Here are ten things you need to know about installing paver patios. We recommend you use a professional, though. It could be a months-long DIY project, and end up costing about as much as using a pro! Explore these details to see what we mean:<br><br>

E N D
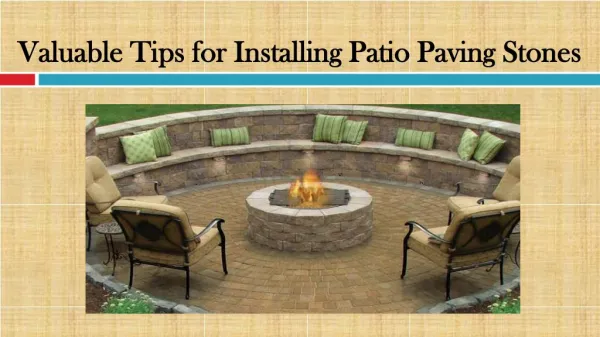
A patio is a great addition to your home. It increases the visual appeal of your property, which makes for a nicer living experience. It also improves resale value in case you are looking to sell your home in the future. Patios are highly functional; you can stage plants and furniture around them to create an attractive place to host family events. Or, you can simply use it as a place to relax. One of the best materials for creating a beautiful and functional patio are pavers. Here are ten things you need to know about installing paver patios. We recommend you use a professional, though. It could be a months-long DIY project, and end up costing about as much as using a pro! Explore these details to see what we mean: Tips for Installing a Paver Patio 1. Low Cost and Low Maintenance Of all the materials that can be used to construct a patio, there is no better material than pavers. They are straightforward to paver patio install and simple to maintain. The initial cost might be a bit higher than materials like concrete, but will be less expensive in the long run. Pavers do not stain easily, plus they are easy to repair. 2. To Achieve the Best Results, Dig Deep Before starting on a paver patio installation, you must first contact your local utilities to mark any electrical lines, plumbing or cable. Then dig at least six inches deep into the ground.
If your area of residence has dry soil, try and water it a night before digging. This will help soften and dampen the soil for easier digging. Finally, you have to properly dispose of the soil you dig up! 3. Remove Any Weeds You have to create a barrier between the old soil and the new base of sand that you will be using to keep the weeds away. You will have to lay down a landscaping cloth, for instance, prevent any weeds from growing in between the pavers of your patio. 4. Create the Base You will need to lay your pavers on a solid, level and smooth base. To achieve this, you will have to rent a Wacker plate compactor or tamper to pack in the paver base or sand. This process must be repeated to repack each subsequent layer of material. 5. Come Up With a Good Plan for Drainage While it’s vital to have a level patio, you need to make it in a way that it slopes away to an area that can handle additional moisture or to your existing home drainage. For every two fit distance, plan for a quarter-inch drop in elevation. This is where most DIY paver patio installers come up short. 6. Keep a Tight Edge It’s important that you keep a tight edge between the pavers and their surroundings. To achieve this, you can use additional pavers, vinyl, a solid cement lip or metal edging. This does not only increase stability, but it also helps to minimize weeds from creeping in between the pavers. 7. Make the Most of Colors Make full use of the broad range of hues and patterns to create your paver design. Use shades that complement your surrounding landscape or take a cue from colors inside your home. Blend varying pile of bricks or stones together to create a natural look. This will help you avoid a patchwork appearance. Our installers are masters at matching pavers to create this natural look. 8. Makes Cuts for A Perfect Fit For you to come up with a great design and achieve a perfect fit, you will need to cut some of the bricks or stones. You will have to master a chisel to do this, or rent a wet saw from your local home center, then figure out how to use that equipment! 9. Pack In the Cracks If there are some designed gaps between your pavers, fill in the gaps with sand. This helps keep them in place and also allows drainage, all while minimizing weed growth.
10. Keep Pavers on Hand Over time, pavers might be subjected to accidents that may result in them breaking. Make sure that you keep a few pavers for repair just in case such incidences occur. You can remove a broken paver and replace it without deconstructing large patches of the patio. Contact a Bright Green Landscapes for Paver Patio Installation If all that sounds like a snap to do, you may to try to do it yourself. In the end, though, it might end up being expensive and quite labor-intensive as a DIY project. We have all the right tools and exactly the expertise you need. And we can get in done in a lot less time! Contact Bright Green Landscapes to do the installation for you. Call us at 847-344-4656.