Download
1 / 32
330 likes | 464 Views
Word Lesson 6 Working with Graphics. Microsoft Office 2010 Introductory. Pasewark & Pasewark. Objectives. Create and balance columns. Add borders and shading. Insert clip art and pictures. Insert, resize, and move inline and floating objects. 2. 2. Objectives (continued).

E N D
Word Lesson 6Working with Graphics Microsoft Office 2010 Introductory Pasewark & Pasewark
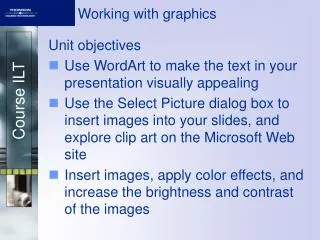
Objectives • Create and balance columns. • Add borders and shading. • Insert clip art and pictures. • Insert, resize, and move inline and floating objects. 2 2
Objectives (continued) • Recolor graphics. • Draw and modify shapes. • Add text and callouts to drawings. • Create and modify SmartArt and WordArt. 3 3
aspect ratio callout chart clip art crop diagram floating object graphic inline object keyword object pull quote rotation handle selection rectangle sidebar sizing handle SmartArt text box WordArt Vocabulary 4 4
Working with Graphics • Graphics are pictures that help illustrate the meaning of the text and make the page more attractive. • You can add predefined shapes, diagrams, and charts as well as photographs and drawings. • You can also use the drawing tools in Word to create your own graphics. 5 5
Creating Columns • Columns are easy to create in Word. • You can choose one, two, or three columns of equal width. You can also choose Left or Right, which creates two columns with either the left or the right column a little less than half the size of the other column. • If none of these options suits you, you can create columns of custom widths. 6 6
Creating Columns (continued) • Columns menu
Adding Borders and Shading to Paragraphs • You can specify a border style and whether a border appears on four sides, two sides, or one side of a paragraph. Borders tab in the Borders and Shading dialog box 8 8
Just as you can add borders to paragraphs, you can add borders and shading to entire pages. Adding Borders and Shading to Pages 9 9
An object is anything that can be manipulated as a whole, such as clip art or another graphic that you insert in a document. You can insert, modify, resize, reposition, and delete objects in documents. You can cut, copy, and paste objects the same way you do text. Understanding Objects 10 10
Graphics that are already drawn or photographed and available for use in documents are called clip art. The term clip art also refers to photographs, video clips, and sound files. When searching for clip art the words you use to describe the clip art are called keywords. Inserting Clip Art 11 11
Inserting Clip Art (continued) • Inserting clip art
To select an object, position the pointer over the object, and click. A selection rectangle with small circles and squares appears around the object. The squares and circles are sizing handles. The green circle is the rotation handle. When you select a clip art image, the Picture Tools Format tab appears. Selecting an Object 13 13
Selecting an Object (continued) • Selected picture
Resizing an Object • To resize an object, first select it, and then drag a sizing handle. • The relationship of the object's height to its width is called the aspect ratio. • If you drag a corner sizing handle (a circle), you maintain the aspect ratio; If you drag a side sizing handle (a square), you do not maintain the aspect ratio. 15 15
Repositioning and Removing an Inline Object • When you insert an object, it is inserted as an inline object, which means it is treated as if it were a character in the line of text. • You can apply paragraph formatting commands, Cut, Copy, and Paste commands, and also drag and drop an inline object. • To delete an object, select it, and then press the Delete or the Backspace key. 16 16
Wrapping Text Around an Object • To wrap text around an object, it needs to be changed from an inline object to a floating object. • A floating object acts as if it were sitting in a separate layer on the page. You can drag a floating object anywhere on the page. 17 17
Wrapping Text Around an Object (continued) • Wrapping text around an object
Wrapping Text Around an Object (continued) • Text wrapping commands
Recoloring Pictures • You can change the brightness or contrast, or recolor an image all in one shade. • To do this, click the contextual Format tab. In the Adjust group, click the Corrections button (to adjust brightness/contrast) or Color button (to change color). 20 20
Inserting Pictures • In Word, pictures are graphic files stored on your computer. • Pictures are inserted as an inline object at the location of the insertion point. • You can then change the object to a floating object if you want, as well as resize and reposition it, in the same manner as clip art. 21 21
Adding Shapes • When you click a shape on the menu, the pointer changes to the crosshairs pointer. Drag the pointer to draw the shape. Drawn shapes are inserted as floating objects by default. • As with clip art objects, you can cut, copy, and paste drawn shapes as well as move and resize them. 22 22
Adding Shapes (continued) • Shapes gallery
Adding Shapes (continued) • You can add color and style to your drawings: • Change the color of an object. • Change the line or outline color of a drawing. • Change the line weight, or thickness, of lines or shape outlines in your drawing. • The easiest way to add text to an object, is to click an object and start typing. 24 24
Adding Shapes (continued) • Another way to add text to your drawing is to insert text boxes. A text box is a shape specifically designed to hold text. • A callout is a special type of label in a drawing that consists of a text box with an attached line to point to a detail in the drawing. 25 25
Creating Diagrams and Charts with SmartArt • Diagrams and charts are visual representations of data. You can insert diagrams and charts quickly using predesigned drawings called SmartArt. • To insert text in a SmartArt graphic, click in each box in the graphic and start typing. • You can resize SmartArt graphics, add an outline and a colored fill to the entire graphic. 26 26
Creating Diagrams and Charts with SmartArt (continued) • Choose a SmartArt Graphic dialog box
Creating WordArt • WordArt is stylized text that is formatted and placed in a text box. • If you select text before you click the WordArt button, the text you selected appears in the text box; otherwise “Your text here” appears as a placeholder for your text. • You can change the WordArt style, color, and outline color. 28 28
Summary In this lesson, you learned: • Graphics add interest to documents. • You can format all or part of a document in multiple columns. • You can add borders and shading to selected text to emphasize it. You can also add a page border and shading to the entire page. 29 29
Summary (continued) • An object is anything that can be manipulated as a whole. An inline object is inserted as if it were a character in a line of text. A floating object acts as if it is sitting in a separate layer on the page. • You can insert clip art and resize and recolor it to fit your document. You can also insert and resize pictures in a document. • You can draw shapes in a document. Drawn objects can be resized, moved, and colored. 30 30
Summary (continued) • You can add text to drawn shapes or create a text box shape. Text boxes can be formatted, resized, or moved just like other drawn objects. • Callouts are special text boxes that have a line attached to them to point to specific items in a document. 31 31
Summary (continued) • Charts and diagrams organize your data in a manner that illustrates relationships among data. You can use SmartArt to add charts and diagrams to documents. You can change the structure and look of SmartArt. • You can insert WordArt to create stylized text objects. As with other objects, you can resize, reposition, and format WordArt. 32 32