Download
1 / 30
300 likes | 421 Views
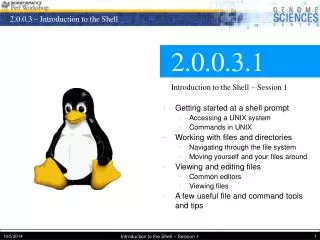
2.0.0.3.1 Introduction to the Shell – Session 1. Getting started at a shell prompt Accessing a UNIX system Commands in UNIX Working with files and directories Navigating through the file system Moving yourself and your files around Viewing and editing files Common editors Viewing files

E N D
2.0.0.3.1 Introduction to the Shell – Session 1 • Getting started at a shell prompt • Accessing a UNIX system • Commands in UNIX • Working with files and directories • Navigating through the file system • Moving yourself and your files around • Viewing and editing files • Common editors • Viewing files • A few useful file and command tools and tips Introduction to the Shell – Session 1
What is a Shell? • Shell prompt = command prompt = command line • Text interface that allows user to type commands which the OS then executes • A more direct (and powerful) way to interact with your computer Linux command line DOS command line Introduction to the Shell – Session 1
Accessing a UNIX / Linux Shell Prompt • If you are at the GSC, your user account allows you to log on to any Linux machine on our network • Other ways to access UNIX/Linux: • Linux server set up by Sheldon: Access from other Linux systems or using eg. Putty from Windows • UBC Roadmap to Computing (http://www.roadmap.ubc.ca/): free access to tutorials and UNIX shell • Canadian Bioinformatics Resource (http://cbr-rbc.nrc-cnrc.gc.ca/): free academic access to bioinformatics tools and databases, web and UNIX command-line • Cygwin (http://www.cygwin.com/): a free Linux emulator for computers running Windows • Linux (http://www.linux.org/): install Linux on your own computer – Linux itself is free to download and install; versions with full installation instructions and support are also available commercially Linux and UNIX Linux is a UNIX-like operating system, which is open-source (free, code can be contributed by anyone). The command line and command line tools for UNIX systems and Linux are basically identical. Introduction to the Shell – Session 1
To access a shell prompt you will have to log in to a UNIX system using a username/password How you do this will depend on what the system is Once you are logged in to one computer, you can connect to a different computer on the same network using rlogin (remote login) or ssh (secure shell) – ssh is better as it encrypts any information you send Get back out using exit (if you opened another shell) or logout (if this is the shell you started with) Logging In Introduction to the Shell – Session 1
Command: Any UNIX command or program to run Options: Modifiers of the command, usually preceded by – Files or other things: When appropriate, a file name, string, etc. that the command will act on Basic UNIX Command Structure command <options> <files or things to operate on> Spaces ls –la README File Command Options My prompt just says > You can determine what the text at the prompt is. It can be the date, current directory, or your favorite saying. Details in session 2.0.0.3.2. Introduction to the Shell – Session 1
UNIX Help: man, info and apropos • Look up usage of a command with • Accesses the manual pages for the given command • To exit man, type q (man uses less to display) • Also try <command> --help • To find a command you can try but often the command you really want isn’t listed! man info apropos Introduction to the Shell – Session 1
home The UNIX File System • When you log in, you will be in your home directory, in my case • Files are arranged in directory trees: /home/egarland Parent directory: next directory up in tree (directory which contains current directory) Child directory: all directories down in tree (directories which are contained by current directory) Watch out for Caps lock! UNIX files are CASE SENSITIVE, so eg. there is no /Home/egarland, and you can have a file “myfile” AND a file “Myfile”. Many people just avoid using capitals altogether. Introduction to the Shell – Session 1
Navigating Through Directories: cd and pwd • Check current directory with • Change directories with • Specify directory: • cd only will go to your home directory • cd – will go to previous directory pwd cd cd <directory name> What are all those dots? Current directory is called “.” Parent directory is called “..” The home directory is also called “~” Introduction to the Shell – Session 1
Absolute and Relative Pathnames • You have to specify exactly where the shell should look for a directory home egarland relative unix_intro dir1 dir2 absolute Absolute pathname: How to get to a directory or file starting in the root directory / Relative pathname: How to get to a directory or file starting in the current directory Introduction to the Shell – Session 1
Seeing What’s There: ls • To list directory contents use • Common ls options: ls -a list all files (including . and ..) -l list “long” file info -t list in reverse chronological order (newest first) -h list file size in “human-readable” format (use with –l) Options can be combined: ls –lt does both –l and –t (only if the options do not require any additional info) Introduction to the Shell – Session 1
Moving and Copying Files: mv and cp • To rename or move a file, use • To copy a file (while preserving the original), use • Common cp options: mv cp -I ask before copying over a file -r copy recursively (directory and all its contents) Naming files Files and directories can contain any characters except “/”. However, using spaces or other “special” characters (such as “*”) will cause you problems later. Avoid them! Instead of a space, use an underscore “_”. To refer to a file that has a space in it, use quotes: cp “my file” myfile Introduction to the Shell – Session 1
Creating Links to Files: ln • If you want to create a “shortcut” or “pointer” to a file or directory, make a link using • Editing the link will change the original file • Common options: -s: “symbolic” link: removing the link does not remove the original file ln Introduction to the Shell – Session 1
Creating and Copying Directories: mkdir and cp • Create a directory with • Copy whole directory structures using cp –r mkdir Wildcard characters * Matches any string of characters ? Matches any single character Introduction to the Shell – Session 1
Getting Rid of It: rm and rmdir • Remove a file using • Remove a directory using • Common rm options: rm rmdir -I ask before deleting a file -r remove recursively (directory and all its contents) Be very wary of rm * ! This will remove all files in your directory! For safety, always use the –i option (or, even better, use an alias: see session 2.0.0.3.2). Introduction to the Shell – Session 1
Creating Files: pico,vi, and emacs Editors • pico: simple text editor; intuitive • Just start typing • Commands listed at bottom • ^X to exit (hold control and push X) • ^O to save • ^R to open Introduction to the Shell – Session 1
Creating Files: pico,vi, and emacs Editors • Vi (or vim): not so simple • Two modes: command and insert • Type a or i to start inserting • Esc to get back to command mode • Commands are in form :<letter> • :q to quit Insert mode Command mode Introduction to the Shell – Session 1
Creating Files: pico,vi, and emacs Editors • emacs: full-featured but more intuitive than vi • Once a file is opened, just start typing • Common commands: • Cntl-X F to open (hold control while typing X and then F) • Cntl-X S to save • Cntl-X C to exit • “Meta” key is either Alt or Esc • If started without a filename, you first have to “find” (open) a new file with cntl-X F What are all these extra files in my directory? Emacs automatically creates autosave files (#filename#) when you don’t save before exiting and backup files (filename~) whenever you save changes Introduction to the Shell – Session 1
Viewing Files: more is Less and less is More • To output the contents of a file to screen, use • With long files, this scrolls past too fast to see cat Introduction to the Shell – Session 1
Viewing Files: more is Less and less is More • To view a file a bit at a time, use • Navigating in more: • Go down 1 line: Enter • Go down 1 screen: Space • Go back 1 screen: b • Exit: q or Cntl-c more Help! Let me out! Control-c is a general UNIX “exit” command. It will end whatever command you are running. For more commands like this, see “job control” in session 2.0.0.3.3. Introduction to the Shell – Session 1
Viewing Files: more is Less and less is More • To view a file a bit at a time with full navigation and searching, use • Navigating in less: • Go down 1 line: Enter • Go down 1 screen: Space or PgDown • Go up 1 screen: PgUp • Go to beginning of file: Home • Go to end of file: End • Search down: / • Search up: ? • Exit: q (Cntl-c does NOT work!) less Introduction to the Shell – Session 1
Printing From the Command Line: lpr • In an application, you can just hit “print”. What if you just want to quickly print a text file? • Common options: • Don’t print a non-text file with lpr! (You will print meaningless symbols, and lots of them) lpr -P[printername] print to specified printer -K[# copies] print specified # copies -V verbose: tells you everything it’s doing Default printer (and other defaults) You can set the default printer (and all kinds of other cool and useful things) using environment variables – see session 2.0.0.3.2. Introduction to the Shell – Session 1
More About Your Files: stat (and touch) • UNIX stores more information about a file than just its contents • Size • Owner • Permissions • Modification and access times • To look at this info, use • To update a file’s modification time, use stat What’s the –rw-r--r--? These are the file’s permission settings, which determine who can read, write, or execute the file. More on permissions in session 2.0.0.3.2. touch Introduction to the Shell – Session 1
More About Your Files: file • UNIX does not require 3-character filetype specifications (eg. wordfile.doc), so just by looking at the name you can’t determine of what type a file is • Instead, use • Possible types are specified in /usr/share/magic file Introduction to the Shell – Session 1
A Text File is a Text File is a Text File? Using dos2unix • Windows-created text files can be read in UNIX and vice versa, but they use different line break characters • Linux uses only the linefeed (\n) character • Windows uses both the carriage return (\r) and linefeed (\n) characters • Result: • Not all Windows programs (eg. Notepad) will correctly display newlines • UNIX programs (eg. xemacs) will display newlines with an extra ^M • View these “hidden” characters with • Convert Windows-type to UNIX-type with cat -A dos2unix Introduction to the Shell – Session 1
Now Where Did I Put That? Searching for Files with find • Search for files using • Can search entire directory trees • Find based on things like: • Filename (Where did I put that?) • Last modification time (What was I just working on?) • Size (What’s taking up so much space?) • Owner (Is there anything of mine here?) • Multiple search terms can be combined Matching name find Modified in last 40 min. Larger than 1000 KB Check the man page! UNIX commands (especially powerful ones like find) have many options. You are never going to remember them all, so use man often! Introduction to the Shell – Session 1
A Few Tips to Make Your UNIX Life Easier: tab • You don’t have to type out those long filenames • Use tab autocompletion • When partway through typing a command, filename, etc., hit tab • If there is only one name that starts that way, the shell will complete it for you • If there is more than one name, it will list all the possibilities Introduction to the Shell – Session 1
A Few Tips to Make Your UNIX Life Easier: history • You don’t have to retype that complicated command • You can scroll through previous commands by using the up and down arrows • You can see all your previous commands using • Some options: history • Cntl-r “text” show last command containing “text” • (navigate matching commands with Cntl-r and Cntl-s) • history 10 see only last 10 commands • !500 repeat command #500 Introduction to the Shell – Session 1
A Few Tips to Make Your UNIX Life Easier: Moving Around and Copy/Paste • Moving the cursor on the command line: • Move to the beginning of a line with Cntl-a • Move to the end of a line with Cntl-e • Copy text from one place to another: • Select the text in one place • Move the mouse place you want to put the text • Press the middle mouse button (or both left and right together, if you don’t have 3 buttons) to paste the text Introduction to the Shell – Session 1
2.0.0.3.1 Introduction to the Shell – Session 1 • Now you know…. • How to form UNIX commands • How to create, edit, view, delete, move, copy, find, and learn about files and directories • How to learn more with man • How UNIX users type so fast (they don’t – they use tab!) • Next you’ll learn…. • Permissions • Customizing your UNIX environment • Pipes, redirection, and running command line programs Introduction to the Shell – Session 1
2.0.0.3.1 Further Readings • Introduction • Learning the UNIX Operating System Ch. 1 • Linux Cookbook Ch. 2 • Files and directories • Learning the UNIX Operating System Ch. 3.1, 3.2, 4 • Linux Cookbook Chapter 6 • Viewing and editing text • Learning the UNIX Operating System Ch. 4.1 • Linux Cookbook Chapter 10,11 Introduction to the Shell – Session 1