Download
1 / 30
320 likes | 575 Views
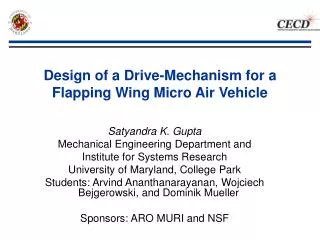
Design of a Drive-Mechanism for a Flapping Wing Micro Air Vehicle. Satyandra K. Gupta Mechanical Engineering Department and Institute for Systems Research University of Maryland, College Park Students: Arvind Ananthanarayanan, Wojciech Bejgerowski, and Dominik Mueller

E N D
Design of a Drive-Mechanism for a Flapping Wing Micro Air Vehicle Satyandra K. Gupta Mechanical Engineering Department and Institute for Systems Research University of Maryland, College Park Students: Arvind Ananthanarayanan, Wojciech Bejgerowski, and Dominik Mueller Sponsors: ARO MURI and NSF
Motivation • Attributes of fixed wing flight • High forward speeds required for generating lift • Low maneuverability • Difficult to operate in confined spaces • Attributes of rotary wing flight • Low forward speeds and hovering possible • High frequency leads to noisy operation • Attributes of flapping wing flight • Low frequency flapping leads to quiet flight • Low forward speeds lead to high maneuverability • Ability to use in surveillance operations
Design Goals • Drive mechanism to convert rotary motion to flapping wing motion • Include symmetry to ensure stability and minimize vibration • Constraints • Transmit torque of 0.66 N-mm • Support wings of total area 260 cm2 • Flap wings at more than 10 Hz • Achieve flapping range between -12.5° and +52.5° • Performance metrics • Weight • Cost • Power transmission efficiency Requirement of low weight electronics demands high transmission efficiency Drive Mechanism Motor Wing Flapping range Flapping range required to generate the right amount of thrust and lift demands highly synchronized drive mechanism Our exploratory experiments indicated that the drive mechanisms must weigh less than 1.5 g
Design Concept • Compliant members used in mechanism to minimize power losses • Molded mechanism frame used to minimize weight • 2-stage gear reduction used to transmit motor torque ACTUAL MECHANISM DESIGN DESIGN CONCEPT Wing Supports Wing Supports Motor with Pinion Compliant Frame Flexural Member Rocker Gears Rocker Crank Crank
Problem Formulation • Primary Objective: Minimize weight • Secondary Objective: Minimize number of mold pieces • Constraints: • Structure shape should be such that forces acting do not induce excessive stresses • Structure shape should satisfy molding constraints • Mold machinability • Demoldability of part • Weld-lines should be placed in low stress areas of the structure shape
Decomposing the Problem Mechanism concept Final molded mechanism • Objective function • Minimize weight • Constraints • Stresses should not be excessive • Mold machinability • Decision Variable • Structure shape and dimensions • Objective function • Minimize mold pieces • Constraints • Demoldability • Decision Variable • Non-critical connector shapes • Parting lines • Constraints • Mold filling • Demoldability • Location of weld-lines • Decision Variable • Number of gates • Sacrificial shape elements Gate Placement: Constraint satisfaction problem Shape Synthesis: Optimization problem Mold Piece Design: Optimization problem
Decomposing the Problem Mechanism concept Final molded mechanism • Objective function • Minimize weight • Constraints • Stresses should not be excessive • Mold machinability • Decision Variable • Structure shape and dimensions • Objective function • Minimize mold pieces • Constraints • Demoldability • Decision Variable • Non-critical connector shapes • Parting lines • Constraints • Mold filling • Demoldability • Location of weld-lines • Decision Variable • Number of gates • Sacrificial shape elements Gate Placement: Constraint satisfaction problem Shape Synthesis: Optimization problem Mold Piece Design: Optimization problem
Overview of Approach • Mechanism shape analyzed • Forces at different points of the mechanism computed • Shape altered to allow for low deflection forces on structure • Forces input into FE model to find stresses • Mechanism dimensions computed based on allowable stresses • Moldability constraints need to be met while selecting dimensions Design Requirements Moldability Constraints Elaborate Mechanism Shape Parametric Model Parametric Optimization 3D Model Mechanical Concept Stress Constraints Molding Rules
a b A B Fapplied Fapplied c C D i1 d f e i2 E g Fapplied Fapplied Ω Ω krot krot krot krot Kinematic Representation and Modeling • Force estimated using MSC-ADAMS Upstroke Wing Action Downstroke Wing Action
Measurement of Forces Generated by Flapping • Linear motion using a rigid linear • MAV is mounted in a clamp fixed to the end of the linear air bearing • COOPER LFS270 load cell with a 250 g capacity and 0.025 g resolution is used for the measurement MAV Clamp Load Cell Air Bearing Vertical Setup MAV Clamp Load Cell Air Bearing Horizontal Setup
Shape Elaboration • Shape selection: • Bi-planar body-frame In-Plane Constraints for the Wing Supports Two-Point Support for the Gearing Axis Rounded Fillets around the Sleeve Crash Impact Protection
Finite Element Analysis (Pro/Mechanica) and Optimization • FE structural analysis conducted on the body frame using force estimates from ADAMS • Large displacement and high stress concentration areas identified • Feature sizes based on maximum allowable stresses Undesired Weld-line locations Large Displacement Areas Maximum induced stresses at one time instant High Stress Concentration Area
Shape Synthesis Result:Optimized 3-D Model • Final dimensions Width = 16 mm b t Length = 41.7 mm Flexural Members for Compliant Mechanism y Motor Support Diameter = 7mm z x b = 0.89 mm t = 1.52 mm
Decomposing the Problem Mechanism concept Final molded mechanism • Objective function • Minimize weight • Constraints • Stresses should not be excessive • Mold machinability • Decision Variable • Structure shape and dimensions • Objective function • Minimize mold pieces • Constraints • Demoldability • Decision Variable • Non-critical connector shapes • Parting lines • Constraints • Mold filling • Demoldability • Location of weld-lines • Decision Variable • Number of gates • Sacrificial shape elements Gate Placement: Constraint satisfaction problem Shape Synthesis: Optimization problem Mold Piece Design: Optimization problem
Overview of Approach Part Model Part Model &Parting Lines Part Model &Parting Lines Part Model & Parting Lines Is it possible to change connector shapes? No No Demoldability or Excessive Flash Problems? Parting Line Optimization Yes Yes Change Connector Shape Add Sacrificial Shape Elements Perform FEA-based Parametric Optimization Modified Part Model
Changing Connector Shape to Reduce Mold Pieces • Consider different polygonal and circular shapes for non-critical connector shapes • For each shape, determine the total number of mold pieces (used MoldGuru a software developed by my students) • identify candidate parting directions • compute the mold piece regions for each direction • Select the connector shape that minimizes the mold pieces Triangular shape element
Mold Piece Optimization Result:Optimized Mold Pieces • Mold Piece Design: • five pieces • five side-cores Injection molded body frame Side Mold Cores Step 1: Removal of top and bottom layer of mold pieces post injection Step 2: Removal of cores 3 Piece Middle Layer Assembly Top Mold Piece Bottom Mold Piece Step 3b: Removal of middle layer piece Step 3a: Removal of middle layer pieces
Decomposing the Problem Mechanism concept Final molded mechanism • Objective function • Minimize weight • Constraints • Stresses should not be excessive • Mold machinability • Decision Variable • Structure shape and dimensions • Objective function • Minimize mold pieces • Constraints • Demoldability • Decision Variable • Non-critical connector shapes • Parting lines • Constraints • Mold filling • Demoldability • Location of weld-lines • Decision Variable • Number of gates • Sacrificial shape elements Gate Placement: Constraint satisfaction problem Shape Synthesis: Optimization problem Mold Piece Design: Optimization problem
Overview of Approach • Identified allowable gate locations • Low stress areas from FE analysis • Permissible location for flash • Filling simulations conducted in Moldflow Plastics Insight for different number of gates and sacrificial shape elements Yes Yes PartModel Insert Gate Simulate Flow Weld-lines at acceptable locations? Final Mold Design Cavity fills? No No Gate move possible? Yes Insert additional Gate Move gates No Gate addition necessary? Yes Add Sacrificial Shape Elements No
Filling Analysis • Single gated mold leads to asymmetric filling • Causes warpage in molded body frame Gate location Gate locations (a) Single gate mold (b) Two gate mold
Appearance of Weld-lines • Weld-lines appear in critical areas due to use of two gated mold • Third gate introduced to move weld line to non-critical area Weld-lines Gatelocations Gate locations Undesirable weld-line location Weld-line moved to desired location (a) Two gate mold (b) Three gate mold • Weld-lines still present in other critical areas
Introduction of Sacrificial Shape Elements • Sacrificial shape elements added to: • Absorb Weld-lines from the critical areas • Absorb flash from the critical areas • Provide for better material flow within the cavity • Ensure that the part is sticking to only one mold piece during demolding • Features sheared off and removed after molding completed Sacrificial element 1 absorbs weld lines Sacrificial element 2 ensures part sticks to one mold piece
Gate Placement Results:Gate Locations • Sacrificial shape elements: • Resulting gate placement: Sacrificial shape element 1 Gate 1 Gate 2 Location of Weld-lines Location of the Gates Sacrificial shape element 2 Gate 3 • Sacrificial shape element 1: • completely eliminated the weld-line on the top of the compliant members • provided a better melt flow between the cavities • ensured safe demolding • Sacrificial shape element 2: • eliminated the weld-line around the hole
Molded Mechanism Frame • Bi-planar Design: • In-mold fabricated Body-frame: In-Plane Constraints for the Wing Supports Two-Point Support for the Gearing Axis Rounded Fillets around the Sleeve Crash Impact Protection Side View Top View
Assembly of MAV • Mechanism Integration into MAV
“Big Bird with Vision” • We have build a version of big bird that flies with a miniature video camera • Camera, transmitter, and battery weigh 10.0g • Total weight is 45.0g
“Big Bird” with Folding Wing Weight: 36.9 g Wing Span: 57.2 cm Flapping Frequency: 4.5 Hz Pay Load Capability: 10.0 g
Summary • Concurrent optimization of shape satisfying functionality and moldability constraints using multi-piece multi-gate mold design • Weight • Cost • High transmission efficiency drive mechanism developed to convert rotary motion to flapping wing motion • Tools used • ADAMS • Pro/Mechanica • MoldGuru • MoldFlow • Pro/Manufacturing • We had to rely on physical tests to estimate aerodynamic forces • Designed and developed successfully flying flapping wing MAV