Download
1 / 45
450 likes | 565 Views
Managing Learners on the LINGOs LMS. An Introduction For Level 1 Members. An Overview by Dan Sherman dls@ngoaccess.com. Introduction and Objectives.

E N D
Managing Learners on the LINGOs LMS An Introduction For Level 1 Members • An Overview by Dan Sherman • dls@ngoaccess.com
Introduction and Objectives • This webinar is designed to introduce new Level 1 Portal Administrators to key functions of our LMS and provide basic strategies for successful implementation of the Shared LMS Space. • You are strongly encouraged to download the Intralearn Manuals for both Administrators and Students Available at: • http://ingo.sharepoint.apptix.net/portal/Shared%20Documents/Forms/AllItems.aspx 2
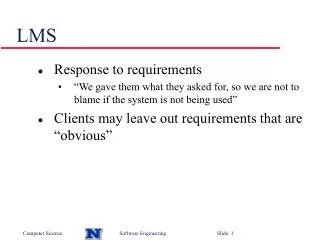
What is an LMS? An LMS is a strategic solution for planning, delivering, and managing all learning events within an organization. The focus of an LMS is to manage learners, keeping track of their progress and performance across all types of training activities. It is essential for reporting to HR systems but isn’t generally used to create course content.
Why do you need an LMS? Using an LMS provides several benefits not usually available in standard web hosting environments. An LMS: • Provides a secure place to host content • Allows your organization to easily track student progress and completion • Provides an easy way to quickly generate reports of student activity
Learning Management System • LINGOs uses an implementation of the Intralearn LSP 4.2.1 • Our implementation of the Intralearn LMS is hosted by Connected Learning Network who also provide 24 hour a day tech support for your students. • Shared content is stored on the Main Portal and “shared” to the Shared LMS Space (http://lingoslearning.org). • Organizations can create their own content or migrate existing content to Shared LMS Space.
7 Basic Steps for Implementing your LMS • Live or Recorded General Orientation • One on One Orientation conducted via Elluminate • Set up Hierarchy • Migrate content, Request available content. • Create Users • Track Student Progress
General Orientation • Each new organization should have representatives attend a live or recorded General Orientation to the LMS. (Your watching it now!)
One on One Orientation • Using Elluminate Live new member organizations will receive one on one training in how to use the Shared LMS Space. • This training will show them how to establish users and manage courses. • Each organization’s hierarchy will be established in this 1on 1 session. • Questions specific to the organization can be addressed in this session. • New Users can have supervised hands on practice in LMS.
Establishing a Hierarchy • The Hierarchy is a graphic representation of the way students are organized in the LMS. • The Hierarchy’s value is in it’s ability to have separate Registrars track and report on particular groups of students. • With the help of Dan Sherman, each organization may create a Hierarchy which reflects their organizational structure.
Hierarchy Structure • The Hierarchy is constructed of Enrollment Levels extending down from a root level. • These Levels can contain sub-levels • A level is the smallest group of students that a Registrar can gather reports on. • The System Administrator may restrict a Registrar’s access to a single level, or allow access to the whole Sub Portal.
Hierarchy Structure cont. • A common Hierarchy Structure among LINGOs members is to arrange their Hierarchies in the following manner: Organization “Field” Region (First Region) Country (Sub Region) Department U.S. (Second Region) Department
So what difference does the hierarchy make? The way you layout your hierarchy early on can have big implications in the ease and ability with which you do your job. In the following slides we’ll see two ways of arranging a hierarchy with the same students and the effect those different organizational styles have on reporting.
“Big Bucket” approach Some organizations choose to have very few levels in their hierarchies. In organizations in which learners move regularly this organizational style can save maintenance time. However, this arrangement can produce reports with an excessive amount of data.
Hierarchy with very few Levels Very few (only 1) element in the Hierarchy
Hierarchy with very few Levels A Detail Report of the students in the Region element of the Hierarchy.
Multiple Level Approach Some organizations choose to have a great number of levels in their hierarchies. This allows for very precise reports and yields a manageable amount of data in those reports.
Hierarchy with multiple Levels Several elements in the Hierarchy
Hierarchy with very few Levels A Detail Report of the students in the Finance Sub Level of the Region Level of the Hierarchy Note the much more targeted information available in this report.
More Levels in your Hierarchy means more detailed reports are possible. More detailed reports means more targeted data.
Content Course Content is available from 5 sources. • Courses can be migrated from an existing LMS. • Courses can be developed in external authoring tools for use on the LMS. • Any course listed at http://www.lingoscatalog.org is available immediately for your sub portal. • Courses not listed on the lingoscatalog.org site can be requested from the MindLeaders catalog at http://www.mindleaders.com contact Dan Sherman for more information. 23
Testing New Courses A safe and private “sandbox” site has been established at http://www.lingostest.org Courses in development can be uploaded here for private review before being announced to your students. Organizations wishing to experiment with new courses are encouraged to contact Dan Sherman to gain access to this site. This site also provides an opportunity to test functions of the LMS before making them live on your Sub Portal.
A note about naming users... • Since we operate our LMS in a shared environment it is imperative that consistent naming practices be used within your sub portal. • No 2 users in our shared system can have the same user name, so LINGOs members have come up with a variety of naming conventions.
Sample Naming Schemes Organization name: “XYZ” • jdoe@xyz.org • jdoe.xyz Use whatever makes since for your organization, but remember choose something both easy for your staff to remember and unique to your organization. Please notify Dan Sherman with information about whatever schema you will be using so that he can ensure that there is no duplication in the system.
Registrars • There are two functions available to a Registrar: • Managing student enrollments, by adding and deleting students, moving students between enrollment levels if the students location or position changes, and updating Student Profiles. • Some Registrars may generate Reports about the students they manage. Currently there are 10 separate reports available. • Other Registrars may have their permissions restricted so that they are only responsible for managing students in specific areas of the Hierarchy. • There can be more than one Registrar per Sub Portal
Student Users Students may be established and enrolled in courses via 3 methods. • Students may select courses from the course catalog and automatically submit a request to the LMS Order Manager from within the LMS. • Registrars may create new students and enroll them into courses. They also may add courses to a students profile independent of student requests. • A simple Bulk Registration Excel Document is available to automate the process of establishing multiple students.
Tracking Student Progress Student Progress may be tracked via 10 available reports. • Exam Results • Student Profile • Registered Courses • Data Report • Detail Report • Status Report • Department Compliance • Incomplete Course Report • Student Compliance • Course Compliance
Events A new feature in the LMS is Events Management. • Create announcements for upcoming organizational events • track student attendance in the LMS • provide shared files and resources • survey participants about course • wait list students • Communicate with participating students via e-mail blasts • Events show up in the course catalog • much more...
Introduction • Single Student Registration • Batch Student Registration Introducing the Order Manager Admin Set Up Student View Order Manager View Registrar View Available Customization
Single Student Registration LINGOs uses a “Request Driven” enrollment model. Students are able to select courses, create a profile, and request enrollment. Enrollment requests are processed by an administrative user on your portal referred to as the Order Manager. On the Level 1 Shared LMS Space the Order Manager function is handled by a LINGOs Employee.
Introducing the Order Manager Level 2 members who allow students to request enrollment in courses have an Order Manager, who approves or denies access to a course.
Student Enrollment Scenario The following scenario will demonstrate the user experience of all participants in the enrollment process. Linda, Organization Order Manager Miguel, Student Gene, Registrar
Student Enrollment Scenario student view Miguel Wishes to enroll in a basic Excel course. He visits his organization’s sub portal and finds a suitable course in the course catalog. Step 1. Students select courses by clicking “courses” in the left hand navigation bar. Step 2. After checking the box next to the course they want to take they click enroll. Step 3. The Student either logs-in or clicks the link to create a new user profile. Miguel, Student
Student Enrollment Scenario student view Step 4.A series of e-mails is automatically generated by the LMS. The Student will receive an e-mail similar to the one below. Miguel, Student
Student Enrollment Scenario order manager view Step 5.His Organization’s Order Manager receives an e-mail notification that a student wishes to enroll in a course. Linda, Organization Order Manager
Student Enrollment Scenario Step 6. In the role of the Order Manager at the organization, Linda either approves or denies access to the course. Linda, Organization Order Manager
Student Enrollment Scenario registrar view Step 7. If the student’s request was approved, the Organization’s Registrar can now move the student to the correct level in their hierarchy in two easy steps. First, choose “Move” from the Action drop down menu Gene, Registrar
Student Enrollment Scenario registrar view Step 8.Next, the Organization’s Registrar can choose the appropriate level in the hierarchy and choose “Get” from the Action pull-down menu. Gene, Registrar
Batch Enrollment You can batch load student records into the LMS. This batch load includes the information in the student Profile plus any course enrollments. You will need to prepare a designated Enrollment spreadsheet which you can request from Dan Sherman. The spreadsheet has 4 tabs. The first 3 have examples and instructions, the fourth is where you will enter data. Built into the spreadsheet is a Macro that creates an .xml file when you have completed the spreadsheet and saved the document. When you are ready to upload the student accounts on the spreadsheet, you will upload the .xml version of the file.